diy solar

diy solar

4 Valence U1-12RT in Parallel Questions

pjschae

New Member
Joined
Jan 26, 2020
Messages
10
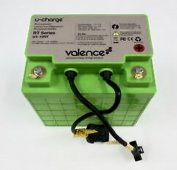
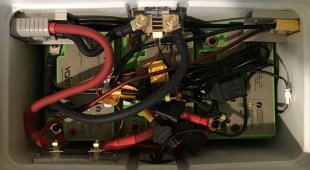
These are the Valence with the internal BMS. 12V system. Using 2 awg cable. I want to have them in a cube (rectangle) configuration so they fit in the box I have. The diagram is from impactbattery and is similar to Victron's wiring unlimited document.
1. Is this the best way to parallel them for balanced charge/discharge?
2. Do the cable lengths need to be as shown or all the same length?
3. Has this guy done it right?
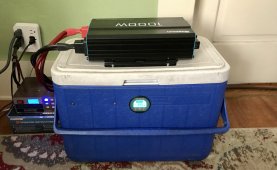
4. From the battery bank to the inverter (MPP LV1012), do the cables need to be the same length? There will be a shunt, fuse, and breaker.
5. This should have been question 1 - any issues with connecting 4 Valence in parallel?
1614013204982.png
 
do the cables need to be the same length?
The cables between the batteries should be the same length to eliminate any differences in current. The cables from the parallel group to charger and inverter can be different lengths. Some people stagger those to different ends of the parallel strings to balance the current. In other words, one to battery A and the other to opposite polarity on battery D.
 
Also in case you didn't know there is no need to connect the data cables if the batteries are connected in parallel. It doesn't sound like you were going to anyways. I have two connected in parallel and absolutely love them. Last I checked I am getting at least 75ah's out of them or 94% capacity which is surprising considering how old they are.
 
LOL realized I was posting under the wrong post ? so you can edit but not completely delete. (Mods job) but must post something so I copped a plea of delirium?
 
Thanks Ampster.
And Gazoo, thanks for confirming that I shouldn’t connect the communication cables.
Given that they have internal BMS, how close should the voltage be before connecting them in parallel?
 
Given that they have internal BMS, how close should the voltage be before connecting them in parallel?
Good question, It would depend on the limits of the BMS. If they are significant one battery is going to see a charge current and the other a discharge current and at 12 volts that could be significant. I wish I could be more helpful but the only thing i can offer is the closer the better.
 
I don't think you will have the same balance issues as lead acid. Even though the balanced drawing is best I don't think it is critical. Worst case connect the main positive and negative at each end of the stack.

As for connecting with different voltages I would note the voltages and start charging the lowest battery. As the battery being charged rises in voltage simply connect the others as they become equal. Once they are equal you can rewire as needed.
 
Thanks Ampster.
And Gazoo, thanks for confirming that I shouldn’t connect the communication cables.
Given that they have internal BMS, how close should the voltage be before connecting them in parallel?
I think Will mentioned that in the video review he did of these batteries. What I did was charged the batteries up fully, then waited until they were at close to equal resting voltages. Mine were within .02 volts of each other when I connected them in parallel. It won't take long to get to the resting voltage. The BMS draws a lot of power, around 2 amps per week for each battery. That is one drawback with these batteries.
 
Last edited:
Thanks for the input. I now have them paralleled per the wiring unlimited diagram.
I didn’t know they drew 2 amps per week. That explains why I had to revive the from a low voltage state.
 
Also in case you didn't know there is no need to connect the data cables if the batteries are connected in parallel. It doesn't sound like you were going to anyways. I have two connected in parallel and absolutely love them. Last I checked I am getting at least 75ah's out of them or 94% capacity which is surprising considering how old they are.
Gazoo,

Can you tell me more about your setup? I am looking to purchase two of the same and plan to connect in parallel also. What inverter are you using?
 
I put the batteries in this battery box:


One of the batteries is sitting flat and the other sits on it's end. It's the only way I could get both of them to fit inside the box.

The batteries are connected together with 6awg cable.

I am using a Juntek 100 amp meter for coulomb counting and it can be found on aliexpress.

For the inverter I am using a Bestek 300 watt sine wave.


As I recall the cigarette lighter output of the battery box is rated at 10 amps. So I ordered this cigarette lighter socket rated at 30 amps and soldered terminals to it so I can connect directly to the terminals on the battery box.


Since the Valence batteries are old I would not buy them unless you can get them cheap. It would be better to build a DIY 100 amp battery IMO.
Nice battery box. I have a similar box almost identical from Minnkota. But only have one 55ah Ampedoutdoors drop in LiFePo in it with the same 300w Bestek PSW inverter. Good idea to switch out the stock b box plugs with the ones your using because they are not as capable for 30a of power. Since I have room inside the box I’m thinking of installing a Victron blue 75/15 Mppt CC to hook a panel to when needed. ?
 
6 x Valence Batteries 12v wired in parallel…
 

Attachments

  • 654F178D-381A-4EAC-AA5B-E6948ED46ECE.jpeg
    654F178D-381A-4EAC-AA5B-E6948ED46ECE.jpeg
    285.6 KB · Views: 10
  • 09159CE1-5C91-43C0-B6C6-5A75EE940761.jpeg
    09159CE1-5C91-43C0-B6C6-5A75EE940761.jpeg
    288.4 KB · Views: 11
  • 724CF84F-6FB4-4431-AE85-D498376B8595.jpeg
    724CF84F-6FB4-4431-AE85-D498376B8595.jpeg
    98.8 KB · Views: 12
  • D93C01C2-51C5-49B4-9214-521638AB9AB4.jpeg
    D93C01C2-51C5-49B4-9214-521638AB9AB4.jpeg
    271 KB · Views: 13
  • FBDA35B7-2AC0-49F7-AB0C-956FAB78E733.jpeg
    FBDA35B7-2AC0-49F7-AB0C-956FAB78E733.jpeg
    203.1 KB · Views: 10
Back
Top