shocksll
Technology Geek and Outdoor Enthusiast
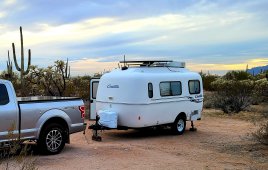
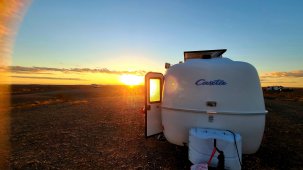
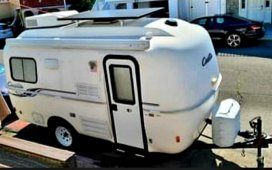
Finally finished the solar install on our 2021 Casita Heritage Deluxe.
4 x Renogy 100w panels
Victron SmartSolar 100/30 MPPT controller
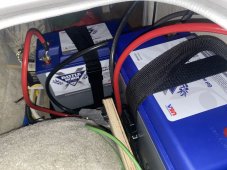
2 x Battleborn 100Ah heated batteries
PD 4655L Wildkat converter
Victron Orion Tr Smart 12|12|18A DC-DC charger
Victron BMV-712 battery monitor
Because of the massive space under the bunks of our Heritage Deluxe, I was able to create some mounts for both batteries under the bunk beds.
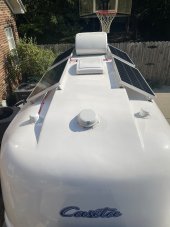
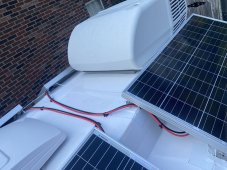
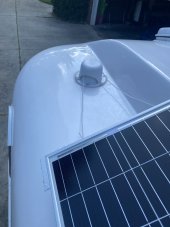
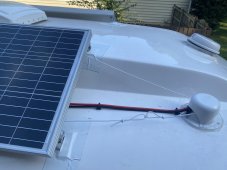
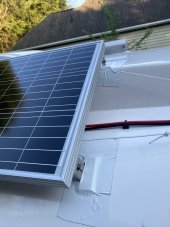
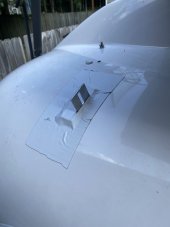
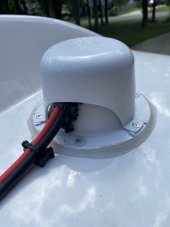
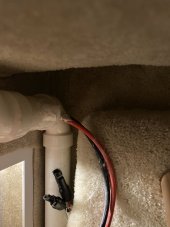
I didn’t want to put any holes in the roof so I used VHB tape on the panel legs and went through the grey vent for the wire run. I’ve added eternabond over the feet to give it a little more holding power and ensure the tape is protected from the elements. This should increase the tensile strength of the feet from 270 lbs of tensile strength to 336 lbs of tensile strength per foot. So my total tensile strength is over 1400 lbs per panel. With a weight of 14 lbs, that’s a 100x safety factor to handle any wind factors. From my research and calculations, 130 mph wind hitting the panel laterally would generate 275 lbs. That gives me a 5x safety factor for what I consider a worst case scenario.
I’ve also added tethers to my install so if any panels come off they should stay on the Casita. I included one around the a/c unit and others around the vent caps. And all of the panels are connected to one another with the idea that it’s doubtful that all 4 panels would come off at one time.
Right now they are all in parallel but am considering testing to see if going with 2 in series and then parallel would give me better performance.
Excited to see how much this will extend our boondocking capabilities.
4 x Renogy 100w panels
Victron SmartSolar 100/30 MPPT controller
2 x Battleborn 100Ah heated batteries
PD 4655L Wildkat converter
Victron Orion Tr Smart 12|12|18A DC-DC charger
Victron BMV-712 battery monitor
Because of the massive space under the bunks of our Heritage Deluxe, I was able to create some mounts for both batteries under the bunk beds.
I didn’t want to put any holes in the roof so I used VHB tape on the panel legs and went through the grey vent for the wire run. I’ve added eternabond over the feet to give it a little more holding power and ensure the tape is protected from the elements. This should increase the tensile strength of the feet from 270 lbs of tensile strength to 336 lbs of tensile strength per foot. So my total tensile strength is over 1400 lbs per panel. With a weight of 14 lbs, that’s a 100x safety factor to handle any wind factors. From my research and calculations, 130 mph wind hitting the panel laterally would generate 275 lbs. That gives me a 5x safety factor for what I consider a worst case scenario.
I’ve also added tethers to my install so if any panels come off they should stay on the Casita. I included one around the a/c unit and others around the vent caps. And all of the panels are connected to one another with the idea that it’s doubtful that all 4 panels would come off at one time.
Right now they are all in parallel but am considering testing to see if going with 2 in series and then parallel would give me better performance.
Excited to see how much this will extend our boondocking capabilities.
Attachments
-
 20210912_142354241_iOS.jpg138 KB · Views: 71
 -
 20210914_213046216_iOS.jpg274.9 KB · Views: 62
 -
 20210914_213100905_iOS.jpg111 KB · Views: 59
 -
 20210914_213508403_iOS.jpg178 KB · Views: 57
 -
 20210914_222014246_iOS.jpg122 KB · Views: 64
 -
 20210914_203346874_iOS.jpg62.2 KB · Views: 63
 -
 20210911_175733205_iOS.jpg75.8 KB · Views: 64
 -
 20210911_195606703_iOS.jpg119.8 KB · Views: 69
 -
 20210917_173656000_iOS.png324.9 KB · Views: 60
 -
 20210914_220411728_iOS.jpg295.5 KB · Views: 70