diy solar

diy solar

519ah 12v lifePo4 DIY project. Alibaba cells.

Cavendish

New Member
Joined
Nov 29, 2021
Messages
28
Hello.
* Not sure if this should be in the newbie corner?!
I decided to make the decision to purchase x12 EVE 173ah 3.2v lifePo4 cells, and x3 JBD 200a smart BMS from Daisy at Docan technology (Shenzhen) co., Limited.
The reviews were good, and Daisy Efest was very helpful to guide me through my first purchase.
Will try and update this post with progress on the project.
I should state that this will be my first build. If all goes well I'll end up with a 12v 519ah battery pack.

* Please comment if this in inappropriate or in the wrong place.
 
Last edited:
Tested and waiting for shipment
 

Attachments

  • Screenshot_20211211-130819.png
    Screenshot_20211211-130819.png
    295.4 KB · Views: 32
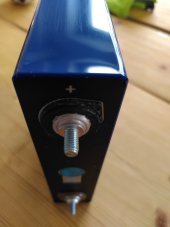
Balancing and capacity test.

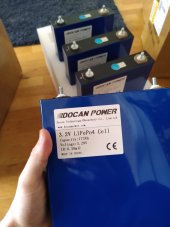
So my cells should hopefully arrive February. I'd quite like to be ready for then. Minimising single use items would be great.

Questions first:

1) My ideal 
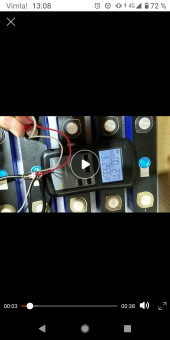
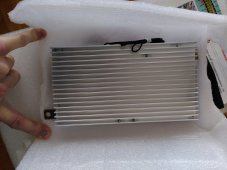
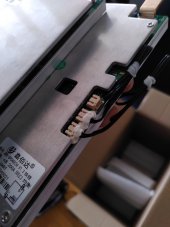
capacity test idea. I'm going to purchase a victron smart shunt 500a, and JBD smart BMS 200a. So my question is this:
Can I use these two for capacity test? (Battery -> shunt -> BMS -> load (load - should this be via inverter? Or can I attach any 12v appliance? Such as LED lights))
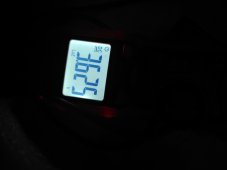
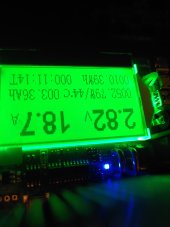
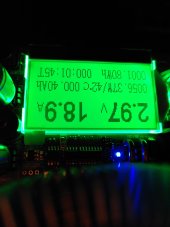
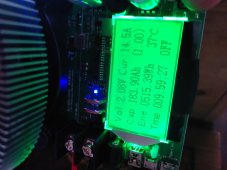
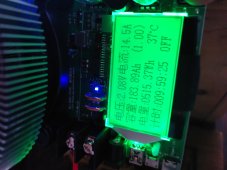
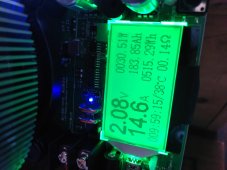
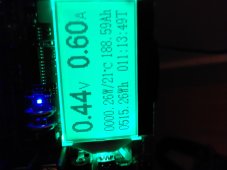
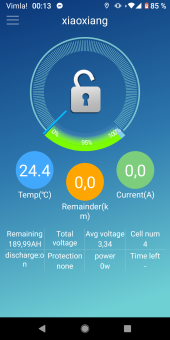
If I understand correctly this wiring will allow the shunt to stay on when the test is done, I also plan on having a live screen record video to capture the final stages of the test from the shunts bluetooth, so I can see Ah and get my final capacity (screen record is necessary, because I understand the shunt/ Bluetooth won't store the data).
BMS set to 10v LVD. If this isn't a smart plan, i have listed below a more traditional method(or so I believe).
My main reason for doing it this way, is because I don't want to purchase more stuff, it saves money and is more environmentally conscious.
- If this yields unsatisfactory results I may have to purchase a tester and start over.
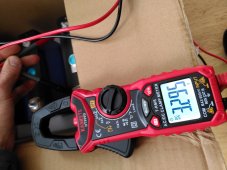
- Will this shunt record the total ah? I guess this is my biggest concern!

2) Car battery jump cables..! Is this a good idea to use for capacity testing?
As I'd rather not cut wire and put lugs on for temporary tests.

https://www.amazon.se/dp/B0856PHNLX...t_i_RTDW7P6REMN06QEXGJ9W?_encoding=UTF8&psc=1
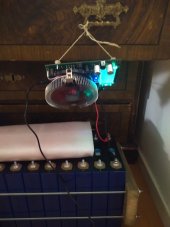

Balancing:
- If they seem low SOC, Divide the 12 cells into 4 4s packs in series, charge them with the 8amp charger I use for my car battery (it has a fast charge option, maybe someone can say if that's a good idea to use or not).

-Connect all 12 cells in parallel and charge with a power supply @ 3.6v 10a, until the amps drop down to Zero.
https://www.amazon.se/dp/B071HW378T...t_i_SD8WCHCHBF11PBENPV68?_encoding=UTF8&psc=1
• This step seems fairly straight forward.. or so I hope ?
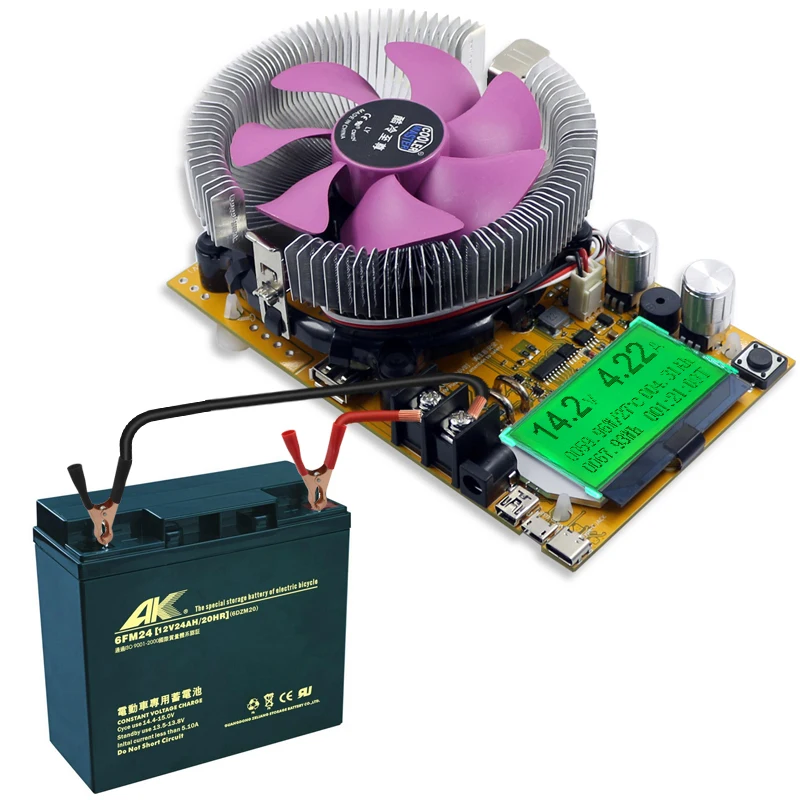
Capacity test
*If using the smart shunt doesn't work!
-Split the cell up into 4s 12v packs.
-connect capacity tester. Set at zero before connecting to battery. then up the power from the tester and wait until it cuts out and gives a final report. https://www.amazon.se/dp/B09DF7V98Y...t_i_ZAXB796F2NA21FMXPQXT?_encoding=UTF8&psc=1


I am curious to know if this is a good way to do it.. as most people capacity test each cell, from my YouTube searches. But having 12 cells and 1 tester seems very arduous to test one by one.
- * should I, for some reason top balance again after capacity test? Does the capacity test effect the balancing?

I do hope this makes some sense.
 
Cells arrived today. Happy valentine's ?
All seem good.
Packaging was and sturdy.
All 12 cells voltage all come in at 3.295v.
The cells all seem to have a slight bulge/expansion in the middle.

Temperature is around -5°c outside, so waiting for them to warm up before balancing and testing.

Is a slight bulge normal. Will attempt to attach photos.

But so far, aesthetically all seems good.
Purchased from Daisy Efest at DOCAN POWER, Alibaba.
 

Attachments

  • IMG_20220214_105445.jpg
    IMG_20220214_105445.jpg
    200 KB · Views: 25
  • IMG_20220214_105708.jpg
    IMG_20220214_105708.jpg
    201.1 KB · Views: 21
  • IMG_20220214_105806.jpg
    IMG_20220214_105806.jpg
    133.2 KB · Views: 29
  • IMG_20220214_110016.jpg
    IMG_20220214_110016.jpg
    89.2 KB · Views: 31
  • IMG_20220214_110241.jpg
    IMG_20220214_110241.jpg
    206.4 KB · Views: 29
  • IMG_20220214_110537.jpg
    IMG_20220214_110537.jpg
    213.1 KB · Views: 20
  • IMG_20220214_110739.jpg
    IMG_20220214_110739.jpg
    107.1 KB · Views: 21
  • IMG_20220214_110905.jpg
    IMG_20220214_110905.jpg
    106.7 KB · Views: 20
  • IMG_20220214_110910.jpg
    IMG_20220214_110910.jpg
    102.6 KB · Views: 25
  • IMG_20220214_111917.jpg
    IMG_20220214_111917.jpg
    65.2 KB · Views: 26
More photos
 

Attachments

  • IMG_20220214_112021.jpg
    IMG_20220214_112021.jpg
    81 KB · Views: 16
  • IMG_20220214_112046.jpg
    IMG_20220214_112046.jpg
    145 KB · Views: 16
  • IMG_20220214_112408.jpg
    IMG_20220214_112408.jpg
    66.5 KB · Views: 18
  • IMG_20220214_125842.jpg
    IMG_20220214_125842.jpg
    234.6 KB · Views: 18
Next steps

Top balancing with "Wanptek Adjustable DC power supply 30V 10A LED Digital Lab Bench Power Source" Ali express.
SEK 511.75 36%OFF | Wanptek Adjustable DC power supply 30V 10A LED Digital Lab Bench Power Source Stabilized Power Supply Voltage Regulator Switch
https://a.aliexpress.com/_mNg1rfe

Capacity testing with "150W DC Electronic Load Tester USB Adjustable Testing Module Power Meter load charger 18650 battery Tools 200V 20A" also from Ali express.
 
3.295 start voltage measured with my new clamp meter from Amazon.
https://www.amazon.se/dp/B07Z398YWF...t_i_4VHFN5Y8G2Q48Q6KTMPA?_encoding=UTF8&psc=1

Have connected them all in parallel, and charging at 3.6v, started at 7amps.
Did a silly thing buy purchasing a charger which only has 1 decimal point on the voltage guage, so 3.6v and a little turn is what I stuck with.

Charger is rather warm after a few hours, but I guess that's natural, being that it's taking 220v AC down to 3.6v DC. ?

I didn't upgrade the wires that came with the charger, I would have liked to, but was to unorganised to fix them in advance, and too hasty to wait for some to arrive.

I also added some compression plates at either end. A few of the cells still seem a little swollen, but was scared to go tighter.
Maybe you can see a few in the middle have a little more gaps than the end cells.
 

Attachments

  • IMG_20220214_194830.jpg
    IMG_20220214_194830.jpg
    152.4 KB · Views: 15
  • IMG_20220214_211952.jpg
    IMG_20220214_211952.jpg
    63.2 KB · Views: 15
Top balance done.
Charged to 3.64v
Now capacity testing starts..
Although the cables are immediately hot and the wall plug is flimsily. I'm a little sceptical if I should carry on.
*Maybe I should purchase larger wire and a decent quality plug! But I'm a little to hasty to wait.

The capacity tester seemed to get hotter underneath, rather than expelling the excess heat via the fan and blades. So I strung ut up in the air, hopefully air flow will at least allow for the board not to overheat.
The max amps I could pull through this was 18/19a, was hoping for 25+.
A little nervous to leave this tester alone, the actual tester seems fine in quality. But all of the cables coming in/out leave much to he desired, either too small guage, to short lead or poor plugs.
You get what you pay for. I did however expect a little better haha.
 

Attachments

  • IMG_20220224_234203.jpg
    IMG_20220224_234203.jpg
    61.6 KB · Views: 9
  • IMG_20220224_234208.jpg
    IMG_20220224_234208.jpg
    83.4 KB · Views: 9
  • IMG_20220224_232124.jpg
    IMG_20220224_232124.jpg
    44.2 KB · Views: 9
  • IMG_20220224_232017.jpg
    IMG_20220224_232017.jpg
    77.2 KB · Views: 6
  • IMG_20220224_231116.jpg
    IMG_20220224_231116.jpg
    70.8 KB · Views: 6
  • IMG_20220224_231038.jpg
    IMG_20220224_231038.jpg
    84.1 KB · Views: 5
  • IMG_20220224_231023.jpg
    IMG_20220224_231023.jpg
    98.6 KB · Views: 5
  • IMG_20220224_225936.jpg
    IMG_20220224_225936.jpg
    87.2 KB · Views: 4
  • IMG_20220224_225942.jpg
    IMG_20220224_225942.jpg
    114.3 KB · Views: 8
I'm guessing that the tester chooses the voltage based on the input. Which if I'm correct is why it states 2.8v
 
Beep!
Woke up to a finished test.
Pulled 183ah
2.6v LVD
Would be nice if you could turn off the beeping though haha.
11 more to go ?.

Is it ok to leave cells fully depleted for a few days? Or should I hook them back up immediately?
 

Attachments

  • IMG_20220225_092450.jpg
    IMG_20220225_092450.jpg
    100.2 KB · Views: 3
  • IMG_20220225_090730.jpg
    IMG_20220225_090730.jpg
    117.3 KB · Views: 2
  • IMG_20220225_090601.jpg
    IMG_20220225_090601.jpg
    171.4 KB · Views: 2
  • IMG_20220225_090558.jpg
    IMG_20220225_090558.jpg
    169.9 KB · Views: 2
  • IMG_20220225_090548.jpg
    IMG_20220225_090548.jpg
    166.2 KB · Views: 2
  • IMG_20220224_234208.jpg
    IMG_20220224_234208.jpg
    83.4 KB · Views: 2
Oopsie daisy. 0.44v
Second capacity test was done during the day when I was working. Came home just over 12 hours later and the capacity tester still draws power even after the 2.6 low voltage disconnect.
Bit of a bummer, as I now have inaccurate result and a beaten cell. Was under some compression, hopefully that's ok.
But the result is in line with the first cell. So it feels good for now, will see how it holds up.
After 30 seconds on the power supply it was up to 2.7v whilst on charge. Hopefully I got away with this one.
If you have the money, I could highly recommend purchasing x4 capacity testers, so after the 10 hours or so, you can just charge them all back to desired voltage.
 

Attachments

  • IMG_20220226_001605.jpg
    IMG_20220226_001605.jpg
    105.7 KB · Views: 4
  • IMG_20220226_001649.jpg
    IMG_20220226_001649.jpg
    64.4 KB · Views: 4
  • IMG_20220226_002554.jpg
    IMG_20220226_002554.jpg
    44.6 KB · Views: 4
So how is it going with these ? I'm currently looking to add another battery to break into the 30kWh storage and I got a quote from Daisy. Do you think you've received grade A cells? Have you been able to continue testing and verify if the capacities are in line with expectations ?

Thx
 
So how is it going with these ? I'm currently looking to add another battery to break into the 30kWh storage and I got a quote from Daisy. Do you think you've received grade A cells? Have you been able to continue testing and verify if the capacities are in line with expectations ?

Thx
So far seems ok. This is my first time with these things, so no comparisons unfortunately.
I would have like them to have come with absolutely no bulging. But half of them have. However the capacity tests all came back closer to 180ah, and they are rated 173ah. So no complaints.
I am waiting for components to arrive to assemble into a 3p4s.
But I am happy with my purchase and daisy was very helpful.
 
Finally finished the build. Now waiting to have a use for it!
BMS Bluetooth app is the carplounge BMS monitor. The other I tried didn't allow for parameter settings.
https://play.google.com/store/apps/details?id=com.carplounge.bms

Purchased 173ah cells. The xiaoxang app says 190ah available..

Setup 3p4s

Set high/low voltage disconnect 2.5/3.65v

Copper Busbar 5*100*30mm. (BMS Busbar)

I'm fairly certain having 1 200a BMS for each 4s is over kill, and means they don't actually talk to each other. However the BMS theoretically should take care of each 4s anyway.

Might have gone overboard with the cable sizing. Couldn't decide if I'll be installing an inverter, so planned for one anyway.
95mm2 high flex welding cables for all battery cables to and from the main Pos/neg busbars..

Very tight space, will be keeping an eye on temperature, might have to install a fan and some vents. But that's a project for when it's in use.

Will at some point charge them up and to another capacity test on the pack.

Hope this is a little bit useful for someone.
 

Attachments

  • IMG_20220426_004053.jpg
    IMG_20220426_004053.jpg
    106.9 KB · Views: 16
  • Screenshot_20220426-001328.png
    Screenshot_20220426-001328.png
    349.6 KB · Views: 16
Back
Top