diy solar

diy solar

Daly Smart BMS 4S 250A UART Version - UART Pinout for PC Parameter Setting

I have two firmware, one for bt work and one for lcd work, I have tried both and they both work, I can put one or the other without a problem, if you want I can give them to you, but I am not responsible for what may happen. ;)
That would be perfect! I’ll send you a PN.
Thanks!
 
thank you very much. Which sequence is Pin1-4, look at the plug or look to the rifle on bms?
I have 2 sockets with 4 Pins. one with description UART, one no description and one 3-Pin with chinese description. The BT Modul works on the socket with no description.
Just an FYI, mine uses a connection on the other side labeled "monitor" for the USB cable.
 
Wow that is just begging for an esp8266 connector for wifi - no need for a buck converter - use the 3.3/ground lines directly, cross TX/RX and you have a wireless solution with esplink.

I might pick one up to try it out :)
yes, you could also plug it into the connector designated for the pc marked "monitor", as Just John says. I would like to see the data in home automation with home assistant, but unfortunately I am not trained to configure that, I need to learn but I have little time for it ...
 
Wow that is just begging for an esp8266 connector for wifi - no need for a buck converter - use the 3.3/ground lines directly, cross TX/RX and you have a wireless solution with esplink.

I might pick one up to try it out :)

I have a few esp8266 to play with and are totally blank in knowledge on how to use.
(Almost blank)

TX/ RX sure.
But isn't the app expecting BT connection?
Or the windows software USB port?

There is my biggest blank..
How to use the WiFi information when you don't do BT (or usb UART)

I use it now to turn on/off lights and stuff on a schedule or remotely.
But am highly interested in further possibilities.

You know a site that explains in "baby talk" on how to make this conversion??
 
If it's a UART (serial connection), and if it provides a stable 3.3v power supply and a ground, all you really need is to hook it right up to the 8266.

After that, it's up to your programming skills to pull the info from it ;P

If there's a windows app for the BMS, you could use HW Virtual Serial port to create a COM port on your PC which connects to the 8266 chip:


You'd have to flash esp-link or maybe program the esp chip with your own firmware to handle the connection.


If you could create a python script (or C or whatever) to pull the info from the bms, you can turn it into an IoT device, something like this:


See post #37. I wrote a utility called "jbdtool" to pull data from my BMSs. The utility will publish the BMS data to a MQTT server. node-red picks up the MQTT, "massages" the data a little and inserts it into an InfluxDB. From there, Grafana pulls the data from Influxdb and displays the info.

It may seem like a long road from where your at but you eat an elephant one bite at a time. Here's the thread on building my Wi-Fi module:


Any questions, just message me.
 
Thank you a lot for this explanation!

Lots of new technologies to learn and brush up old knowledge.
(I haven't worked with Database this way (write the queries) in over 15 years)
 
This was very helpful fhorst, you could make a resource entry for the cable. I'll look and see how mine are wired.
 
yes, you could also plug it into the connector designated for the pc marked "monitor", as Just John says. I would like to see the data in home automation with home assistant, but unfortunately I am not trained to configure that, I need to learn but I have little time for it ...
Are you able to confirm that the 4 pin output labeled "monitor" is able to function like this? Would the 4 pins be tx, rx, 3.3v and gnd? If so, do you have a pin out diagram showing which pin is which for the 4 pin output labeled "monitor"?
 
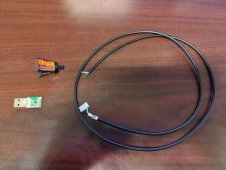
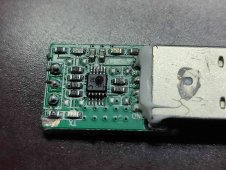
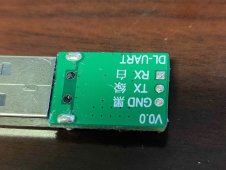
My cable died. I am going to just swap on another USB Serial adapter for the one that burned up, but I figured I would put the tear-down pictures here.
IMG_20220209_085826.jpg

IMG_20220209_085853.jpg
IMG_20220209_085923.jpg
 
Back
Top