diy solar

diy solar

I'm interested in a hiked-in wilderness water collection setup using solar energy

Like @curiouscarbon this is something I'm interested in so I hope you and others post what they're doing and experimental results.

Haven't seen anyone post on this, but.... the condensation plate might do better getting it as high as possible since humid air is less dense and rises (e.g., morning dew evaporating off grass/leaves would go up). It may also depend on the "dryness" of the ground, for example, dry ground might absorb moisture out of the air competing with a dehumidifier, whereas moist ground might have the highest possible humidity.

...you can DIY this with a peltier thermoelectric cooling module, this is the route i am taking because of considerations about water safety. https://www.amazon.com/BQLZR-TEC1-12730-Thermoelectric-Peltier-Cooling/dp/B00EQ1X5EC
So, why 1x 30 amp 62x62 mm for $25 when you get 5x 40x40mm 6A for $16? That's a surface area of 8000 mm vs. 3844.
 
Oh snap! it's on now. JK

I didn't even realize this thread had any peltier talk in it. Hadn't read it yet.
 
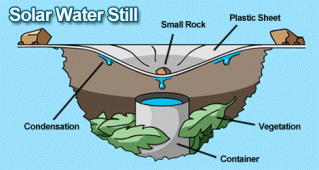
From my military survival training.
Dig a hole about 4' across and about 3' deep. Put a container in the bottom with a screen over the top to keep out the bugs.
Place a sheet of plastic over the hole and cover the edges wit the dirt from the hole. Put a rock in the center of the plastic sheet. Collect the pure condensed water from the container after a couple of hours.
The vegetation is optional.
proxy-image.gif
 
So, why 1x 30 amp 62x62 mm for $25 when you get 5x 40x40mm 6A for $16? That's a surface area of 8000 mm vs. 3844.
Great point about price and surface area!

I did an experiment with that 62x62mm one with hot side touching a cpu water block via thermal paste. 420x140mm radiator. Easy to get the cold side completely frozen (of course this is very low heat load, but it’s fun!”) coolant water heats up very gradually.

the water block cooled the center of the hot side best, but the edges were more warm. in the future i’m planning on using 1-5mm copper plate as heat spreader to keep temps more uniform.

Have moved onto the smaller 40x40mm 12715 module from this source “cold and colder” https://www.amazon.com/dp/B01JRUNE6U/

50 usd for 10 of the highest grade peltier (15Amp Imax)

have only done preliminary testing on those 12715 modules. ran 1.4V through it at ~1A with hot side on a small 100x80mm aluminum heat sink. the cold side got like 6C cooler.

1.5A is 1/10th Imax (15A) and DTmax is 67C so 1/10 of that is about 6C so the test checked out for me. it did not pump much heat but if i rested my wrist on the cold side while in a hot room it felt really nice. FWIW

edit: pics
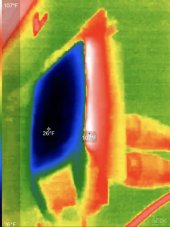
thermal image of 62x62mm peltier operating with 12V applied from some meanwell ac adaptor. remember it using about 8-9A at 12V definitely not the advertised 30A. fuzzy memory, this was last year. you can see the coolant tubing on the right. the upper one is the inlet (from radiator to center of hot side) the lower one is outlet.
1621793535570.jpeg


image of air -> ice fun freezing stuff in place
1621793600380.jpeg

(for context, this test was just to have fun and hands-on observe the cold factor for myself. haven't gotten to the actual condensation optimization step yet ^^; )
 
Last edited:
I should check the coil temperature of my dehumidifier, it's probably the optimum temperature to condense water while minimizing the amount of loss due to air-cooling. 26 °F seems way too cold.

I wonder how much fins add? For example, how would a cookie sheet (no fins and no forced air-flow ) do?

From my military survival training....
From what Jamie did, it doesn't work all that well. Plus if I left it unattended the squirrels and iguanas (who are thirsty too) would probably drink it up.
 
Cistern with a rainwater collector?
Old-time cisterns are typically underground concrete-lined holes and have a sand/filtration system above them (Fort Jefferson, Dry Tortugas National Park has one, rain-water is filter through sand from the top of the fort's walls). I don't know enough about modern ones and should probably look into it. Biggest problem here (other than digging) might be salt-water flooding. The same thing for a well, there is a fresh-water bubble floating over the salt-layer underground, but it's so thin it's hard to use.

Rain barrels seemed like a no-go due to Mosquitoes, algae, parasites (got to love the tropics). Heck, a rat was so thirsty that he bit through the windshield washer reservoir tubes of both cars and chewed through the dehumidifier hose (ref).
 
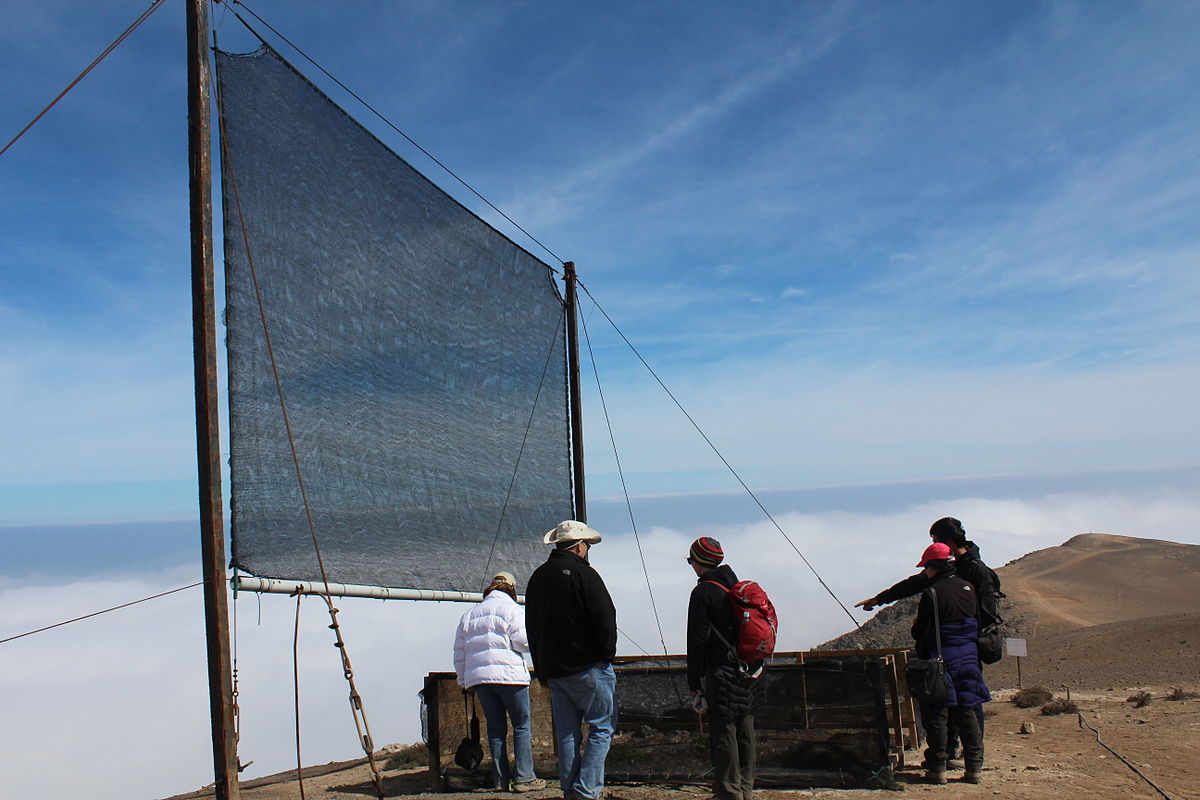
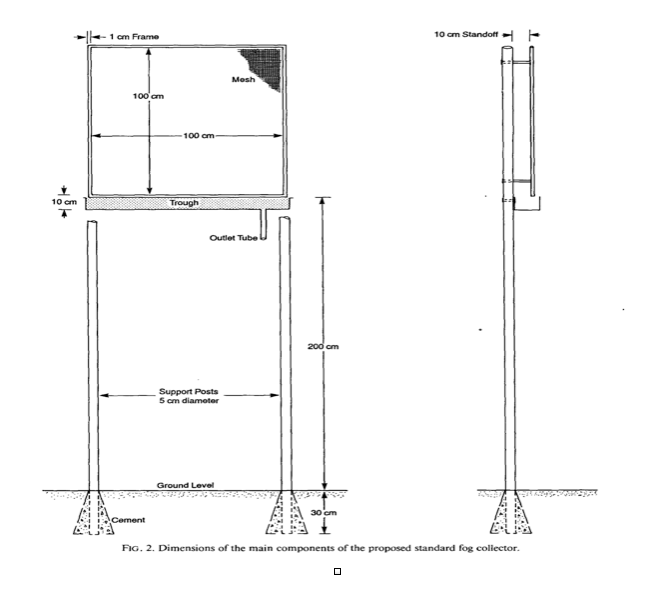
I've read about dew harvesting netting material used to collect water. But you need enough humidity in the air to begin with

 
sorry for mentioning the silly concept of running the air through the hot side before condensing water, that’s nonsense.. need coffee.. if the ambient air is very high temperature and high relative humidity, then now we are talking.

*sheepishly accepts guilt for giving poor engineering advice*
 
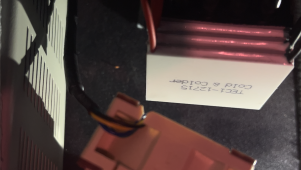
i tested 3x TEC1-12715 peltier stacked with 12.5W/m•K thermal pads between the successive hot and cold faces. used a CPU heatsink with copper heat pipes.

test ran 6V through the 3 series (2V/module roughly) and observed 1.7 Ampere flow, heatsink T=31.0°C cold side T=-1.9°C dT=32.9°C with 10W of input power. 5CFM airflow to heatsink but not cold side.

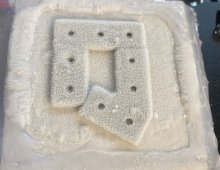
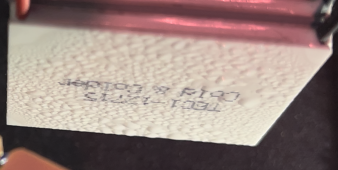
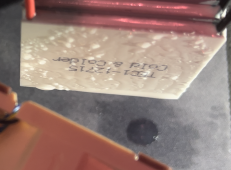
pointed the 5CFM fan at cold face, removing airflow from heatsink. water began visibly forming after 2 minutes, by 10 minutes it was sweaty, and 14 minutes first droplet dripped off. over the 33 minute test six droplets fell and it used ~10-12W for the entire time.

T=0:00
t0.png
T=10m
10m.png
T=33m
32m29s.png

i calculated that the test used about 5.5 Wh to draw 6 droplets out of the air in half an hour in 27°C ~37%RH condition.
 
Code:
 0:00 power applied 6V 1.7A
 1:34 shimmer of condensation begins
 2:00 visible layer of condensation forming
 5:00 droplets start to combine and become larger
10:00 droplet size peaks and dripping cascade begins
12:00 water has begun to accumulate along bottom edge
13:45  first droplet falls off peltier
17:21 second droplet falls
20:16  third droplet falls
24:18 fourth droplet falls
28:30  fifth droplet falls
32:29  sixth droplet falls
33:00 concluded test

three tec1-12715 stacked.png
 
Last edited:

The principle of the process is as follows: hygroscopic brine – saline solution which absorbs moisture – runs down a tower-shaped unit and absorbs water from the air. It is then sucked into a tank a few meters off the ground in which a vacuum prevails. Energy from solar collectors heats up the brine, which is diluted by the water it has absorbed.

Because of the vacuum, the boiling point of the liquid is lower than it would be under normal atmospheric pressure. This effect is known from the mountains: as the atmospheric pressure there is lower than in the valley, water boils at temperatures distinctly below 100 degrees Celsius. The evaporated, non-saline water is condensed and runs down through a completely filled tube in a controlled manner. The gravity of this water column continuously produces the vacuum and so a vacuum pump is not needed. The reconcentrated brine runs down the tower surface again to absorb moisture from the air.
 
Regarding the topic of preparing the air to have less mechanical contaminants..

Most Atmospheric Water Generation designs seem to be “Straight Through” systems.
Atmosphere supplied air goes through a filter, hits the cold surface, and is expelled to atmosphere.

The input process air cleanliness thing is so paramount to me, that I’m seriously considering a different recirculating design architecture to achieve cleaner air.

A sealed volume of air inside the device would be repeatedly recirculated through the air filter (stainless steel mesh,MERV 8, HEPA, HyperHEPA etc..).

At least two fans total. One for recirculating filtration. One for introducing new air into the sealed volume. Maybe a flap to open while pushing in new air, since it’s supposed to be sealed except for intake and exhaust.

Ok. The device is turned on. Internal air volume: empty. Internal water reservoir: empty.


Open up exhaust flap. Power on new air intake fan. Run until internal and external humidity/temp within target threshold.


Close exhaust flap. Power off new air intake fan. Power on recirculating fan. Power on cooling plate.


The recirculating motion of the air moves it across the cold plate. Water condenses onto it.
 
Back
Top