diy solar

diy solar

IoT (cell) uplink for GroWatt SPF 5000ES

RESUME SIMULATED EMERGENCY

Ok, I am doing it.

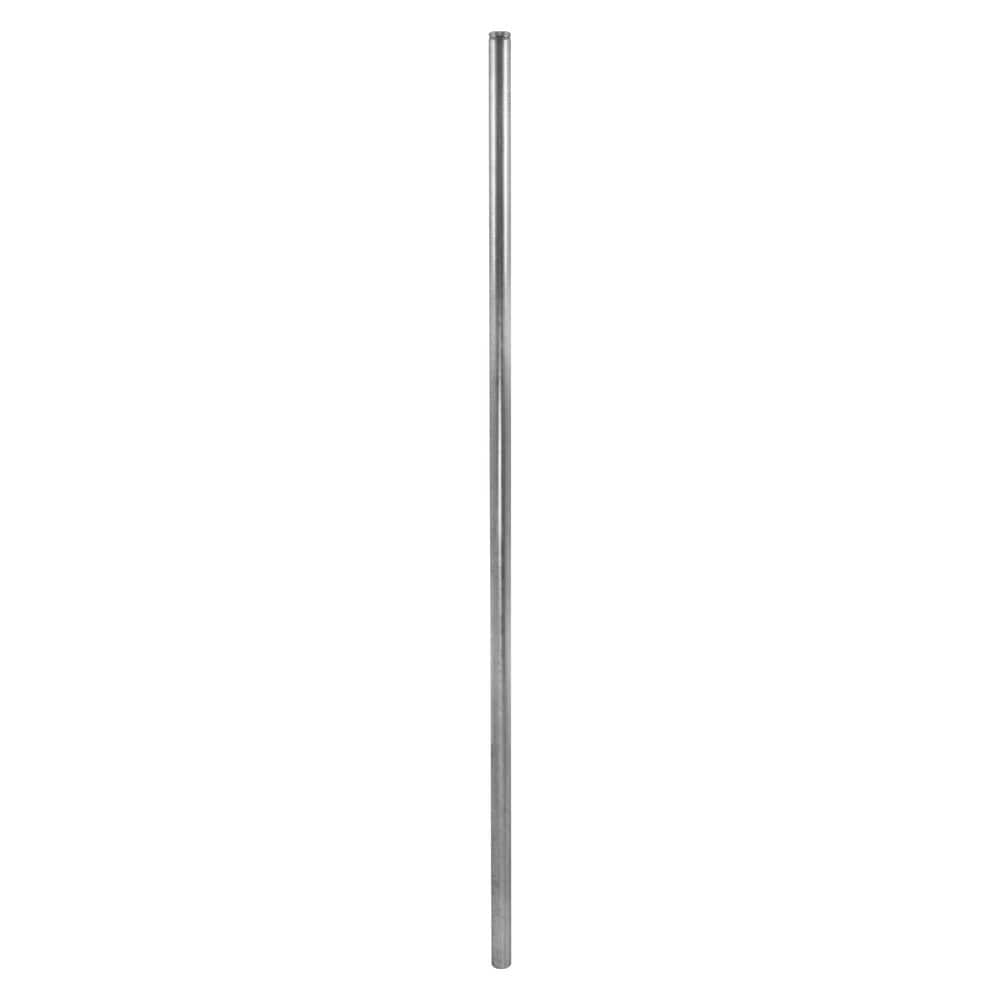
* Gonna use the smaller diameter 1 5/8" 6' pole, like $12 bucks and in stock
* Going to sink that 2.5' into the earth in my back yard... leaving 3.5' for a panel that is 40.5" wide, on the ground!

This means there can be
* No weeds
* No bumps in the earth
* Ok, we are on a very steep slope in the final end-run

What do we have so far?
* Pole poking out of the ground three and a half feet
* Panel that is 3 and a half feet wide, on its side
* We are in for under $20/460W module so far

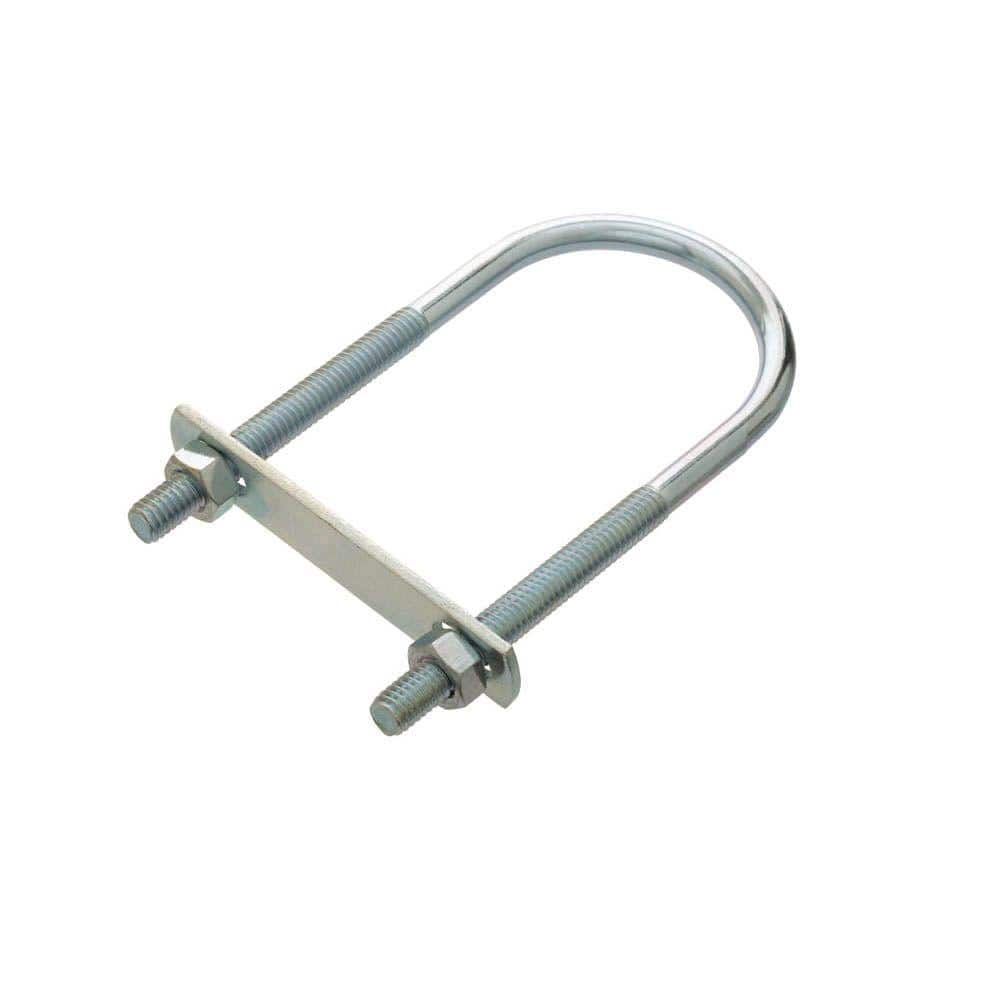
U-Bolt clamps are cheap
Top caps are cheap - today - lets go with a NO WELDING REQUIREMENT... since this is a Knock-Together emergency simulation.

* U-Bolt at the top, single
* Bolt a hinge to that
* Tapper-Screw the hinge into the panel, center
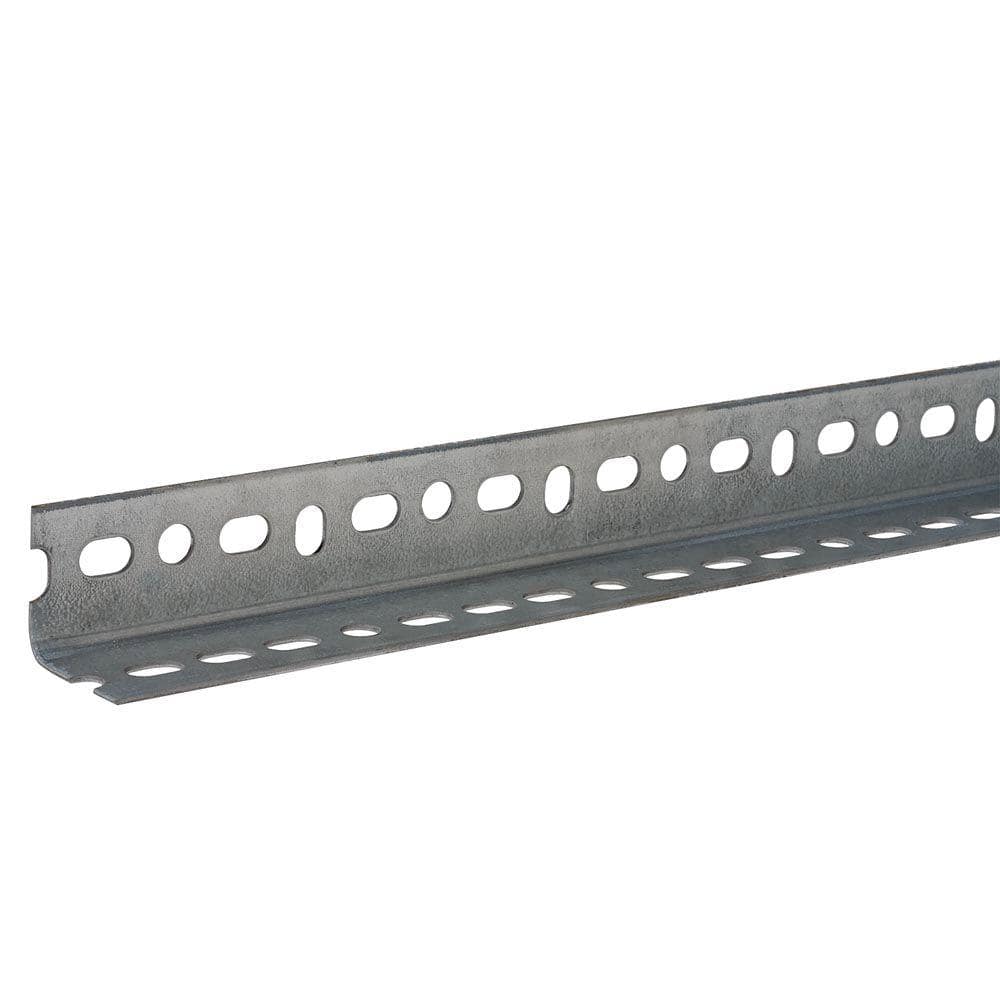
* Back the panel (86" or 7.2' or 2182mm) wide with a stiffener with 2 points of attachment***

So in this case, we affix to the pole at a single point, but the stiffener attaches to the panels at two points along the top... so it will wiggle a bit, but the panel wont be flexing at the middle. Stiffener can be VERY light gauge steel or aluminum now, since we can "punch it thru" along the way for multiple points of attachment. The stiffener just has to go "long side" against the worst bend, so 1" should do it.

What do we have now
* 6' pole in the ground, 3.5' exposed
* U-Bolt at the top (DOH - Ran out of pole)

What do we have now
* 6' pole in the ground, 4' exposed, more concrete which is cheap and easy
* U-Bolt at the top, hinge attached, stiffener attached - at least 4' of L bracket, at least 1", at least 1/16 aluminum or 14G steel
* Panel could now be affixed and hang vertical, bottom could be propped up with a bucket or piece of wood

What are we in for? Definitely under $42 - way under. Possibly under $21, but likely only if we buy larger stock and cut it down. I have 4" grinder cutter wheels but we need to buy some more. I gave away my chop-saw so we need to go to Harbor Freight, or just cut aluminum with my wood saw, or... we will just angle-grind the damn steel backers. OK....

What are the Trigonometric realities of that?

* Needs to be near vertical this time of year
* Needs to lean up quite a bit for summer
* Looks like it can rotate no problem

What about shading at different angles?
* Wont matter in summer, they could go side to side
* Turned, in winter... eh... better be careful!

So what does it cost to move a post once it is set? Not much right? Ok, move forward

-methods
 
STRICTLY FROM COMMON STOCK
* Accept nothing that is quantity 2 or 4

Highest stock count is this

Over 52pcs one mile away... ok, what do we have
* 8' long (SWEET!)
* 16 Gauge (OK)
* 2' or 3' into the ground, leaving 5-6' exposed (PERFECT)

Can it take the side load? Yea... but we will find out. Not at the top like a kite (lol) but the way I am going to use it, yea.

$22 in
Now for the Bracket. Aluminum is light and easy to work, but ...

1.5" slotted Steel for $20 bones, 19 available

Searching by "In Stock" and accepting only things that are stocked over 19pcs, that is what it is going to be. Ok, Check. Now on to hinging with U-Bolts.

(see how important it is to only pick from Common Stock? You will see soon enough, accept NO one-off's!!)

Undersized but may work for a few bucks
Cant get it in 3/8" so moving along

* Pole in hand
* U-Bolt that fits in hand
* Good length of stiffener in hand
* Box of self-tappers, bigger than the last batch or we will need too many, washers

What do we have?
* Panel mounted to a stiffener mounted to a U-Bolt mounted to a pole
* Missing the Hinge!!!

Must be outdoor rated, looking for wide, not long.
(Million hinges in stock, I will take the U-Bolt and Stiffener and see if anything lines up)
NOthing will, but we may have to drill only 1 hole and not two

OR
Make a hinge by ... what?

* back two U-Bolts together
* Run a round stiffener

nah

-methods
 
So now the bottom is flapping in the wind
The top is affixed to a pole by a hinge

Load is distributed on the panel by the stiffener, ultimately landing in 1 spot... the U-Bolt... which can rotate on the pole. We may have to cut down some threads, stuff like that.

Now, the bottom...
We dont want to "add legs" or any ghetto like that. It has to triangulate back to the pole in some way.

* One more Stiffener stretch, so buy the first in double length
* One more U-Bolt for sure
* Some kind of Peg-Leg going out that wont bend in the middle

PAUSE

-methods
 
RESUME

All accounted for except the bottom adjustment rod

REQUIREMENTS
* Must be round or Square stock, significant side load
* Must be easy to adjust, continuous
* Must have a full length stiffener
* Stiffener must go to a hinge to adapt to the extreme angle change

So we have to adapt to a Hinge on one end and the pole at the other. 1/2" pipe could bend, 1 5/8 is too large, so looking at 1" or 1 1/4" pipe. Must be steel, no PVC or any crap like that.

* Bottom of panel to Stiffener
* Stiffener to Hinge
* Hinge to U-Bolt, 1" fitted
* 1" pipe long enough for 90degree thru 0 degree (will hit ground)
* Pair of U-Bolts at the pipe mounted flat to flat at 90 degrees (one large, one small)

That would be very hard to adjust, so... "some fixings" made of end-cuts to fiddle it all together.

TIME
* BOM (Bill of Materials) Complete
* CHECK - hits budget
* CHECK - in stock in volume
* CHECK - can scale to 10pcs or 20pcs same day
* CHECK - can have a proof of concept before sunfall

The way this works in a real emergency is that I build ONE prototype, then follow that with ONE proof of concept (minus bodges), I calculate two things and set other men to the task

* TAKT TIME
* DIFFICULTY LEVEL

I assign the task based on difficulty anywhere from "total meahead" to "Engineer" and we divide and concur (eh hem)

* Bag of quick set pole cement
* Some cut-off wheels for the grinder
* Some fasteners, if what I have on hand wont cut it (Tappers and Nut/Bolt/Washer)
* ... odd bits

We make one and only one trip to the store - NOW...

FAILURE MODES
* It will rock clockwise and counterclockwise SUPER BAD
* The FIX is to tie them together along the row once adjusted with Plumbers Tape

FAILURE MODES
* Pole rocking out
* The FIX is to set it deep, set it solid - takes a lot of force to bend a fence pole.... a lot less to shake it loose

FAILURE MODES
* Rust
* The Fix is the cheapest spraypaint over anything that is not Zinc coated

Failure modes
* TBD, lets find out

ONWARD

-methods
 
Time is 0900
I have been up working on this since 0300.

Now that everyone else is just waking up, lets see if I can actually GET SOMETHING DONE... before everyone else takes their morning dump.

-methods
 
As always the Home Depot website had almost no correlation to the Home Depot shelf stock.

We went way over budget for this prototype... But that's to be expected. 4X to 10X is what a prototype costs.

Now to do it, pics later

-methods


PXL_20220123_180221669.MP_compress40.jpg
 
Got the pole in, panel up, and 16" linear actuator driving. Puts out 9.66A short circuit today.

-methods
 
PXL_20220123_190534660_compress22.jpg

Super easy dig, took no work.


PXL_20220123_184022926_compress44.jpg
For perspective, 6'3" 185lbs

PXL_20220123_191317553.MP.jpg

That above is a LONG way down for this soil. We hit clay.

PXL_20220123_191543029.jpg
Totally overfilled for the quantity of concrete we had on hand. I had to get real clever after that... So we'll just say it's not up to code (any code, anywhere... Not even my code)

-methods
 
PXL_20220123_193131207.MP_compress21.jpg

Confirmed our Soil Samples

PXL_20220123_200404758.MP.jpg
When you are drilling in this direction it's absolutely required that you put a backer behind the drill.

You don't want to find out. Look closely at the picture and you'll see that I'm holding a metal bracket behind the pair of brackets I'm drilling.

I'm drilling out for 5/8" fasteners

Don't be that guy, don't sleep with the drill, don't slip with the screwdriver, don't slip with the electric screwdriver.

Yep
Never happen to you... Until it does

PXL_20220123_205338116.jpg

Yea yea, I don't have the stiffener in there right now. I'm tired directly into the frame, no L bracket.

The linear actuator was a super last minute rush... At the bottom it's just zip tied, at the top it has two number eights.

None of the Cross bracing is in

-methods
 
On the first go I lined up with the diode boxes on the back instead of the split in the cells on the front... So I'm off center significantly.

Sweet!
New holes won't be bothered by old holes

... The stiffening l bracket material I bought was woefully inadequate, to the degree that I did not even bother including it.

The hinge mounts to a stiffener, the stiffener grabs the panel.

Don't even look at the bottom, we had 15 minutes to show a 9-year-old proof of concept.

...
Anyhow
I learned what I needed to learn. I set up a prototype I can fool around with easily.

Next up
* Finding a good stiffener
* Spreading the load
* Cross bracing

I'll probably counterbalance it like you do with a garage door, then I can use an even lighter weight linear actuator, or leverage it to a larger degree.

I'm not sure what the target is for Value engineering yet. $42 per panel seems excessive to me.

* Concrete
* Pole
* Top cap

* Upper bracket
* Lower bracket
* Linear Actuator

* Hinge
* Stiffener
* Fasteners
* Braces

I can't value engineer for a volume greater than 50 pieces. That will get you much better prices than Home Depot...

Well let's not get ahead of ourselves. The next step is to shake it to the point of failure.

-methods
 
I already know that will fail immediately, so... I'll wait to do the destructive testing until I finish one more round of bracing and load spreading.

Also
Obviously the linear actuator on that setup is pretty useless. I just wanted to play with it.

... Tension wires, springs...

Er
I don't know how I'm going to do it yet, but it starts by just doing something. More is always revealed... And it's always worth making a super rough prototype that's way off the mark


-methods
 
large-side-pole-mount-back__73805.1597351775.jpg

Something like this appears to be value engineered to the max. We're going to go ahead and drop 10 poles in the ground... 2 3/8" standard fence pole.

That means I have to mount my panel sideways - so something like the bracket shown above should suffice.

I'm on the lookout for some cheap solar rail

...

We are very close on the 10KW fully adjustable array. All parts in hand except for the last fiddling mounting bits.

-methods
 
No time, from phone

* The arbitrary setup is producing 65% work

That is imperfect angle, at the worst month, at midday, with dirty damaged panels, reasonably well binned.

* 460W nameplate
* 380W work rated at my location
* 65% of the latter number

That's the reliable work that I can extract from the totally shattered panels in a fixed array configuration.

PXL_20220213_025039488_compress41.jpg

Remember that this is a bush simulation

The only thing that matters is practical work on the worst day of the year hand to mouth.

* How many horsepower?
* For how many hours?

I have absolutely no interest in net metering, yearly averages, or any BS like that. My metric is one of available work in the immediate, measured through the charging of a large battery Bank.


PXL_20220213_024700300.MP_compress69.jpg


Tough working for my phone

So ignore the details of this prototype, it was built from scrap Parts in hand. It has two attributes that are important.

* It can rotate
* It can lean

Plenty of folks have figured out how to make things lean, but getting rotation and stability at the same time is tough.

PXL_20220213_024017547.MP_compress4.jpg


In method one you have only one horizontal Pole. You jave four brackets, 2" angle iron, 4' long. You affix to the panels at one point in the middle

In method 2 you utilize two horizontal poles, affix at more traditional locations, the top can rotate, the bottom throws out a pair of kickstands

... You really have to build something like this to see how unstable it is*

It'll flop around like a wet noodle until you have all of the pieces in. Right? Like a wall without shear or a gate without a diagonal.

PXL_20220213_014322100.MP_compress76.jpg


The most important aspect is how staggering of an impact it has first person. Since the panels are mounted vertically, there are over 7 ft tall, they are about 4 ft wide....

The human mind reacts to them*

Two standing side by side, representing a horsepower of potential. Ready to do a horsepower worth of work, directly measurable by the scientific method.


PXL_20220213_015301760.MP_compress16.jpg

I'm hitting Android bugs hold on

-methods
 
Suppose stock is a nice thing to work with. Round*

Aluminum is used for many reasons
* Lightweight
* Easy to cut and drill
* Fast with a bracket type of system

If you're on the ground and can tolerate weight, if you know how to drill Steel, if you have time... 2 inch steel angle iron in 1/8th is a better value.

If you start looking at the prices of that, $25 sticks, you come right back around to 2x4s at 1/10 the cost. They are not professional but they are functional***

PXL_20220213_024451702.MP_compress48.jpg

In the example I started above, the bottom of the two panels have to be tied together with a horizontal runner. That runner can then triangle back to the pole at one point in the middle, or drop down at two points kickstand style.

It is easy to see that running an 8 ft 2x4 is the best value. You can easily fashion brackets that screw in. Forget all the pinching... You don't need pinching.

You screw right into the frames, with either a standard L bracket or with any of dozens of fancy 2x4 brackets. You'll have to string the ground with a wire***. But that only takes a minute

So far we have

* Punch a two foot hole in the ground
* Drop a 2 and 3/8 Pole and set concrete

You know have six feet of pool coming out of the ground.

* Affix to that pole a horizontal 8-ft member. Above I used a smaller diameter, but two and 3/8 might be more appropriate.

Now you're running into trouble. How do you mount to the panels?

... Anybody who can machine steel, has a welder, etc knows what to do.

It doesn't matter what you do, just find a way to attach the top third of the panel to the horizontal Pole. In the picture I used prototyping materials that allow me to slide the panels up and down*

-methods
 
I prototyped mounts out of shingle mount kit parts from signature solar. These obviously aren't what I'm going to use, but they allow me to grab the panels, rotate at the top, adjust mounting point...

Remember that a prototype never looks like the finished goods.

What you want is something that allows you to play with the balance points, assess the rigidity, try different pricing.

So
Today

* Run an 8 ft 2x4 along the bottom of the panels
* Anywhere from the very bottom, to 1/3 of the way up
* Try propping that directly back to the pole
* Try propping that straight down with kickstands
* Try propping that down at an angle

I'm going to fasten to the 2x4 with some kind of standard Hardware, drilling into the side of the panels, careful to land below the active electronics.

* I am working without a mig or tig
* I am working only from Parts I can get at Home Depot
* I assume standard hand tools

* Angle grinder
* Miter saw
* Drill

Just stuff like that.

I'm going to set eight of these poles, carrying 16 panels, very soon. After I get my data back, eight more poles, 16 more panels, 32 in Total.

I did not do the more traditional
* Vertical pole pair
* Horizontal runner

Because it cannot rotate! You will never be able to perform the experiments I'm going to perform if you can't change the angle of your panels

Remember this is R&D, testing, experimentation... But on a budget.

At the end of the day I'm going to show you exactly how much work completely shattered panels can do on a farm.

On a farm you have plenty of space. What you don't have is plenty of money... So Mountain cannot cost more than the panels (duh)

I value these panels at $42 each. If you can find them that cheap, transport them, and get them mounted on the cheap...

You're getting close to an astoundingly good deal. Without considering mounting I'm currently performing at 250%.

Mounting and logistics are the bugger!
I have to drive down the cost of mounting and logistics, while allowing the end user to tune the system.

-methods
 
Now... I got way off Target here, deep down a rabbit hole.

My goal (lol)
Is the collect the field data in mongodb Atlas.

I will of course make the data public, but first I have to prove that what I'm doing is honest work. I am not trying to sell anybody anything.

* This is not newfangled stuff
* I'm happy to run Polly panels
* This is about upcycling and reducing waste
* This is about lowering the barrier to entry
* This is about getting practical power where power is needed

I'm a battery in BMS expert. I'm also an IoT expert. We will get into all of that... But first we got to have something to play with to create our data.

We have to earn our position as a solar tinkerer*

... I take this stuff very seriously

If an honest man can't afford to get into solar then the world is broken. Something like $18,000 is not feasible.

I can ask a man to throw around $2,000

* Buy any used inverter
* Buy a pile of cracked panels
* Collect some basic storage

To pull this off you're going to have to be able to build a battery from scratch. Lead won't do it, you're going to need lithium.

You can get a grid tie inverter cheap, but you'll be right back where you started from... Cobbling together crap

* I went with 5000ES

Of course there's a minimum voltage to get that thing working. It'll work without batteries, but you really want some kind of battery in there... Even if it's just a kilowatt hour.

* I went with an auto Transformer to make 120

You can call one of these together from scrap if you're crafty. Stuff like this lands all the time... You just have to know what you're looking at, and not let the recyclers get to it before you.

* I prefer 1C LiFe

This is a more stable chemistry, get more perfectly matches charge profiles of lead, it is low cost, it is mistake tolerant, it'll deep cycle fine.

Automotive batteries have a higher C rate. This is important technology that I don't want to pay for. Any battery can excel in energy density or power density.

Car batteries are about power density. What we want is energy density. We're not limited by space or weight*. We seek bulk storage.

...

We always run a BMS on a lithium battery, but in an emergency, you the human can be the BMS. My advice is not to build any lithium batteries if you can't afford and understand a BMS.

I have developed multiple BMS systems from scratch*

....

Sigh

Get ready for the big swing. I've got all my generators running now.

* EU2200i
* 22KW standard
* 45KW industrial

I was able to repair my dysfunctional Honda that I got off of Amazon. It didn't even work when I got it. I used a Weller soldering iron to melt the lock off of the enrichment screw.

* Properly set idle rpm
* Properly set idle enrichment

When I got mine the idol was set too high and the fuel was set to lean. It was then clogged up with bad gas...

I can now rebuild the carburetor in that thing in under 10 minutes. From Total non-function to perfect function in 10 minutes.

Prepare

-methods
 

When you take the carburetor out, it is really easy. It literally takes like 1 minute.

There are a lot of teeny tiny holes... You can clean all of them with carburetor spray.

There is one port that you won't be able to clean! The only way to get to it is to remove the enrichment screw!

They glued a cap over the screw to stop you from setting your enrichment. That's great but there's two problems

* The ethanol gas clogs up the carburetors
* A bad batch of generators went out

A whole batch of generators went out in the high altitude setting*

I fixed mine brother, it purrs as perfectly as you could ever imagine and carries full load.

* You don't need to cut anything!
* It's just loctite!

You can use a small butane torch, large soldering iron, etc... And even if you break it it's just a couple bucks.

Good luck, signing off.

-Schindler
 
On my way to collecting data, progress report

* Pulled 250' of conduit for the 18 panel array
* Doubled out-shack battery from 4kwh to 8kwh
* Binned out-shack (pulled three panels to side)
* Sank 2 of 9 poles that will hold 2 panels each

Numbers
460W SMASHED Jinko give up about half of nameplate while mounted in a compromise angle in February on the west coast @ noon facing south.

7 panels (binned) wired series into a 5000ES with reasonable soiling produce 1690W usable work for hours.

NOW
We can see why I need to uplink this data... And that is what I am doing in this thread. Just takes some set-up*

... Two poles sunk 2' into the ground with 150lbs of concrete, 7 to go.

Then
* Hook up the second 5000ES
* Confirm they actually work reliably in parallel
* Hook up 42KWh of batteries
* Replace Out-Shack inverter
* Start cycling the equipment

One step at a time. . .

-methods
 
Back
Top