


Hi all,
I purchased Solar Assistant earlier today to install on an existing Raspberry Pi 4b that is already running home assistant.
I made the purchase and then downloaded the raspberry Pi image, 2022-06-28-solar-assistant.img.
I then removed the existing and working SD card from the Pi and used Balena Etcher to write the image - which completed successfully.
I put the SD card back in the Pi, connect an ethernet cable, and boot it up. I can see the SolarAssistant SSID being broadcast by the Pi and also see it on the wired network.
If i then hit the web ui with a browser to by going to http://ipaddress i get no response. I can ping the Pi.
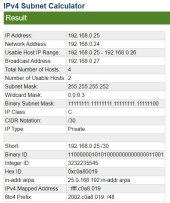
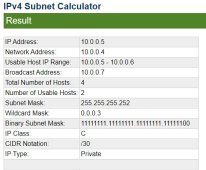
If i join the SolarAssistant WiFi network and try and to hit the web ui at http://10.0.0.5 i get no response. I can again ping the Pi.
When connected both wired or wireless i've used NMAP to do a port scan of the Pi. I can see the Pi listening on ports tcp/53, tcp/2222 and tcp/1883 - DNS, SSH and MQTT respectively. What i dont see is anything listening on port 80 or 443 hence why i cant hit the web gui.
I've played email ping pong all day with support who offer nothing other than try wifi, try wired, try bluetooth, reimage the SD card and now radio silence. They've ignored my input about nmap and not actually seeing a web server listening on port 80/443.
Has anyone any ideas? Im a network guy by trade so whilst reasonably clued up on connectivity i have little idea about a linux box with no console access!
If put the SD card back in the reader and hook up to my desktop, are there any config files i can check or tweak? Anybody else with a Pi4b able to download the image and confirm it is or isnt an issue with the image?
Appreciate any help!
I purchased Solar Assistant earlier today to install on an existing Raspberry Pi 4b that is already running home assistant.
I made the purchase and then downloaded the raspberry Pi image, 2022-06-28-solar-assistant.img.
I then removed the existing and working SD card from the Pi and used Balena Etcher to write the image - which completed successfully.
I put the SD card back in the Pi, connect an ethernet cable, and boot it up. I can see the SolarAssistant SSID being broadcast by the Pi and also see it on the wired network.
If i then hit the web ui with a browser to by going to http://ipaddress i get no response. I can ping the Pi.
If i join the SolarAssistant WiFi network and try and to hit the web ui at http://10.0.0.5 i get no response. I can again ping the Pi.
When connected both wired or wireless i've used NMAP to do a port scan of the Pi. I can see the Pi listening on ports tcp/53, tcp/2222 and tcp/1883 - DNS, SSH and MQTT respectively. What i dont see is anything listening on port 80 or 443 hence why i cant hit the web gui.
I've played email ping pong all day with support who offer nothing other than try wifi, try wired, try bluetooth, reimage the SD card and now radio silence. They've ignored my input about nmap and not actually seeing a web server listening on port 80/443.
Has anyone any ideas? Im a network guy by trade so whilst reasonably clued up on connectivity i have little idea about a linux box with no console access!
If put the SD card back in the reader and hook up to my desktop, are there any config files i can check or tweak? Anybody else with a Pi4b able to download the image and confirm it is or isnt an issue with the image?
Appreciate any help!
")