diy solar

diy solar

My 6X8 off-road trailer build, 24V, 2000VA, 600W Solar

glowworm238

New Member
Joined
Feb 22, 2020
Messages
6
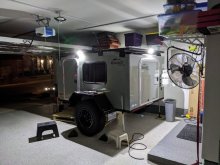
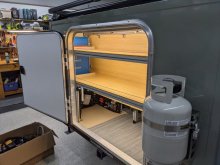
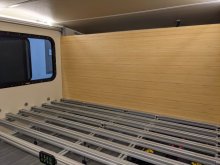
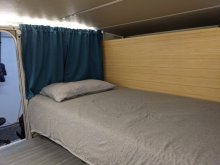
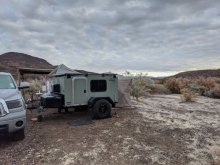
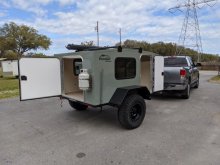
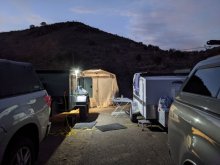
Here are some of the build photo's from my first trailer build. It is a 2020 Runaway 6'X8' Venturist. I bought it last March and due to the current events had plenty of time to build it. Its comes as an empty shell with 1 Shelf and a small window A/C that uses ~ 365W max. I built the interior out of 15 series 80/20 aluminum extrusion and bamboo. I converted the original power system comprising of a 15A shore power plug, a metal wiring box, and 2 power strips to a 24V system that uses 4 UT 1300 batteries, Victron Multiplus Compact 24V/2000/50, SmartSolar MPPT 100/30, 3X HIGHTEC Solar 200W+25% panels wired in series. Its been a fun build and this forum has been a big help in designing my system. It's been fun trying to figure out how to fit everything into such a small area, but everything fit.
IMG_20200302_101636.jpg
Picking up the trailer

IMG_20200619_165825 - Copy.jpg
Removing front shelf and factory wiring.
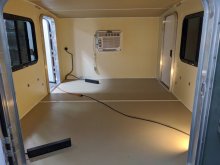
IMG_20200624_114533.jpg
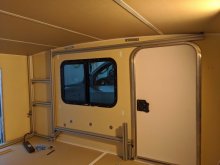
Initial assembly of the interior

PXL_20201004_195834518.jpg
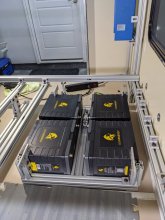
Test fitting battery location. I chose this location due to it being directly over the axle and it would help offset the weight of the propane cylinder and a passenger side awning.
PXL_20201107_211001992.jpg
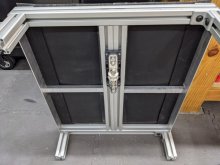
Frame assembled with the T-Fuse and 1/8 rubber for some vibration reduction
PXL_20201108_005844448.jpg
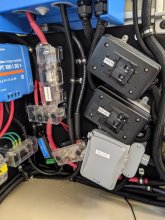
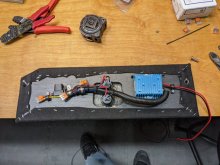
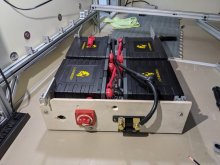
Fitting the Smart Shunt and Main battery disconnect. Batteries are wired in a 2S2P configuration with a T-Fuse before the Main battery disconnect.
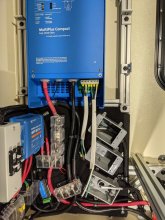
PXL_20201107_212009732.jpgPXL_20201112_025951651.jpg
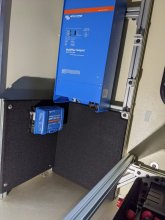
Initial test fitting of the SCC and Inverter
PXL_20201126_010659603.jpg
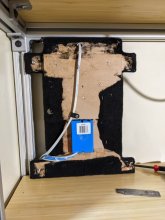
Rear of the front 120V plug and 3 port 24V power plug
PXL_20201126_030010499.jpg
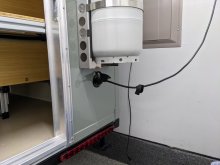
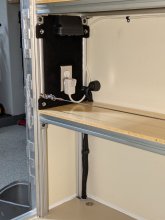
Front 120V plug and 3 port 24V power plug. The factory 15A shore power inlet is run thru the floor under the camper to a 15A circuit breaker in the rear before going to the Inverter. Due to this15A plug, I limited input of the inverter to 14A and turned off the inverters capability to subsidize the shore power.
 
Last edited:
PXL_20201128_014848198.jpgPXL_20201206_231443596.jpg
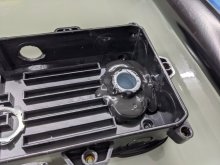
Hole for AM Solar C-Box

PXL_20201209_234935403.jpg
I used a 1" metal conduit to allow for future wiring changes

PXL_20201219_163218334.jpg
I used the Zamp quick disconnect plugs for each exterior light to allow for easy removal in the future. I ran a larger 10Ga wire to the distro block for the ground for the lights, the 3 smaller gauge wire pairs were labeled on both ends and used as positives for the lights. This allowed for less wires overall and allowed me to leave 3 extra for future expansion
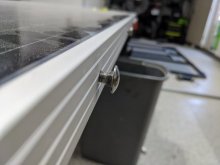
PXL_20201212_224502423.jpg
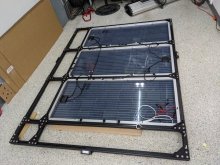
Used Stainless Steel Carriage bolts thru the panel frame to connect to the 80/20

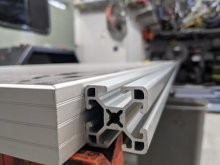
PXL_20201212_224322343.jpg
Test fitting extrusion

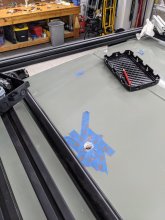
PXL_20201219_180959809.jpg
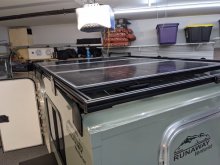
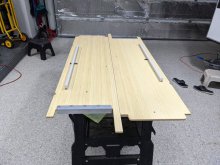
Roof rack and panels were assembled on the floor before mounting to the trailer. Total Weight is around 140- 150Lbs. I know that the Bifacial panels won't get any additional power from the rear in my setup, but I wanted the rear of the panel to be dark (instead of the normal white) when you view it from the ground to prevent people from thinking its something other than just a roof rack.


PXL_20201220_040615021.jpg
Installed

PXL_20201221_005242044.jpg
Testing side lights, they are controlled independently from the Auxbeam switch inside.

PXL_20201220_194535905.jpg
Routing of wire running to the roof, would have rather run it closer to the side but I didn't want it over any of the electronics.
 
Last edited:
PXL_20201221_012002506.jpg
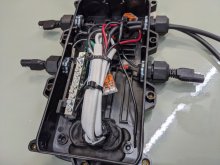
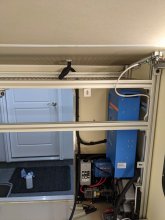
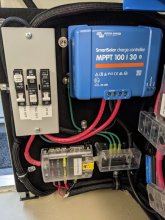
Midnight Solar Baby Box for SCC input and output and main 24V power distribution

PXL_20201221_012021789.jpg
120V In and out circuit breakers for the inverter. The output then goes to the AGFCI before heading to the front and exterior outlets

PXL_20201226_223147493.jpg
Led lights mounted under rear shelves

PXL_20201229_215044325.jpg
Added an exterior 120V plug

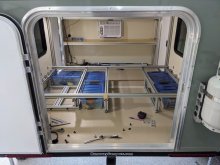
PXL_20201228_192759975.jpg
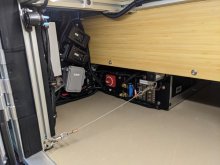
View showing placement of the electronic and the shelves

PXL_20201229_215108562.jpg
Built a removeable cable to prevent anything from touching or destroying the electronics. I also added a 24V power plug for DC power, its at the top left of the photo.

PXL_20201228_185238293.jpg
Mounted an Auxbeam 8 Gang Switch Panel to control all the lights and 24V to 12 V inverter

PXL_20201228_192622190.jpg
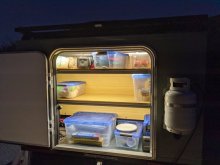
Finished interior with remote dimmable COB LED lighting

PXL_20210104_003608735.jpg
Galley lighting at night

PXL_20201217_021311092.jpg
24V to 12V inverter and wired to small 2 plug panel for 12V only accessories. This is installed it on the front of the battery box under the bed.
 
Last edited:
This is simply one of the cleanest, well thought out builds I've seen in awhile. Very excited to see posts of this in the future in use! You should have made a Youtube channel and posted this build. Inspiration to many and I would love to see some links to some of the products you purchased, especially the extrusion as its so versatile! Well built!
 
This is simply one of the cleanest, well thought out builds I've seen in awhile. Very excited to see posts of this in the future in use! You should have made a Youtube channel and posted this build. Inspiration to many and I would love to see some links to some of the products you purchased, especially the extrusion as its so versatile! Well built!
Thank you for the compliment! I was able to get test it out at Big Bend over New Years. I did find a few Items that I will need to add to make it better, no changes for now to any of my electronics. I just need to make a cabinet for clothes instead of the multiple bins I used and then a pullout kitchen in the rear. I built my power system around the fact that I live in Texas and most of the year I will need to use the AC at night. I need to wait until it warms up to see if it fulfills my needs. If it doesn't I think that I might extend the rack farther forward over the AC and tongue box and tilted down like the front of a tractor trailer and add 1 more 200W panel. I also might just add an additional MPPT, mount a Zamp quick disconnect to an exterior wall and then use some flexible panels on the ground. I already have one of the Sol-Go 115S for my renogy dcc50s in my truck, so I'd need to get another one to work with my 24V system, but it would give me the capability of aiming some of my panels.

I bought most of my electrical items from Bay Marine using the forum discount. They were great to work with and if I could have I would have bought everything from them. When I couldn't get an item from them, I went to PKYS then to Amazon. I'm always leary of Amazon selling knockoff parts when buying higher end products. I bought so many items and ended up not using them due to size restraints that I stopped keeping the parts list updated. I know Will doesn't like links, but I can make a list of what types of parts I used for everything if it helps. I thought about filming it, but I made so many changes along the way it would have been hard to document it. Also in the past I have had to create a couple of videos for work, there is a good reason that people get paid to create them.

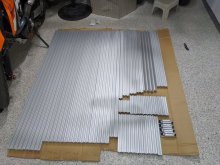
The aluminum extrusion I used for the framing was the 15 series from 8020.net. I originally planned on buying the extrusion and cutting each piece and corner bracket myself. I am so glad that I just bought the parts and pre cut lengths from them. There were a couple of pieces that I bought that the length was dependent on the curve of the roof, I bought those pieces 2-3 inches long and just cut to length. Another thing that wasted time was that a couple of the manufacturers offer free design apps to build your project, I wasted 2-3 weeks trying to learn their app and finally gave up and drew it out on graphing paper. I had 2 different drawings, one from a side view and one looking down thru the roof. This made it easier for me to figure out all the lengths and the pieces orientation to each other. I then grouped and labeled pieces that were the same in the design with a letter. I used the different lengths and number of pieces to order from their website. When all the cut pieces arrived, I took a red grease marker and labeled each piece with the matching letter in the design, this made it so much easier later. 8020 sells 3 different weights/strengths of the 15 series extrusion, I used the heavier profiles on the wall beams that support the bed rails, but after actually using it, you really only need to use the lightest profile unless you are supporting a lot more load.

Sorry for the long post, hopefully this helps and if you have any questions let me know. If you want to see all of photos of the build, I have a shared google photo's album here


3.jpg


2.jpg1.jpg
 
Awesome. Nice project. I will need to read through again.

I see you used the industrial RV 30 or 50 Amp plug with the rubber plug. Would you recommend this over the hinged door style?
Thanks, The plug is a 15A that came on the trailer when I bought it, I like that it doesn't take much room inside or out. I used the same brand for the the exterior plug off the inverter so it would match. Here is what came installed for the input side Here. And this is the one I added for the output here. I am not sure if they make a similar plug for 30 or 50A.
 
Back
Top