


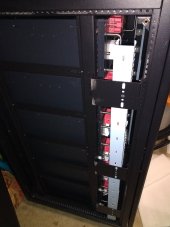
I just got my shipment from Signature Solar a few days ago and had the same issue. I have a possible explanation and two solutions to fix the issue. I think the specific rack you got was configured to fit the newer "V2 batteries", the ones with the front panel display and the fire suppressant feature. I think the distance from the back of the battery to the mounting tabs in front is slightly shorter. I think this was done to fix a potential issue with the foldable pull-out handles coming into contact with the buss bars on either side if folded out (could cause a very bad electrical safety hazard). Unfortunately the original Lifepower batteries are too long, will contact the back ventilation panel of the enclosure and not be close enough to align with the mounting tabs on the front of the battery to the rack mounting holes. When I ordered my kit it had the V2 batteries with the Schneider equipment but I substituted the original Lifepower batteries (6). So I guess the configuration may have been carried over in the ordering process.I was able to get all my battery mounting holes lined up (after a little lift here and there) but the battery side brackets don't get all the way to the vertical mounts before hitting the back panel. I still have a 1/2" space and the only way to get them fully seated is to remove the back panel. My rack also came assembled so I'm guessing there's a problem where that happens. I tried contacting SS but getting through is an issue with how busy they are right now. I "spoke" with someone else in the forum and his measurement from the back panel to the front vertical mounts measured 19". For some reason mine are only 18". Has anyone else had problems getting their batteries in completely without removing the back pan?
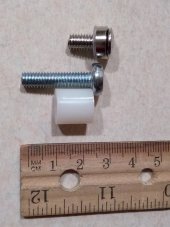
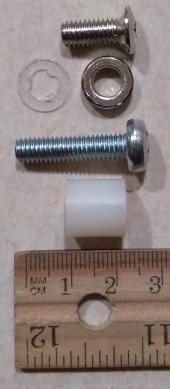
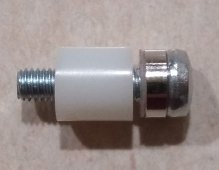
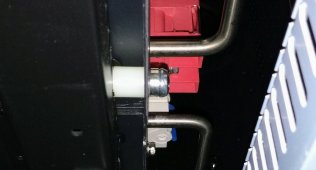
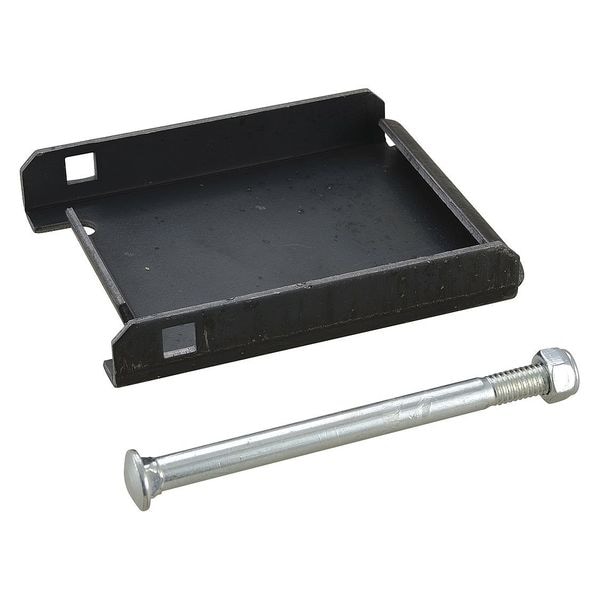
Potential Fix #1: Get longer mounting screws (6mm x 25mm, 1.00 pitch Philips) along with Nylon spacers (0.257" ID, 1/2" length) and swap out the spacer and clear film washer on the original mounting screws. NOTE: the nylon spacer goes BETWEEN the mounting holes and the battery mounting tabs when you put the screws through as shown in photo. I spent roughly $16 on the hardware for 2 screw sets / battery. This also allowed me to fix some of the spacing issues but would only allow for typically two of the four mounting screws to line up due to the issues mentioned above. When screwed in the batteries aren't going anywhere. I think the elongated tab holes sometime mentioned on the LL battery version might be a better solution for the alignment issue long term.
Potential Fix #2: After thinking about this and sleeping on it, I realized a potentially cleaner fix. Before you move any of the batteries into the rack (which I already did and didn't want to move all 6 batteries myself in/out again, hence my fix #1), simply unscrew each side mounted assembly (two vertical bars on each side, with rails attached) with the screws top and bottom on front and back vertical rails... and move the entire assembly forward roughly 1/2"+. Then remount the top and bottom screws on front and back. There are 3 mounting screws that you will also have to remove from outside of each side, so you will need to remove each side cover to access these (4 screws each from the outside). Once you move the rail assembly forward and remount it you will have to drill 3 new mounting holes on each side, thread tap to have everything remounted and the vertical racking tied into the three front forward mounts on each side. A bit more work but a cleaner solution. That still doesn't fix the alignment hole issues but at least you can mount your batteries with potentially two screws / battery and fix the front / back spacing issues.
I know the folks at Signature Solar do there best for their customers considering their order load and growth. Now I just have to inspect my solar panels which arrived with a destroyed pallet under them...
Hope this helps,
-Joe


![IMG_E4917[1].JPG](/data/attachments/135/135755-ee279d356ea5eafeece722909b9b5cb5.jpg)