diy solar

diy solar

Panel placement on roof of Class A & VHB Tape Mounting

you find the cross beams with a stud finder just like in a house?
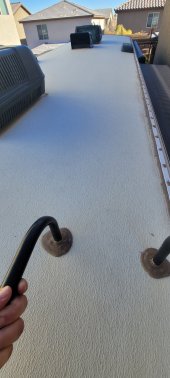
Depends. They ‘scan’ for density and an RV roof doesn’t lend itself as well to differentiating density. Too thin or too thick.

Sometimes you can also ‘feel’ spacing by walking on the roof, sometimes gauging from the ceiling seams and fasteners can help you figure it out. Often you can pull vent trim or AC escutcheons, light fixtures or speakers inside the camper and see into the space.
 
Looks like fiberglass to me? Or plastic? It certainly doesn't feel like rubber-based
 

Attachments

  • 20220120_114717.jpg
    20220120_114717.jpg
    122 KB · Views: 16
  • 20220120_114725.jpg
    20220120_114725.jpg
    109.2 KB · Views: 17
Find the original brochure from the manufacturer of your RV for your year of RV. It will tell you there.
 
Looks like fiberglass to me? Or plastic? It certainly doesn't feel like rubber-based
what Manufacturer of RV do you have there ?

It looks like fiberglass (Winnebago?) - but heavy textured, note sure if I would trust VHB with such a rough surface structure.
 
If you do decide on VHB look for the 3M VHB Primer. After you clean the surface, apply the primer, then the VHB tape, then pressure, then if needed, add a screw through the roof, then Dicor (or your favorite). At least that was my process.
 
If it's a Winnie, go watch some of AZExperts Winnie roof videos before you make any changes.
 
To find the ribs you could use a thermal imager like a FLIR on your smartphone see "see" through the roof . On a hot day lightly spray down the roof and the ribs should stay hot while the skin is cooler showing where the ribs are located. Smartphone FLIR attachments are super handy and not too costly.
 
what Manufacturer of RV do you have there ?

It looks like fiberglass (Winnebago?) - but heavy textured, note sure if I would trust VHB with such a rough surface structure.
It is a forest river FR3 32DS. Checking on that manufacturer brochure

To find the ribs you could use a thermal imager like a FLIR on your smartphone see "see" through the roof . On a hot day lightly spray down the roof and the ribs should stay hot while the skin is cooler showing where the ribs are located. Smartphone FLIR attachments are super handy and not too costly.
That's a good idea, although I don't have a FLIR. I have a couple stud finders that I'll give a try
 
The Forest River website says it's a fiberglass roof.

Call them and ask for a roof layout and tell them what you plan on adding. Might take a few tries, but they should be able to send you a layout for the roof supports so you can measure to fit.
 
That is pebble-textured fiberglass. The texture does not lend well to VHB tape adhesion.

The flir scan is a great idea. As is a support beam diagram from the manufacturer. If they frame out skylights and vents and you know they go all the way across, you at least have those to attach to.
 
The flir scan is a great idea.
090721BE-486C-44D4-AD5D-C8B78E5E55FD.jpeg
White is cold, black: warm. 68 inside, 14F out. Night vision scope. LED light is the black blob, ceiling joists quite clear.
This inside, from below, my ceiling has tan carpet on it and they still show through.
(did I already post that?!)
 
Last edited:
The Forest River website says it's a fiberglass roof.

Call them and ask for a roof layout and tell them what you plan on adding. Might take a few tries, but they should be able to send you a layout for the roof supports so you can measure to fit.
That is pebble-textured fiberglass. The texture does not lend well to VHB tape adhesion.

The flir scan is a great idea. As is a support beam diagram from the manufacturer. If they frame out skylights and vents and you know they go all the way across, you at least have those to attach to.
The diagram that the manufacturer supplied didn't seem to scale according to my measurements so I don't have much confidence in sending screws into my roof based off it. I did try out my "Walabot DIY" scanner, a sort of "smart" stud finder that plugs into your phone. Using the roof diagram as a guide, I think I was able to locate the metal studs. It will be interesting to see how accurate it is once I start drilling.

Any recommendations on screws? I'm thinking metal self-tappers, starting with 1.5" to see if that reaches the studs.
 
starting with 1.5" to see if that reaches the studs.
I’d start shorter if you want to test with screws.

I would recommend that you drill yourself first to ‘feel’ what’s actually under there. Plus there’s potentially wires and stuff.
 
a 3 mm hole will be very easy to seal and forget :)

and the contrast of material pushback during drilling ought to be more apparent!

great points

(3.175mm <- 1/8 in * 25.4 mm/in)
 
Back
Top