diy solar

diy solar

Quick 4 panel mount

DThames

Solar Wizard
Joined
Nov 22, 2019
Messages
2,669
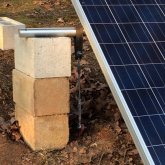
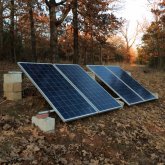
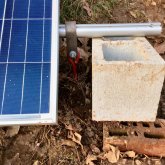
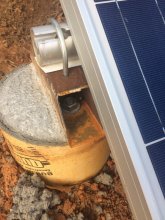
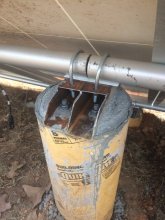
I needed to get some panels up in a hurry for some charge testing that I have planned. I had some aluminum frame sections that someone had given me. They have a slot that a 5/16" carriage bolt will slide right in. So I laid them out on some concrete blocks and anchored them with some screw in anchors.

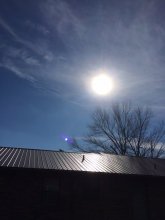
The north anchors are adjustable so I can keep them cranked down pretty tight. The south attachment is tight because of the block height and what happens when I tighten down the eyelet bolt. The angle is set a little toward winter, 35 rather than 30 degrees from horizontal. They are on the bank right behind the house, but up enough to be in the winter sun.
 

Attachments

  • NorthAnchor.JPG
    NorthAnchor.JPG
    130.3 KB · Views: 44
  • Overall.JPG
    Overall.JPG
    173.5 KB · Views: 43
  • SouthAnchor.jpg
    SouthAnchor.jpg
    151.9 KB · Views: 43
Update: I am making this more permanent, part of my emergency standby power system. So I poured some concrete pillars in order to be able to close up the gaps between the panels. Saturday is was fairly cool, but sunny. I dressed accordingly. While digging the pillar holes, I quickly got warm, like someone had a heater on my back. After a bit I removed my over-shirt, turning around, I could see why I as warm. I was getting 130%-150% (wild guess) of the direct sunshine, as the sun reflected off my metal roof. I wonder what positive impact this has on the solar output under these same conditions. The photo below was taken from the panel's point of view. I have room on the far end for 3 more panels. I added 4 more pillar mount points and another 17 feet of AL railing.
 

Attachments

  • 7PanelsOnBank.JPG
    7PanelsOnBank.JPG
    257.7 KB · Views: 13
  • SunReflectingOffRoof.JPG
    SunReflectingOffRoof.JPG
    85.8 KB · Views: 13
I dug a hole below the frost line that was large enough to insert one of these 8" forms in. Put concrete mix in and as I filled it up, filled around the outside with dirt, tamping both inside and outside. I cut the form to be below the surface just a few inches. Normally they were too low on top., but as I filled and tamped them, I wiggled them and pulled them up toward my rail. On top of the form, I have a 2" square tube that is drilled for concrete L bolts. When the form was about 10inches from full, I would make sure it was up high enough to allow the 2" tube to sit on top of the form and be against the bottom of the rail. The L bolts were put in with the last of the concrete. All of this time the weight of the rails and panels was supported by other means. The holes for the U-bolt that holds the rail to the 2" tube was drilled after the concrete cured. The alignment was not perfect, so drilling for the U-bolt after everything else was in place allowed for out of position issues to be solved by moving the drilling a little bit.
 

Attachments

  • ConcretePier1.JPG
    ConcretePier1.JPG
    155.9 KB · Views: 12
  • ConcretePier2.JPG
    ConcretePier2.JPG
    126.4 KB · Views: 12
Back
Top