diy solar

diy solar

Setting Up a Lithium Battery (Lithium Werks Valence) for DC & AC Power

reg

Winter: New York City Summer: Atlantic Canada
Joined
Mar 24, 2021
Messages
336
I plan to set up my summer home for solar power, but my first project is to get a lithium battery to supply me with 12V DC and AC electricity. I thought that I'd start this thread as a way to document that. Perhaps over time others will find the thread useful. Some people may be interested in the thread just to see the test results for the Lithium Werks Valence battery that I expect to receive this week.

Historically, I've used AGM (Absorbent Glass Mat) batteries to start cars, motorbikes and boats, and to run related, low draw accessories such as lights, and of course I use small lithium-ion batteries to run portable devices such as my mobile phone, tablet computer and digital cameras. This is my first foray into setting up a battery that will deliver electricity to a wide variety of devices, regardless of whether they require DC or AC to run.

I'll be using the following components (photos below), and I'll post about putting them together over the next week or so.

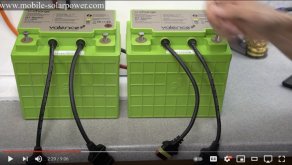
12V Battery (Lithium Iron Magnesium Phosphate)
Maker: Lithium Werks
Model: Valence U-Charge, RT Series, U1-12RT (In December 2020, Lithion Battery purchased Lithium Werks's Valence battery business.)
Specifications: 12.8V 40Ah (512Wh)
Weight: 6.5kg (14.4lbs)
Price: US$180 + $13 shipping from jobber Battery Hookup in Pennsylvania

I was on the verge of purchasing a Battle Born 50Ah battery or RELiON 35Ah battery when a participant in this forum told me that Battery Hookup has some of Lithium Werks's Valence 40Ah batteries for sale at attractive prices. There's discussion about the various brands and models of battery that I considered in the thread Need Recommendations for an Off-the-Shelf 25Ah to 50Ah LiFePO4 Battery. The details of the Battery Hookup offer are in this post near the end of the thread.

I decided to purchase one of Battery Hookup's Lithium Werks batteries. Battery Hookup is less than 160km (100mi) from me, so I expect to receive the battery this week. It is supposed to be at 100% capacity and probably unused, but I'll have to confirm capacity by testing. If the description proves correct, a member of this forum will have saved me a substantial amount of money.

Will Prowse has made at least three videos that talk about Lithium Werks's Valence batteries, including a teardown video of the U-Charge RT model that I've purchased. The 2019 Lithium Werks video below describes the U-Charge series. Note that the RT battery is unique in the series in that it has an integrated Battery Management System.


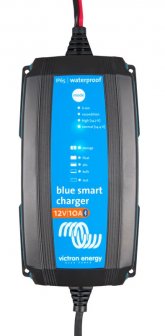
Charger for 12V Battery
Maker: Victron Energy
Model: Blue Smart IP65 10A
Bluetooth App: Victron Connect (iOS and Android)
Weight: 0.9kg (2lbs)
Price: US$128, shipping included, from Bluewater Boat Supply in North Carolina (also available from Amazon U.S.)

I purchased this charger after concluding that my Yuasa 1A motorbike charger (I prefer to slow-charge my bike battery) isn't going to cut it when it comes to charging the Valence battery.

This 2016 Victron video explains the Blue Smart IP65 charger and the Victron Connect app:


This 2019 video discusses updates to the app:


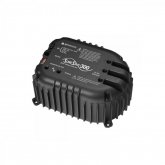
Inverter for 12V Battery
Maker: Morningstar Corporation
Model: SureSine
Waveform: Pure Sine Wave
Continuous Power: 300W
Peak Power: 600W
Weight: 4.5kg (10lbs)
Price: US$280, shipping included, from Stellavolta in Texas (also available from Amazon U.S.)

This inverter is unusually heavy for its dimensions and output because it dissipates heat via a heat sink rather than by a fan. Hence the fins on the case (see photo below). I wanted fanless because I intend to use the inverter while recording sound. Microphones and fan noise don't mix.

Also, this inverter does not have an integrated AC outlet. I'll have to add one.

This March 1, 2021 "unboxing" video appears to be the only video in English that provides an overview of the SureSine inverter. On March 23, the same fellow uploaded a video that shows and discusses the SureSine's internal electrical components.


Photos:

Lithium Werks Valence U1-12RT Battery
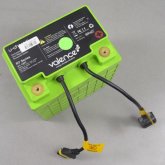
DSC_0453_a51c729b-6af8-4b28-9427-9cf9ec2117af_900x.jpg

Victron Energy IP65 Charger

Victron Charger.jpg


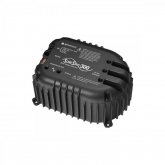
Morningstar SureSine 300W Inverter

Morningstar SureSine top.jpeg
 
Last edited:
As much as I'm tempted to go ahead and purchase wiring to connect the battery to the inverter, I've decided to wait until I have the battery in my hands and have inspected and charged it. I'll be choosing wiring components based on specifications in the following documents:

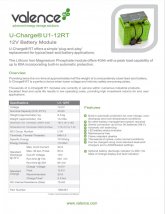
1. Battery: Lithium Werks's data sheet (page 1), dated August 2015, for its Valence U-Charge U1-12RT battery (first screen capture below)
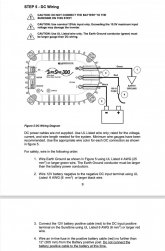
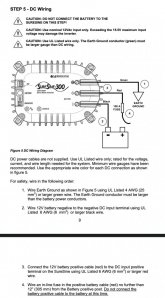
2. Inverter: Morningstar's DC wiring instructions for its SureSine 300W inverter (second screen capture)
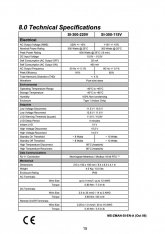
3. Inverter: Morningstar's Technical Specifications for its SureSine 300W inverter (third screen capture)

The distance from the battery to the inverter will be short (no more than than 1.5m/5', probably less), so distance doesn't affect choice of wire thickness. I plan to use either 6 gauge (~4mm or 0.16" thick) or 4 gauge (~5mm or 1/5") for the positive and negative wiring. Morningstar says to use thicker wire for earth ground. As a practical matter of wire availability, if I go with 4 gauge for positive and negative that probably means 2 gauge (~6.5mm or 1/4" thick), not 3 gauge, for earth ground.

I also want to use this battery to directly power a 12V DC device for which I may want somewhat longer positive and negative leads. This might affect my decision on wiring.


August 2015 Data Sheet.jpg


SureSine DC Wiring.jpg

SureSine Technical Specifications.jpg
 
Last edited:
Those are great batts. I was lucky enough to buy some before Will posted his first vid on those and drove the price way up. :oops:

Good to hear. I purchased the Lithium Werks battery on Saturday and should receive it this week. The vendor, Battery Hookup, says that it's at 100% capacity and was probably overstock. The price (US$180 + $13 shipping) was substantially less than the Battle Born 50Ah and RELiON 35Ah options that I was considering, which are $575 and $490 respectively. Full vendor description below; on capacity, see the first sentence of the last paragraph (sorry that the screen captured text isn't sharper).

Screenshot 2021-03-29 at 4.38.50 PM.jpg
 
Last edited:
More on wiring and related hardware...

The screen capture below from a Will Prowse video (July 16/19) shows that the Lithium Werks battery's two terminal posts are hex head screws. The battery specs say that the screws are M6 (6mm, or slightly under 1/4", in diameter).

I'm going to try to find M6 ring terminals for the 6 and 4 gauge battery cable that I'm considering. If necessary, I'll outfit the battery end of the cables with 1/4" ring terminals. That size of ring terminal isn't common, but it's available. For tightening, an M6 hex head screw takes a 10mm wrench or socket, both of which I have because I ride a motorbike that isn't a Harley :)

The Morningstar SureSine Installation and Operation Manual doesn't say how the inverter end of the connection works mechanically. From what I've seen in photos, it's clearly going to require something other than an M6 or 1/4" ring terminal. I'll know exactly what when I receive the inverter.

Re charging the battery... My Victron charger came with both alligator clips and ring terminals. The ring terminals are a common 5/16" in diameter, whereas my battery's M6 terminal posts, as noted above, are slightly under 4/16". We'll see how that works out. There's always the alligator clips :)


July 16 2019.jpg
 
Last edited:
1/4 ring terminals work fine on the M6

I agree. M6 and 1/4" are close enough that I expect that it would work fine. I still want to see if I can find suitable copper or tinned copper M6 ring terminals for 6AWG and 4AWG cable, out of curiosity as much as anything.
 
Last edited:
1/4 is what I use. For a 300w inverter, your cables shouldn't need to be more than a foot long. Then 8 or even 10awg will be fine. I have run 750w through 10awg off of my Valance batts for 20-30 minutes (video inverter test only, not the primary purpose of the batts) and 10awg gets only slightly warm at a foot long

 
1/4 is what I use. For a 300w inverter, your cables shouldn't need to be more than a foot long. Then 8 or even 10awg will be fine. I have run 750w through 10awg off of my Valance batts for 20-30 minutes (video inverter test only, not the primary purpose of the batts) and 10awg gets only slightly warm at a foot long


Hi Mike,

As it happens, I saw your video, and how you're using your battery and inverter on your kayak, a couple of weeks ago while looking into inverters.

I plan to use my battery and inverter in ways that require flexibility in terms of the distance between the two. That said, as explained in post #2 above, distance is not a significant factor in my decision to use either 6 gauge or 4 gauge wire. Also, at short distances (in post #2 I say probably no more than 1.5m/5') I don't think that the cost difference between 6 or 4 gauge and, say, 8 gauge, is meaningful. At least it isn't for me, but of course others may have a different view.
 
Last edited:
Hi Mike,

As it happens, I saw your video, and how you're using your battery and inverter on your kayak, a couple of weeks ago while looking into inverters.

I plan to use my battery and inverter in ways that require flexibility in terms of the distance between the two. That said, as explained in post #2 above, distance is not a significant factor in my decision to use either 6 gauge or 4 gauge wire. Also, at short distances (in post #2 I say probably no more than 1.5m/5') I don't think that the cost difference between 6 or 4 gauge and, say, 8 gauge, is meaningful. At least it isn't for me, but of course others may have a different view.
I am not using my inverter on my kayak :oops: ?. Just testing the capacity of the inverter with my kayak batteries, while waiting for solar gen batteries to arrive.

A tiny 300w inverter is not going to tax those cable sizes. But out of curiosity, what are you doing that you would need to vary the inverter to battery length, and not the length of the 120v plug wires as would normally be done?
 
A tiny 300w inverter is not going to tax those [6AWG or 4AWG] cable sizes.

Good. Morningstar, which designed and manufactures the inverter, agrees with you, seeing as how its DC wiring instructions call for 6 gauge or larger. There's a screen capture of the instructions in post #2 above.

There are a good number of discussions about this inverter on the internet (it's been on the market for well over a decade), and I've read a lot of them. I don't recall anyone questioning Morningstar's specifications for battery cable. There are a number of discussions about its specifications for fuses. I've decided to follow Morningstar's recommendations on both thickness of wires and fuses.
 
Last edited:
This Victron manual is excellent: Wiring Unlimited

There's a thread about the manual on the forum: Wiring Unlimited (free E-Book from Victron on wiring batteries, solar, chargers, inverters, etc)

The thread also has a link to a Victron video on how an inverter/charger works. The presenter is engaging, and his explanation is clear:

00:00 How an inverter converts DC to AC
06:19 How an inverter charges your battery (my inverter is not an inverter/charger)
13:15 An inverter's own consumption of power from a battery, matching an inverter to load and saving power

On that last subject, Morningstar's SureSine inverter apparently gets high marks for efficiency.


Last edited:
I have a torque wrench that I use for some purposes on my motorbike, but I've never used a torque wrench on a battery terminal and I hadn't planned to use one on this battery. I figured that I'd just hand-tighten the M6 screws with a 10mm wrench, or maybe with a ratchet and a 10mm socket. However, if the nine page thread that I've just read is anything to go by, a fair number of people here do use a torque wrench on a battery's terminal screws.

Lithium Werks has published torque values for its U1-12RT batteries. If the 2008 User Manual that I have is current on this question, this is what the company advises under the heading Tips for Optimizing Performance (the screen capture below shows all of the tips): "Use recommended torque ratings for the bolts. Torque provided hardware to 110 in-lbs maximum (12.4Nm). Retorque on occasion to 85 in-lbs (9.6Nm)."

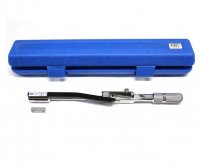
My torque wrench is made by an Australian company called Warren & Brown. In Australia, the company and its torque wrenches are kind of iconic. My torque wrench is beautifully made and is known for its accuracy (video and photo below). It covers 5-120Nm, so it can easily be used with my battery terminals. However, I plan to use the battery in a highly mobile way, and in many cases bringing along the torque wrench would be a pain in the butt. It's 37cm (almost 15") long, and should be transported in its case. I'd also have to bring along a 3/8" drive 10mm socket. Compare that to this Hazet 10mm Open End Wrench, which is 133mm (4.5") long. Or even to my Blue-Point 1/4" Drive Ratchet, coupled with a Wiha 1/4" Drive 10mm Socket, which would be 143mm (5 5/8") long,

I just think that hand-tightening a battery terminal is a straightforward, easy task. That said, I have decided to use an insulated wrench or socket when messing around with this battery, which is why the Hazet wrench and Wiha socket in the links above both look a little odd. They are insulated to 1000V. Seems more important to me than carting around a torque wrench :)

If there are any hand-tool geeks here, this 2020 Warren & Brown video shows how its Deflecting Beam Torque Wrench is made:


Lithium Werks, Tips for Optimizing Performance of its Valence U-Charge U1-12RT Battery:

2008 U1-RT User Manual.jpg

Warren & Brown Deflecting Beam Torque Wrench, Model 321500:
WB.jpg
 
Last edited:
Further to the above post, I've ordered this Knipex 10mm Box Wrench for the battery's M6 terminal screws. Also, doesn't hurt to have another 10mm for my motorbike. I like the length/leverage for this use (165mm/6.5"), and the insulation provides protection to 1000V. It was pricey, but Knipex makes good tools, Amazon U.S. is itself the vendor (means much better protection) and Knipex was the only brand with reasonably fast delivery. Besides, other brands of insulated box wrench aren't cheap either. The Knipex photo below shows the 13mm.


knipex 98 01 10.jpg
 
Last edited:
The Morningstar SureSine inverter arrived today. Appears to be very well-built. Quite compact, but it's 4.5kg (10lbs) as the cost of being fanless. On quick inspection, installation requires one slotted (flathead) screwdriver for the DC and Earth Ground terminals and a smaller slotted screwdriver for the AC terminals. A Phillips screwdriver is required to remove the inverter's top, which I think will make it easier to understand the DC and AC connections. Four Phillips head screws are included if one wants to mount the inverter on wood or similar (see mounting "feet" in the photo below). I'll post more info in the next few days.


Maker: Morningstar Corporation
Model: SureSine
Waveform: Pure Sine Wave
Continuous Power: 300W
Peak Power: 600W
Dimensions: 213mm x 152mm x 105mm (8.4" x 6" x 4.1")
Weight: 4.5kg (10lbs)
Manufacture: Taiwan
Price: US$280, shipping included, from Stellavolta in Texas (also available on Amazon U.S., where Stellavolta is one of the vendors)

Reminds me of a turtle:

SureSine-SI-300-115V-UL-Angled-F.jpg
 
Last edited:
I've decided that the DC wiring from the battery to the inverter will be 6 AWG (American Wire Gauge). As shown in the screen capture below, that meets Morningstar's "minimum" recommendation for the SureSine inverter, which should be sufficient for my use case.* I'm located right on the Atlantic Ocean (salt, humidity) and will use tinned copper. For the length involved, the additional cost over pure copper is insignificant. As recommended by Morningstar, I'll also use wire that is UL Listed.

The crimper that I use with my motorbike can't handle wire that thick (6 gauge wire, independently of the insulation, is ~0.2"/4mm in diameter), and I don't want to purchase a crimper that can. Consequently, I've decided to pay someone to make the cables.

I'll order the cable when I receive the battery, hopefully in the next few days. I may be able to identify someone local. If not, these online vendors are in my half of the continent, they make cables to order and there are favourable comments about them in earlier threads:

Greg's Marine Wire Supply (Pennsylvania)
Battery Cables USA (Kentucky)
Genuine Dealz, also online as Best Boat Wire (Georgia)

If there's little difference in cost, and no significant loss of flexibility in the cable, I might bump up my order to 4 gauge at the last minute, on the "it couldn't hurt" principle. That could also prove to be convenient. Ancor Marine Products, whose wire is highly regarded, sells pre-made cable assemblies in 4 gauge, but not 6 gauge. These are available from West Marine, which has a store 16km (10mi) from me.

I've been able to confirm that M6 ring terminals are readily available from Mouser Electronics and others. However, the vendors above don't offer M6 as an online ordering option, only 1/4". Close enough, but if it turns out that I can easily order cable with M6 ring terminals, I will.

* If using 6 gauge, Morningstar calls for 4 gauge for Earth Ground (see below). However, I'll be using the battery and inverter like a Jackery Power Station. As discussed in the following thread, that raises a question about grounding that I plan to discuss with Morningstar: "Grounding Basics" Not Basic Enough for Me.


Morningstar SureSine DC Wiring.jpeg
 
Last edited:
Here are some comments on screwdrivers needed to wire Morningstar's SureSine inverter. Note the circled screws in this photo.

EM - 1 (1).jpeg

Red Circle
The lid, which is plastic, has to come off to wire the inverter. You need a Phillips #1 or #2 to unscrew the four screws that fasten the lid to the body of the inverter.

Yellow Circle
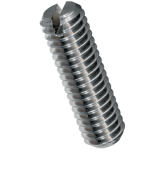
The DC positive and negative terminals, and earth ground, are screw terminal blocks. The screws in the blocks are slotted set screws, also known as slotted grub screws (see photo below). I used a slotted/flathead screwdriver with a 5.5mm blade. A 1/4" blade would work fine. As a practical matter, it's necessary to remove the lid to connect the battery cables to these terminals.

Green Circle
The AC Line and Neutral terminals are also screw terminal blocks with slotted screws. I used a slotted screwdriver with a 3.5mm blade. A 1/8" or 5/32" screwdriver would work just as well. Again, the lid has to come off to get clear access to these terminals.

I'll post a photo tomorrow of the inverter with the lid off, showing the terminals.

This is a photo of a slotted set screw. The ones that the inverter uses (Yellow Circle screws) are about 6mm (1/4") in diameter and about 11mm (just under 1/2") long.

00664-ph-05-ne-medium.png
 
Last edited:
I'm finally turning my attention to the AC outlet that I'll need for the inverter. Luckily, I already have a wire cutter and insulation stripper that can handle the AC wiring, which is 12 gauge.

These are Morningstar's specifications:

1. Built-in Protection: Ground-fault Circuit Interrupter (GFCI), known in the U.K. as a Residual-current Device (RCD)
2. Wire: 12 American Wire Gauge. Diameter of a 12AWG conductor, excluding the insulation, is 0.08" or 2.1mm.
3. In-line Fuse: one 3 amp for the AC Line wire

Witten in 2006, the inverter manual recommends four specific AC receptacles by Leviton and two by Cooper-Eagle. As a result of acquisitions since the manual was written, Eaton has succeeded Cooper-Eagle as a brand name.

This March 19, 2021 video compares Leviton and Eaton outlets:

Which Outlet Should You Buy? Leviton vs Eaton.

 
Last edited:
I now have the battery charger and inverter, and FedEx says that the battery will arrive on Monday. I still have to choose an AC outlet, and I'm interested in the idea of some kind of quick connect for the inverter.

My motorbike toolkit has me covered for the tools that I need to put this together. The only new tool that I’ve purchased in the list below is an insulated 10mm box wrench for the battery terminals.

In most cases, I’ve included a link to the tool, which may be of interest to some.

As Needed
Safety Glasses

Electrical Testing
Multimeter Hioki DT4252
AC/DC Clamp Meter Hioki CM4371

Battery Terminals (M6 Hex Bolts/Screws)
Wrench Knipex 10mm Insulated Box Wrench (98 01 10)
Torque Wrench (I'm ambivalent about using a torque wrench for this) Warren & Brown, 5-120Nm (321500)

Inverter
Phillips #2 Screwdriver (to remove the inverter's cover)
Slotted Screwdriver with ~5.5mm blade (DC & Earth Ground Set Screw Terminals)
Slotted Screwdriver with ~3.5mm blade (AC Screw Terminals)

AC Wiring (the DC wiring will be made to order, see post #16)
Wire Cutter Knipex Diagonal Cutter for Electro-Mechanics (76 01 125)
Insulation Stripper Knipex Insulation Stripper with Opening Spring (11 02 160)
Pliers Knipex Electronics Pliers (32 52 145)

The foregoing does not include tools, such as a drill, for mounting the battery, inverter and AC outlet.
 
Last edited:
Happy I came across the YouTube channel called Everyday Home Repairs, which is in the process of publishing a good series on choosing and wiring AC outlets. The series started with a December 13, 2020 video comparing commercial and residential outlets. Post #18 above links the channel's March 19, 2021 video on Leviton vs Eaton outlets. On March 31, it published a video comparing Eaton and Legrand/Pass & Seymour outlets, and a comparison between Legrand and Hubbell outlets is coming. These videos are helpful on overall features and build quality, even though the presenter compares the makers' standard commercial outlets, not their Ground-fault Circuit Interrupter (GFCI) outlets.

The channel's March 24 video (below) compares and shows three ways of wiring AC outlets: Speed Wiring, Back Wiring and Side/J Wiring. The Back Wiring method that the presenter advocates uses a feature of AC outlets in which a slotted screw clamps down a plate over the wire. As it happens, this appears to be how the SureSine inverter's AC screw terminals work (the inverter's DC terminals use a slotted set screw/grub screw, which works differently).

Parenthetically, at 05:45 the presenter uses a screwdriver that combines a Slotted and a Phillips. Judging from comments on the video, this type of screwdriver is new to a lot of viewers. I'm familiar with these drivers because the battery door screws on my Hioki multimeter and AC/DC clamp meter (post #19 just above) will take a Slotted screwdriver, a Phillips #2 or a combination screwdriver. The presenter in the video uses a Milwaukee ECX combination driver. The one that I use for the Hioki screws is a Wiha SL/PH2x100, photo below.

Why You Should Not Use Speed Wiring | Back Wiring is Preferred


Wiha PlusMinus/Phillips SL/PH2x100:

Anw_KombiProfilXeno_1_600x600@2x.jpg
 
Last edited:
Back
Top