diy solar

diy solar

Solar house generator I started DIY back in 2000 - My path from Trace to Xantrex (on FLA battery) to XW Pro inverters on Tesla Model S batteries

dougbert

Solar Addict
Joined
Sep 20, 2019
Messages
1,031
Location
Wasatch Back, Utah

2024-04-15 Version Update

When I started this thread back in 2019, I did not realize it would turn into a build thread of my system. It documents What and Why I did things as well has How they were accomplished. It also shows designs that didn't work out, and also designs that did work out great.
I hope it is useful for others as it has been for me - I use it as a Reference document
thanks Will for the "library" for my self and the GREAT stuff others have posted
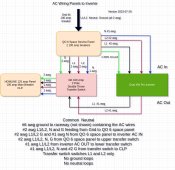
Schematic: See below
===========================================================================
Table of Contents - fast links
Decision point to switch to Tesla Model S modules: https://diysolarforum.com/threads/s...-to-xantrex-to-xw-pro-inverters.11/post-11810
Diversion of PV power when battery is full: https://diysolarforum.com/threads/s...-to-xantrex-to-xw-pro-inverters.11/post-12683
Diversion implemented: https://diysolarforum.com/threads/s...-to-xantrex-to-xw-pro-inverters.11/post-45818
Early power wall implementation with Trace SW4024 and Lead Acid batteries: https://diysolarforum.com/threads/s...-to-xantrex-to-xw-pro-inverters.11/post-22792
New main Critical Loads panel added, along with new raceway: https://diysolarforum.com/threads/s...-to-xantrex-to-xw-pro-inverters.11/post-33082
Swapping out 20 year old panels (100w) with new ones (310w): https://diysolarforum.com/threads/s...-to-xantrex-to-xw-pro-inverters.11/post-58092
Jack-in-the-box (JITB) Tesla Battery Controller: https://diysolarforum.com/threads/s...-to-xantrex-to-xw-pro-inverters.11/post-75795
Lead Acid out - Teslas in: https://diysolarforum.com/threads/s...-to-xantrex-to-xw-pro-inverters.11/post-96045
New solar arrays: https://diysolarforum.com/threads/s...to-xantrex-to-xw-pro-inverters.11/post-112801
3rd and 4th charge controllers: https://diysolarforum.com/threads/s...to-xantrex-to-xw-pro-inverters.11/post-163811
Acquired Xantrex SW Plus 5548 inverter: https://diysolarforum.com/threads/s...to-xantrex-to-xw-pro-inverters.11/post-206500
Xantrex inverter install batteries are now 48volt based: https://diysolarforum.com/threads/s...to-xantrex-to-xw-pro-inverters.11/post-215614
Decision to go back to the Schneider XW Pro inverter: https://diysolarforum.com/threads/s...to-xantrex-to-xw-pro-inverters.11/post-598884
Conext PDP Arrives: https://diysolarforum.com/threads/s...to-xantrex-to-xw-pro-inverters.11/post-610047
Teardown of the Xantrex powerwall begun, in preparation for the new Conext XW Pro powerwall: https://diysolarforum.com/threads/s...to-xantrex-to-xw-pro-inverters.11/post-637210
XW Pro arrives and its installation https://diysolarforum.com/threads/s...to-xantrex-to-xw-pro-inverters.11/post-647602
In depth of the array contactors controlled yby the JITB https://diysolarforum.com/threads/s...to-xantrex-to-xw-pro-inverters.11/post-681547
Adding 5 more AC breakers to the PDP for future 2nd inverter https://diysolarforum.com/threads/s...to-xantrex-to-xw-pro-inverters.11/post-745839
Upgraded AC wires from AWG 6 and 4 to AWG 2 and 1 https://diysolarforum.com/threads/s...to-xantrex-to-xw-pro-inverters.11/post-772947
Added 2 AC line monitor meters, one for L1 and one for L2 https://diysolarforum.com/threads/s...to-xantrex-to-xw-pro-inverters.11/post-774724
Use of ChargeVerter to float battery and run house loads when battery hit LOW voltage https://diysolarforum.com/threads/s...to-xantrex-to-xw-pro-inverters.11/post-957639
Putting the XW Pro's AUX port to good use: Remote Power Off switch and GRID enable of chargeverter when battery voltage is low https://diysolarforum.com/threads/s...to-xantrex-to-xw-pro-inverters.11/post-958585
==========================================================================
Features
  • 125 amp service
  • Solar and battery power plant
  • 100 amp Transfer switch to allow source feed between:
    • grid power
    • solar and battery
  • grid only support for
    • Dryer receptacle (no dryer)
    • Oven receptacle (not used but available)
    • L14-30r outside receptacle
    • 60 amp EVSE port
    • 2 L14-30r GFCI receptacles for 2 external battery chargers
  • 50 amp Generator circuit, support runs to
    • 2 L14-30r GFCI receptacles
    • 2 120v GFCI recepatcles
    • Feed to Inverter AC2
    • Generator interlock for direct charging to main Critical Loads Panel
  • External battery chargers - Chargeverters
    • 1 Chargeverter used for auto recharge when LOW BATTERY VOLTAGE is reached
    • 1 Chargeverter for extra backup or for dual charging requirements
  • 40 amp EVSE selection Solar feed via transfer switch

==========================================================================
High level schematics of the system - I try to keep these updated to actual implementation of the system
therefore the early posts are no longer reflected in the design as I "refactored" the system over time

===========================================================================

Thompson-AC-Phase-240v.jpg
Thompson DC system XW Pro.jpg
Thompson-AC-DC-Arrays.jpg
Thompson-AC-Wiring.jpg
Current Pictures of the Power Plant
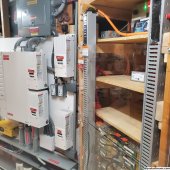
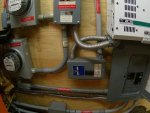
Here is the main AC portion of power plant
There are 4 L14-30R receptacles into which the Chargeverters can be manually plugged into
2 from the GRID and 2 from the generator
There is a "Switched" L14-30r that controlled by XW Pro AUX Relay line - Set for LOW Battery trigger
it is feed from the grid
2024-04-15  Completed AC.jpg
my 2nd Chargeverter is loaned to my son until his V2 arrives
when it comes back it will be positioned above the 1st one
the space to the left of the XW Pro is for the future 2nd XW Pro
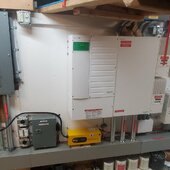
20240411_125954.jpg
DC Side with DIY Tesla battery stack
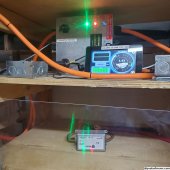
20230918_140132.jpg20230918_140139.jpg


FUTURE PLANS

upgrade current 125 amp service to 200 amp service

1 line schematic
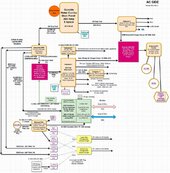
Thompson-AC-Phase-240v 200amp.jpg
 
Last edited:
Original first post below:
Will, I love your energy of spirit and what you have done, researched and how you teach it is great.
When I build things, I generate a build log of what, how , where, when, who, why questions and answers for that build so that I can have a diary of you will of what I did.
This pattern I have used on rebuilding my trucks, one of which is shown in my avatar


So I am sharing this log of my system (currently on my local computer) here so it can used for reference by myself and others:

This was ALL DIY by myself
I began my interest in solar power generation back in 1993 time frame when I came across an issue of the HomePower magazine. I subscribed and received all future issues til the last one that went out in November 2018. An archive of them is located at www.homepower.com
At that time I could not buy solar equipment due to cash flow. BUT I could work on reducing my loads in my house. I counted 50 incandescent 60 watt light bulbs located throughout the house. One by one I replaced them all with 13 watt CFL bulbs ($20 each) - I stored the old bulbs so when we moved I would put them back - which I did and took all the CFL bulbs with me.
I measured consumption via the electric meter for the months before and after I swapped out the bulbs: Power consumption went down 30%
I learned of and bought a load meter for individual devices, but it was expensive $100+. Eventually I learned of the Kill-A-Watt for $25 and have used that ever since.
With such metering devices I measured all the pluggable devices in the house. I insulated the refrigerator (floor coils) not side cooler and gained a reduction there.
My first purchase was an 18 watt Chinese panel for $150, back in 1996 time frame. I also purchased a Trace 10amp charge controller for $120. - I still have this controller. We had an old 1 car garage that is really just a large shed, in which I setup this system.
Starting car battery
18 watt panel
10amp charge controller
wires
switch
and a single 12v light in the shed
No other meters, just the above
Of course I got the usually wife "What do you want to do?" questions and looks so I kept my mouth shut mostly.
Then one night the grid went down and I was not home. My wife went looking for some kind of flashlight and one place she went looking was the shed. As she entered, she just flicked the light on and went looking............(wait for it)...............then she realized that the grid was down (I had taken the old grid light out) but she had lights! She finally saw the vision, er the Light.
SOME FOUNDATION
There are 4 major components in any power generating system:
1) Generation
2) Processing
3) Storage
4) Loads - or things that consume electricity - the WHY we like electricity

In 1999 I scheduled and attended a solar design and implementation class put on by SEI www.solarenergy.org based in Colorado. I took a 1 week class in Washington. The class I took was
PV101: Solar Training – Solar Electric Design and Installation

back then it was focused on battery based system. Today the above class focuses on GRID-TIE systems without batteries. Advanced classes touch on battery based generators


Well I wanted an UPS/battery based system. Uninterrupted Power Supply system. When the grid drops, my system would continue to operation. I had computer servers to run at home.


I didn't (still don't) want a GRID-TIED solar generator. When the GRID drops, then no power to the house not withstanding thousands of watts of power panels on the roof. SO batteries have always been a part of my plan and implementation. But batteries are the dirtiest part of solar generators.


After this class I came home with lots of new knowledge and passion and put together a system plan then began to allocation the monies for it, as well as plans for where to put things. I slowly and concurrently rebuilt the old garage from cinder block walls to 2x6 stick walls (without removing the roof - that was fun) with a good new foundation. How I did that is an other story. But in this new building I housed the first major system I built. The following covers the PROCESSING equipment for my system. This includes controllers, inverters, meters, wires, breakers, conduit and the like.


First pic:

On the far right is the Ground Fault breaker system. If any current hits the ground wires, this will trip OFF all incoming PV power

2012-07-09_21-49-28_186.jpg

Center is the 250 Amp breaker from the batteries to the inverter. Above that center, is the RV Power Products Solar Boost 50 (SB50) which is the controller for Array #1 of solar panels. 24 volt incoming design. I am still using this charge controller today


On the left is the Trace SW4024 inverter. Works on a 24 volt battery bank and produces 120 volt AC power (just one leg).
Nice inverter with all types of configuration menus. Still working today


The meter on the upper right is a battery monitor meter, and measures how many amps are going to/coming out of the battery. Like a gas tank gauge, but for the battery. Did not like this version, later I got a new/better user interface one.

The second picture is the inside of the MPPT charge controller2012-07-09_22-10-27_548.jpg
 
Last edited:
BATTERIES


I used Interstate L16 batteries 8 of them, each 6 volts, 412amp-hrs, for my 24v battery bank. 2 strings of 4

aHR0cHM6Ly9kM2Y3ZHBtOTZvOGV1OS5jbG91ZGZyb250Lm5ldC9tZWRpYS9jYXRhbG9nL3Byb2R1Y3QvY2FjaGUvZWNkMDUxZTk2NzBiZDU3ZGYzNWM4ZjBiMTIyZDhhZWEvdy9pL3dpbmQtc3VuXzIyNzBfNzQyNjE3My5qcGc


the following link refers to the ones I bought www.interstatebatteries.com/products/l-16s


20 years ago (1999), I got them for $140 + $20 core charge. Today I see they are $332 each.
With taxes, they ran some $1350 and picked them up in Woods Cross Utah


Here are some specs from itstillruns.com/interstate-l...s-7540891.html


Performance

The Interstate UL16 is a vented, 6-volt, 380Ah, L-16 type battery. It has a life expectancy that ranges between five to seven years, and has an 80 percent Depth of Discharge (DOD) for 300 cycles. The UL16 is made using multiple rib separators with additional ribs, enabling it to give maximum cycling performance. Patented plate technology provides a higher capacity, as well as more battery cycles, which allow the UL16 to have a longer life. The UL16HC, a High Capacity variant of the UL16, has an extra 10 percent of amp hours with the same physical specifications. The UL16 has a standard Ah Capacity of 380 at 20 hours, while the UL16HC has an Ah Capacity of 420 at 20 hours.
Physical Specifications

Both UL16 variants have an overall length of 11.88 inches, a width of 7.12 inches, and a height of 17 inches. The UL16 weighs 110 pounds, while the HC variant weighs 118 pounds. Their grids are made using a lower antimony alloy, giving them better resistance to excessive water loss and over-charging. They also require little need for additional water because their cases are designed to handle more electrolytes.


Technology and Pricing

Interstate L16s are made using the patented Cystalock plate curing process, which increases the battery’s life and reduces battery paste breakdown. They also last longer because they are made using an antinium alloy, making them more resistant to grid corrosion. UL16 batteries are also equipped with the SpeedCap design, allowing a person to open all three battery vents with just one twist. As of 2010, a UL16 costs about $274, while the UL16HC is around $300.


I used mine as UPS batteries I rarely discharged them. Mine lasted for 10 years, though in years 8, 9 and 10 I noticed poor performance when I tested them. They were located out in the shed and did experience some cold temps as the shed was not heated. It was the only place I could locate them as I was still digging out my basement which was finished in the 2010 time frame.


I liked these batteries better than the normal starter battery or the T-105 golf cart battery. But they are still Lead Acid (LA) and require attention. I did fail at times to water them - that is normal for your first battery bank as you destroy them
 
PANELS - The Generators

There were several brands of solar panels and I went with Siemen 100 Watt panels. Just above middle of the road type of panel for the day. I thought a big company would stand behind their panels. Years later Siemens sold the division and left the business.


I used an adjustable mounting rail system and when I ordered my last of 3 sets, I found out they had stopped making them and I got one scrap set out of the yard - egads


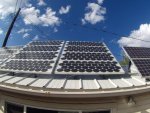
here are the panels as of this past weekend end


P1000015.JPG

Today the panels are connected with MC4 connectors and good solar wire.
The 12 panels are 12v modules and were wired in series for 6 24volt circuits. I removed the old wiring and added MC4 pigtails to each of the circuits

Their capacity was 6.6amps back in the day, but I am lucky to get 3.8 amps or so now. They still working so I use them

P1000016.JPG

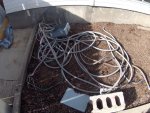
This fourth picture is the flex conduit after I had pulled them out. Its a mess on the ground and it was a mess on the roof


P1000014.JPG

Cleaned up area under Array #1

P1000017.JPG
 
Last edited:
Today the wiring is a LOT cleaner under the panels, with some final tidying still needed to do after I install the new ground wire.


Here looking west into the back of the panels. Imagine all that flex conduit spread out under the panels, vs
what is looks like today. (I have repented of my past works)

P1000017.JPG

The closest panel set (in the immediate foreground) is a 2nd 12v power system that I use to power my HAM radio, etc. 2 100w french panels (I used to have 4 but 2 died, yet these still are working 20 years later) running to a MorningStar PWM 20amp charge controller and 2 T-105 6v batteries in series. They are approach end of life and I think I will replace with LiFePO4 battery

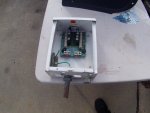
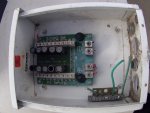
and the last two pics are of the old combiner box, which hit the trash can today.
It did its job and lasted a long time, but it had issues. It had wiring for 10 circuits but only 4 punch outs
in the case.

P1000009.JPG
P1000010.JPG
It used fuses which were hard to test AND my idiot location for the box did not help. No I am not going to admit where I mounted it.
Because of these problems, I suspected a circuit or two were not producing which proved true after moving to the new combiner box


I AM MAKING MORE POWER TODAY because of the upgrade
 
New combiner box

P1000012.JPG

Here is the new 12 position MidNite Solar combiner box ($174) with DC circuit breakers
The array is still 24 volts incoming (future that will change) and I can add more
panels to it. The circuit will handle 50 amps. Today, each of the 6 24v circuits (2 100w panels in series) produces some 3.8 amps. They WERE rated for 6.6 amps, but age has caught up with them. I will continue to use them until......


Currently these 12 panels and one oddball panel (24v) produced 25 amps this morning when I did a reading


The oddball one is a 310 watt 24v panel, is part of an update we did in 2015 (see later)

P1000013.JPG

 
In 2015 my wife asked about the system and what it would take to get it running again. Remember we lost the batteries in 2010 and it was off line until 2015.

So new batteries were purchased along with 6 new panels for Array #2

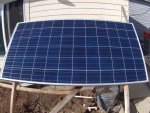
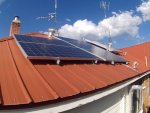
First, here is array #2 mounted with 5 310watt 24v panels, these produce, on a good day, 30 to 45 amps 24v

P1000018.JPG

yeah HAM antennas in view. Solar thermal panel on the far side


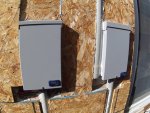
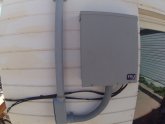
In the lower right you can see the new MidNite Solar combiner boxes, for arrays #2 and #3 (future) amidst the
adding of new siding and insulation to this wall.

P1000019.JPG

Last pic is of the two 6 position combiner boxes.
 
NEW BATTERIES and NEW LOCATION


Since I had finished the basement (dug by hand over 8 years by future missionaries earning $$)
I moved the system into the warmer basement and in 2015 installed the new batteries

I moved to US Battery 2V cells, each 1100 amp-hr@20hr, same size as the L16 but with more storage

I bought these from US Battery online, for $489 each, count of 12 with free delivery back in sept 2015

first pic is their stock pic at their web site

usb_re_l16_2V_reflt18.jpg


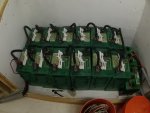
The next pic is where my batteries now reside, in an insulated liquid container area (for acid spills). What you don't see is the 6 gallons of distilled water for thirsty batteries. Every month or two one needs to top off the batteries. Take about 3 gallons per time to do that.

P1000020.JPG

On the extreme right are the 2 T-105 golf cart batteries for the 12v HAM power plant


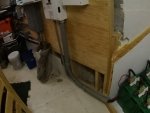
and the last pic is the conduit carrying the 4/0 wire from the battery to the 250 amp breaker

P1000021.JPG
 
THE PROCESSING EQUIPMENT MOVED


here is the system setup in the basement where it is warmer

One thing I am doing better now is getting proper PV labeling stickers from www.pvlabels.com and marking boxes and conduits to provide information to myself and others of what I did

P1000028.JPG

The two SB50 controllers for Array 1 and 2 on top. Room for Array 3

P1000023.JPG

And the big box is the Trace SW4024
 
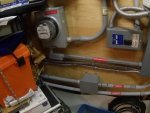
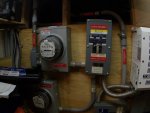
1st) Main solar breaker panel, which feeds to the house solar breaker panel upstairs near the grid breaker panel (125amp) - that in turn fans out to the house. This also feeds to a sub panel in the outside shed where the PV panels reside on, to power that building's lights etc

P1000025.JPG

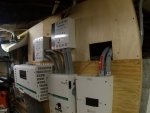
2nd) Generator (in the future) breaker in the center. Upper is the transfer switch I can use to offline the Inverter from the house and continue to use direct grid power to the house while working on the inverter. Common feature back in the day

P1000027.JPG

3rd) I installed standard meters to measure how much grid power comes into the solar circuits (like during the night) and how much goes out to the house. The difference between these two meters is the amount I generate. Again note, this is from 20 years ago. I manually read these 2 meters and the grid meter every day.

P1000026.JPG

Todays tech does this automatically.
 
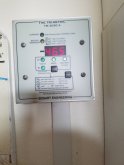
Battery monitoring


I recently installed a new battery monitor and placed it just off the kitchen and showed my wife what it is doing.

Just today she mentioned a pattern of operation (large negative number is draining batteries while large positive number is charging batteries - she is getting it)

20190917_121313.jpg

www.bogartengineering.com/pro...rimetrics.html

The original system cost, in parts, was just over $14,000 . NOTE: This was the year 2000

Of that I got a $2,000 Utah tax credit


The panels themselves were $4.50 per watt, for $450 per panel, and $5,400 just for the panels, back in the day

Trace Inverter was $2350

Each of the Charge controllers were $540

and I don't remember the cost of the two trace power housing boxes - main breaker and ground fault trips, not cheap!


add in hundreds for the wires, and conduit, mounts, etc


Has it be worth it?


RESOUNDING YES!


I am a software engineer by career and enjoy the analytics of this. Nice when the grid goes down, and we don't even notice. I view it as a hobby - fun and interesting


I looked into Net metering and now firmly reject it. I have to go through THEIR hoops and other items, for what? TO treat the grid like a battery that it is not. I am not looking for a $25 a month check from them for my power, that is not my goal/requirement. I prefer to be more independent.


My plan is to use the grid as a battery charger as needed, like a generator and move more aggressively to storing my excess energy on site by getting better equipment and bigger batteries. WHY? Why not?


GRID-TIE solar is okay, but you are STILL dependant on the grid for power

Today the newer technologies coming available is great and that can make being independent even more possible. My labor built it, mostly, and the knowledge gained is priceless.

Some generating results are coming up
 
Last edited:
BATTERIES and USAGE


That brings me up to the present and also recently I have been finding NEW (than my original system) Tech that I want to incorporate into my system.


First, my system is 24v battery and 24v panel based. It is was a compromise back in the day, as 48v based batteries is a better choice. BUT I would have had to buy twice as much battery as I did. And the problem with LA batteries is that you can only use (nominally) 1/2 of the energy in the battery.


My first batteries were 830 amp-hrs 24v or 19.9kw-hrs.
My current set are 1100 amp-hrs 24v or 26.4kw-hrs


LA batteries can be drawn down - called Depth of Discharge (DoD) - to a specific level, BUT NOT DOWN to 0% remaining capacity - THAT damages batteries.


Normally, LA batteries have a daily solar use protocol standard to draw down to 50% DoD. You can go more once in a while, but NEVER below 80% DoD (20% remaining) unless its an emergency. The Standard is 80% DoD, then must recharge back to 100% capacity for the day (or 2 or 3). Going to 100% DoD can damage a battery 10% of life or more per such draw down.


Thus my current batteries have a total energy capacity of 26.4 kw-hrs, but with the 50% DoD rule, I can only use 13.2 kw-hrs then I must recharge. The act of monitoring this and altering use wisely and charging is called Power Management. I am my own power company, along with the grid as my battery charger when solar is lacking.


What has this system generated for me?


In Nov 2017 I began daily meter reading and logging to a spread sheet to get real numbers


Since March of this year, I have been running the system in OFF-GRID mode. This means I run on the battery between 3AM and 9PM, then the grid is reconnected to at 9PM for the grid to finish charging the battery for the day, if it needs it. Some days, the battery is 100 percent, charged by the sun. Since March I have noticed an overall decrease of power used
 
Now looking to the future


With the current system in place I have desires (kinda urges, if you understand) to enhance and build upon what I have.


First is the age of the inverter and the charge controllers. My Trace SW4024 model has had a history of various failures as reported by web searches. I believe I have been lucky (maybe blessed) not to have had major failures, but I cannot rely on that going forward. Also the inverter is tied to a 24v battery operation. As I mentioned I had wanted a 48v system, but it cost too much back then. Today, and in the near future I believe things will become more available.


So requirement #1 is to upgrade the inverter.

And this is where all of this ties into Will and his videos. I think the MPP Solar 5kw Will has referred to might fit my needs

The MPP Solar LV5048 inverter. Capacity is 5kw vs my current 4kw, and it can be configured to do 240v AC operation, whereas my current one was designed to have TWO SW4024 inverters to do that. I only have one.

I will have some rewiring to do in order to implement that, but is fine.

Will links to these on his website


aHR0cHM6Ly9pLmViYXlpbWcuY29tL2ltYWdlcy9nLzZOc0FBT1N3TVg1Y3dqdHYvcy1sMTYwMC5wbmc


The neat thing is that this seller is located in MT Pleasant Utah, I believe I can visit, ask questions and pick it up and save him shipping cost


This inverter allows for full battery charging configuration, which means I can tailor it for the batteries I want.


Specs

aHR0cHM6Ly9pLmViYXlpbWcuY29tL2ltYWdlcy9nL3Iyd0FBT1N3N1BwY3dqdFAvcy1sMTYwMC5wbmc


Price is nice at $1349, free shipping. Might be less with a will call pickup


Okay there is the inverter. SO what does it require to operate. Next post
 
Also Will's tutorials and reviews of Tesla's battery sparked thoughts for me for upgrades:


New Batteries

my current set of LA batteries (12 of them) is for 24 volts. One should not mix new batteries with old as in buying another set of 12. Plus I don't have room for 12 more batteries and I want to reduce my maintenance level by getting away from LA batteries


Enter the Tesla battery. Actually salvaged Tesla batteries from damaged Tesla vehicles. Model S has 16 battery modules in each car. Capacity of those batteries is 75 or 85 kwh. Each module is a 250ah/5kwh 24v module.

salvaged Tesla Batteries.jpg


They can be had for $1250 per module. I could replace my current capacity of 13kwh with 3 Tesla modules @ 24v (5+5+5). In addition this Tesla batteries can be discharged (DoD) 80-90% over and over again without memory.


Caveats are: NEVER over charge, NEVER discharge to 0% (safer to only discharge to 10%), NEVER allow to reach 32F temperature or lower and NEVER allow to overheat.


My current inverter can connect to the Tesla and safely charge and discharge them as the inverter is fuller configurable. When I upgrade to the new 48v inverter I can simply rewire the Teslas from 24v parallel operation to 48v series operation. I will need multitudes of 2 to do that. So I will need at least 2, or 4 or 6 or.......


That now comes to the charge controllers I have two SB50, designed backed in the 1990s and they still work great but they are a 24v battery charger AND they are analog programming and not digital so they would be difficult to use with the Tesla batteries, and errors could damage the batteries


SO.....And WIll's review of the Victron charge controller has added fuel to my fire


I would need new digital charge controllers. Victron is a brand widely used with many different models. The specific one to use depends on battery bank voltage now (24v) and later (48v) and the voltage of the incoming PV panels. Currently I have 24v coming in, but I would have to switch to at least 48v array voltage or even 96v or 120v. As the voltage goes up the amperage is halved.


Victron SmartSolar MPPT 150/60-Tr Charge Controller

Search on ebay for current listings

aHR0cHM6Ly9pLmViYXlpbWcuY29tL2ltYWdlcy9nL3R2a0FBT1N3T25KYnZQNU8vcy1sMTYwMC5wbmc
 
Last edited:
Due to the dependencies of the various parts, the specific order of equipment purchasing needs to be laid out in carefully to keep the system running before full build out yet provide an upgrade path.

Steps:

1) Get the new charge controllers - Need 2 for $1080, but can get one at a time $540
2) Rewire the arrays for higher input voltage. TBD is the actual voltage, 48, 96 or 120
3) Once new chargers arrive, program them and current inverter for LA battery operation (Standard)
4) Acquire new Tesla batteries - Need 2 upfront $2500 for both. More can be added later
5) Wire for 24v battery operation. Get Battery Monitoring System and cell leveling systems in place. Connect to current inverter. Program current inverter for Tesla operation parameters
6) Use system
7) Acquire new MPP Solar inverter. $1400 - from within Utah no less
Rewire batteries for 48v operation. Reprogram charge controllers for 48v as well.
9) Rewire for inserting new inverter for 120v AC - not 240 AC yet


I hopefully can sell my older equipment to help offset the new costs.


The inverter is well, what it is.
The batteries are 4 years into a 10 year warranty and I believe have 6-8 years left, maybe more
The SB50 charge controllers are still working


That kinda states it. So questions and answers (and issues you might see) are welcome on any of this


dougbert
 
Here I have some thoughts and summaries of this project.

Earlier I posted a spreadsheet of the monthly totals for the past 2 years, of what I bought and what I generated. That data came from daily data I gathered from meter reading. For the month of August,I bought 258 kwh and generated 244 kwh, representing 48.1% of the energy I generated. Last sunday, I bought 7 and generated 7. Yesterday, monday I bought 9 and generated 7. (Wife does laundry on mondays)

In terms of cost/savings/money, The electricity I buy, costs 10 cents/kwh. Thus the electricity expense for august is $25.80 and I saved $24.4 for the month - plus $13 service charge and taxes. For yesterday's electricity, I will pay 90 cents for the day's use and saved 70 cents due to my own generation.

Not big numbers is it. When you start a project such as this, you must understand the basis, and the expectations, in terms of financial, social and practical operations on your life and life style. My panels consists of around 2.6kilo-watts of generation. But that is not enough to cover my current needs - please note I have to still buy 1/2 of my electricity to cover my electric needs.

AND my loads are greatly reduced and are NOT a typical American Household electric usage. Please look at your own electric bill and see how many kilo-watt-hours you use each month.

I need another 2.6kilo-watts of new panels to match my daily needs. Hopefully, that will cover all of my normal daily needs. At least for days of this past week.

Also note, the past several months have had mostly sunny days, a typical Utah summer. But fall and winter are coming and my ability to generate my own is greatly reduced. Instead of 50% self generated, my history data shows some months where I produce 18-20% of my own electricity.

Why do I point all this out?

Because of WHY I decided to build a whole house solar generator. I was/am preparing for possible grid-down events. Events that normally last a few minutes, to a few days in rare events. But what if the grid goes down for weeks/months/years? My current system cannot support my current life style, at my consumption rate.

Also know that house generator is not aimed to provide just one day of energy but several decades of energy use if grid down does not happen.
Your own generator's difference is that you buy all the electricity all up front, and not on a monthly basis.

I think others have this urge to tinker with solar - you think, given Will's tutorials and other DIY'ers? - and I have been able to actual DO STUFF. I have learned much by Will's videos, and they provided me an urge to add to my long winded DIY project.


My plan is to continue to add solar panels, and a bigger battery. As it is now, my battery would last ONE DAY without sun or without the grid. In an grid down, I will manually turn off many devices in my house:

Computers (my wife's computer by itself, a tower I built, is THE single most electricity consumer in my house, 4.1kwhrs a day)
Refrigerator (2 kwhrs a day, measured by Kill-A-Watt)
Freezer (2.2 kwhrs a day)
Local Area Network for the computers
night lights?
TV, put on a power strip to turn off totally
Cooling FANs
Furnace is on a solar circuit

We use a microwave for cooking (also have butane cook burner and lots of butane)
lights


Remember my 50% DoD battery provides 13.2kwh of energy - but I used 16kwh of energy just yesterday. A general rule is to have enough battery to run your house for 3-5 days WITHOUT Sun, without solar generation. Thus I would need 5 days at 16 or 17 kwh per day, or 85kwh of battery - which just happens to be the capacity of a Tesla Model S battery bank - 16 modules, around $20,000 from prices on ebay today.

Will prices for these things come down? I believe so. Just like my original solar panels cost $4.50 per watt, and my last array was $1.20 a watt and today, there are panels for 50 cents a watt, other costs may come down as well. Manpower for installation though will have higher costs going forward.


dougbert
 
paulypod said:
So the bottom line- from day one to now you have a negative return on your ‘investment’?


well, just like the ROI on buying a new 2020 Silverado for $90,000
8-)


my truck in my Avatar cost $16,000 to rebuild, er renew

I entered all this with my requirement of NOT getting money back for money invested for the services I want.

As for money, the answer to your question is yes. But for my knowledge base expanded? definitely no. I have had a great return on what I have done. I have spent "tutition" yes, but my "investment" is more than money - and it really is not to save the planet.

I invest in HAM radio, in build rifles, LS based engines and photon harvesters. Let's have fun

dougbert
 
As I mentioned I used an interesting set of panel mounts under Array #1 and they don't make them anymore. Which is fine. But as I designed Array #2, I found that I liked the UniRac solar mounts

unirac.com/solarmount/

I bought some long rails, had them cut in half so they won't go freight, bought various unirac parts from ebay. Rails are UniRac 310168C SolarMount Rail 168" and cost about $150

Some of the parts from ebay were extra parts from others' left installations. Got some good deals, shop thoroughly through ebay

Followed the directions (below) and my sons and I had an install party

here is the link to the SM instructions PDF unirac.com/wp-content/uploads/pdf/SM_Installation-Guide_20190111.pdf

dougbert
 
Spent yesterday working on the improvements for Array #1. Got the grounding cable (50ft) this past we and needed to replace the old grounding cable.


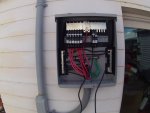
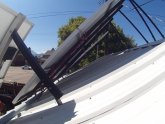
In the first pic, now that the ground wire was finished, I buttoned up the combiner box. Have some PV Labels arriving tomorrow to put on it. I have on order some 30mm wire clips to properly "tie" the modules' feeder lines to the various frames. Did a basic tie up with zip ties, but knew that was temporary. These coming stainless wire clips will hold the wires for decades
The 2 pairs of incoming wires are for testing purposes as this is my main testing area. One goes to the 300w panel and the other is empty at the moment, but I am looking at a 300w panel from a local solar outfit for $225. I need more panels on this string as the Siemens panels age and decline.


B0020007.JPG

In the second pic, hard to see it but #6 ground wire was laced up the center of each section and bolted down to each module and then run back down to the combiner box

B0010002.JPG


And the third pic is of the grounding rod. The PVC pipe brings in the Grid's grounding wire, I also added a #6 wire, seen going to the left and the left over wire from the array, I attached and will run that to a future ground rod I will install shortly. Our local utility now wants 2 daisy chained grounding rods, so I thought to bring it to code. I also removed the 20 year old bracket, bought 2 new ones, cleaned up the old wire and make a better connection for all 3 wires.
I redid the entire house's electrical system some 22 years ago. House was built in 1930, 1100 sq-ft frame. We are still remodeling it. The old 4 FUSE panel with 4 circuits for the whole house is long gone
dougbert


B0030010.JPG
 
Last edited:
Back
Top