diy solar

diy solar

Stripped the terminals, how to re-thread them safely

  • Thread starter Deleted member 9967
  • Start date
Yeah, I'm visual too hehe, best when I can see what blank it is I'm hitting up against hehe...

So yeah, just repair the damaged ones with Helicoil repair kit, then just screw in all the studs where bolts went before, and snug them down. In a racing engine we would glue the studs in with Locktite threadlocker compound, but we don't need to worry about that here as there is no shock or vibration on a stationary application (Locktite might hamper current flow on the threads. Just put the studs in dry, and cinch them down a little bit (helps them to stay in when you go to unscrew the nut later)...

I wouldn't convert all the holes over to Helicoil though not necessary, just repair the ones that are stripped and put the studs in all the factory threads on the rest, that is all you need here...
 
Loctite was to keep studs in place after rethreading. Alcohol could be used as a no-residue cutting fluid.
Stud is just a long thread without hex head.
Either helicoil or oversize tap makes a larger thread in the terminal.
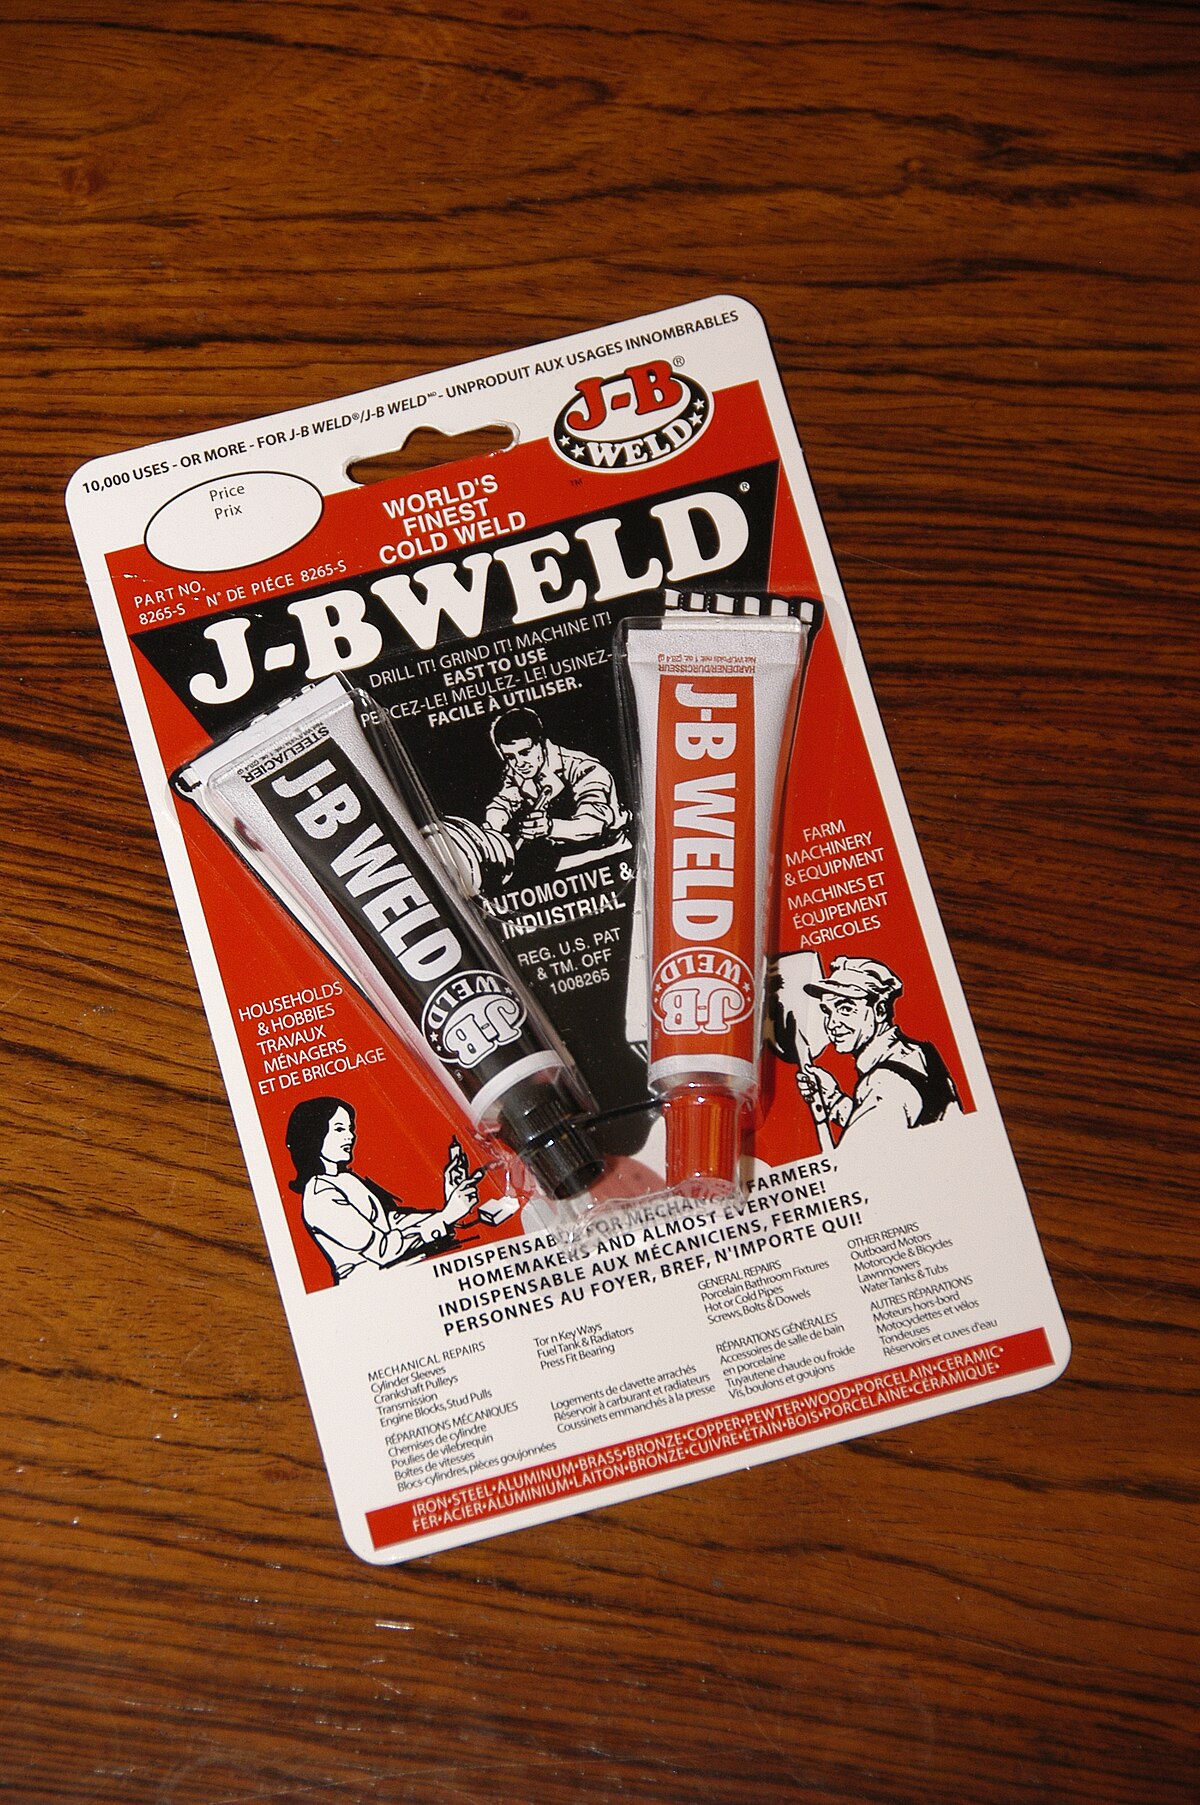
I've got some good epoxy (JB weld) that I would consider using to epoxy a 6mm stud in a stripped 6mm hole. Think the torque for the nut is low enough it is strong. Needs to be clean of oil and loctite, would use slightly larger than 6mm drill to chase and clean hole.

Studs- buy those, ideally with that hex socket as Samson showed.
 
Yeah, I'm visual too hehe, best when I can see what blank it is I'm hitting up against hehe...

So yeah, just repair the damaged ones with Helicoil repair kit, then just screw in all the studs where bolts went before, and snug them down. In a racing engine we would glue the studs in with Locktite threadlocker compound, but we don't need to worry about that here as there is no shock or vibration on a stationary application (Locktite might hamper current flow on the threads. Just put the studs in dry, and cinch them down a little bit (helps them to stay in when you go to unscrew the nut later)...

I wouldn't convert all the holes over to Helicoil though not necessary, just repair the ones that are stripped and put the studs in all the factory threads on the rest, that is all you need here...

Oh, and make sure when you do the thread repair, where you tap the new thread with the included tap, you make sure it is perfectly perpendicular, so it doesn't dig threads in at an angle. So straight up from your view left to right vertical, but also vertical forward and backward...

Usually go in like 1/2 turn, maybe out like 1/4 turn, in like 1/2, out like 1/4, so it kind of cleans the thread as your digging... Be mindful if the tap bottoms out in the hole. If it gets hard to turn all the sudden, then it may have bottomed out.


Only other caveat I can think of here:

Now here's the kicker, since a tap is tapered on the end bit of it, make sure the threads are cut all the way (like square and straight), at least down to the depth that the Helicoil will go into. Meaning if the tap bottoms out first and didn't groom the threads all the way straight all the way down past the depth of how far the Helicoil insert will rest at, then we may need to make a homemade tap to finish the tap job (I've had to do this before).. Like, where you get a bolt the same size and thread pitch as the tap, use a Dremel disc and grind a tap style tooth in it (kind of like self-tapping bolts look like), then carefully thread it into the newly tapped hole, and since the bolt doesn't have any taper to it, it can finish grooming the threads nearly right to the bottom of the hole. Hopefully this situation doesn't happen here, but if it does, then this is how to get around it. You just don't want to screw in the Helicoil into any threaded area where the threads aren't parallel (you want non-taper, no cone shape in your thread cut), or the Helicoil will form and follow to the same taper, which would make it so the real bolt will screw in, and start getting tighter and tighter as it gets down to the area of the taper.
 
After the 1st time I tried to get the screws included with my cells to work with a double bus-bar, I knew that I would end up stripping some, no matter how careful I was, so I shut my project down for a couple days and ordered the 25mm long set screws recommended in other threads. If I had stripped one, the 1st thing I would try would be to get a 1/4" bottoming tap and see if it would cut enough thread to hold a 1/4" set screw, which is a tiny bit bigger than the 6mm threads that the cell was produced with. If that looked like it might hold, I'd thread it in with thread locker or epoxy. If it didn't cut enough thread to trust it, I'd go with a thread insert like the helicoil. I've been very happy that I went with the set-screws and nuts. The number of times I've had the nuts on and off during the top balancing would have surely resulted in stripped threads had I tried to use the included bolts.
 
Every stripped thread is a different challenge. I have successfully used a larger thread, IE; 1/4inch us into 6mm. Careful work with a bottoming tap. Then stay with studs and nuts, no bolts. If you don't know some terms use google to educate yourself instead of trashing someone trying to help you.
 
I don't believe conductivity is an issue for the stud. It's going to be stainless, a poor conductor, anyway.
Purpose of the stud is to let nut mechanically clamp bar or cable end to battery terminal, which makes electrical contact.
So I would use my favorite 2-part epoxy that doesn't need heat if I wanted to bond a stud into a stripped hole, rather than threading oversize (for bigger bolt/stud or helicoil)


For me though (only my personal preference), I like to get all the amperage handling capability as I can, use up all the surface area on both sides of the bus bar, and if I get a little bit through the top of the bus bar, going through the nut, and through the stud, then I'll take it... For me, I would just make a good strong thread with Helicoil repair as necessary, and bolt it all up dry. I might put a lock washer if it was in a vehicle with hot / cold / vibration, etc, but in stationery I wouldn't even bother with a lock washer (maybe if I had some laying around, but I wouldn't lose any sleep if I didn't)...
 
I would not have thought that helicoils and stainless steel studs would be a good solution. Looks like the hole that stud would go through is 25% of the conducting area.

I guess if its been tried before would work.

I’ve got a 12 volt system that cab draw a lot of amps, and I would be comparing both both posts on the battery to the corresponding posts on the busbar with my IR gun a few times to make sure that this helicoil and stainless steel stud is not giving too much heat.

My own worry with my battery terminals is the 26 amp clamp charger I keep the batteries hooked to when I take them out of the RV ruining the lugs.

Yeah, you don't really have to use stainless steel studs and nuts if you didn't want. You could use copper studs ( if you can find them), or buy long copper bolts, and cut them into studs, or use copper threaded rod and cut them to length, and double-nut them to cinch them on, and use a copper nut, and you could have better conductive connection. Heck you could even probably find gold plated studs (or have some plated for you) if one really wanted to...


Or grind the heads down on some of these weld studs:
 
Yeah, I'm visual too hehe, best when I can see what blank it is I'm hitting up against hehe...

So yeah, just repair the damaged ones with Helicoil repair kit, then just screw in all the studs where bolts went before, and snug them down. In a racing engine we would glue the studs in with Locktite threadlocker compound, but we don't need to worry about that here as there is no shock or vibration on a stationary application (Locktite might hamper current flow on the threads. Just put the studs in dry, and cinch them down a little bit (helps them to stay in when you go to unscrew the nut later)...

I wouldn't convert all the holes over to Helicoil though not necessary, just repair the ones that are stripped and put the studs in all the factory threads on the rest, that is all you need here...
Mine is not stationary. It is a mobility scooter and LOTS of bumps etc on the sidewalks. A LOT.
I had planned to use red locktite actually but was concerned if it would reduce the electricity going through the terminal or not like you said.

Ok so get the helicoils just in case but don't convert all of them just yet then eh?
Thanks a lot once again. :)
 
Oh, and make sure when you do the thread repair, where you tap the new thread with the included tap, you make sure it is perfectly perpendicular, so it doesn't dig threads in at an angle. So straight up from your view left to right vertical, but also vertical forward and backward...

Usually go in like 1/2 turn, maybe out like 1/4 turn, in like 1/2, out like 1/4, so it kind of cleans the thread as your digging... Be mindful if the tap bottoms out in the hole. If it gets hard to turn all the sudden, then it may have bottomed out.


Only other caveat I can think of here:

Now here's the kicker, since a tap is tapered on the end bit of it, make sure the threads are cut all the way (like square and straight), at least down to the depth that the Helicoil will go into. Meaning if the tap bottoms out first and didn't groom the threads all the way straight all the way down past the depth of how far the Helicoil insert will rest at, then we may need to make a homemade tap to finish the tap job (I've had to do this before).. Like, where you get a bolt the same size and thread pitch as the tap, use a Dremel disc and grind a tap style tooth in it (kind of like self-tapping bolts look like), then carefully thread it into the newly tapped hole, and since the bolt doesn't have any taper to it, it can finish grooming the threads nearly right to the bottom of the hole. Hopefully this situation doesn't happen here, but if it does, then this is how to get around it. You just don't want to screw in the Helicoil into any threaded area where the threads aren't parallel (you want non-taper, no cone shape in your thread cut), or the Helicoil will form and follow to the same taper, which would make it so the real bolt will screw in, and start getting tighter and tighter as it gets down to the area of the taper.
I plan to put a piece of tape on the tap for depth. :)

Wow, I forgot about the grooved bolt technique. It has been a LONG time. Like 40ish years LOL.
Thanks for the reminder. :)
 
Loctite was to keep studs in place after rethreading. Alcohol could be used as a no-residue cutting fluid.
Stud is just a long thread without hex head.
Either helicoil or oversize tap makes a larger thread in the terminal.
I've got some good epoxy (JB weld) that I would consider using to epoxy a 6mm stud in a stripped 6mm hole. Think the torque for the nut is low enough it is strong. Needs to be clean of oil and loctite, would use slightly larger than 6mm drill to chase and clean hole.

Studs- buy those, ideally with that hex socket as Samson showed.
JB weld says that their JB weld in nonconductive. So for myself anyhow, I would not use this. But yes, it would hold rather permanently LOL.
 
Mine is not stationary. It is a mobility scooter and LOTS of bumps etc on the sidewalks. A LOT.
I had planned to use red locktite actually but was concerned if it would reduce the electricity going through the terminal or not like you said.

Ok so get the helicoils just in case but don't convert all of them just yet then eh?
Thanks a lot once again. :)

Do you have a clamp or tight strap around your cell bank? It would be important to keep the group of cells so they do not move about (in relation to each other), with the bus bars between them. Also I would use a non-rigid bus bar between cells so they have some give for small movements. Yeah, put a lock washer on the studs, but I wouldn't worry about locktite or anything, just check on them once in awhile and see how the lock washers are doing. As long as the bus bars aren't the rigid type, and batteries are clamped securely together, then seems like it should be fine. But of course you would know better since it's your rig, you know it better than anyone else...
 
Do you have a clamp or tight strap around your cell bank? It would be important to keep the group of cells so they do not move about (in relation to each other), with the bus bars between them. Also I would use a non-rigid bus bar between cells so they have some give for small movements. Yeah, put a lock washer on the studs, but I wouldn't worry about locktite or anything, just check on them once in awhile and see how the lock washers are doing. As long as the bus bars aren't the rigid type, and batteries are clamped securely together, then seems like it should be fine. But of course you would know better since it's your rig, you know it better than anyone else...
Yes they are in a specially made wooden box actually. With 6 threaded rods per box. Each tightened to the exact same length.
I am in two other threads that are discussing this very thing at the moment. :)

Until I can get special bus bars I will have to make do with the rigid ones I have which is why I have the cells in a rigid box and that will be in a welded frame on the scooter.
I have someone that made them for me for only $50. He will also of course weld them to the chassis as well. And then the box attaches to the welded box.

But it is my hope to get some sort of braided rope type bus bar. I just have to watch my pennies is all. So it takes months to get what I need is all. :)
Like the helicoils. I hope to afford those in the next month for instance. :) Hopefully not too much longer though. As the scooter is almost unrideable without them.
 
You got the best answer anyone could give (Helicoil). What else do you want, someone to hold your hand or do it for you?
Why not? In 90% of the other threads the MEN have pictures, links to videos, graphs, drawings and more traded between each other and even ask for them also.
So why is it that I am not allowed to ask for these things?
I await your reasoned, thought out, explanation.
Thank you.
 
Mine is not stationary. It is a mobility scooter and LOTS of bumps etc on the sidewalks. A LOT.
I had planned to use red locktite actually but was concerned if it would reduce the electricity going through the terminal or not like you said.

Ok so get the helicoils just in case but don't convert all of them just yet then eh?
Thanks a lot once again. :)
Helicoil just to repair any that were damaged.
But studs almost bottomed for all of them, to avoid further stripping.

I always carried tools with me, even as a kid on a bike.
Do you? maybe a self-tapping screw in case you decide to fix your scooter at the side of the road?

Are you saying the scooter is unrideable without helicoils to fix poor connection?
How much current do you draw? Somehow I doubt it is the hundreds of amps other guys do for inverters.
I'd clean out the hole and JB-weld a stainless stud in it.

We have pictures, just not the kind we share with you! ;)
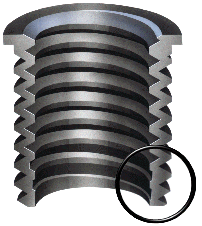
Here's your gratuitous picture, scroll down for helicoil:

 
If that looked like it might hold, I'd thread it in with thread locker or epoxy.
Sounds good and all, but what about conductivity though?
Once you use locktite or an epoxy you cause resistance or even stoppage of the electrical flow.
How did you prevent this from happening?
 
Helicoil just to repair any that were damaged.
But studs almost bottomed for all of them, to avoid further stripping.

I always carried tools with me, even as a kid on a bike.
Do you? maybe a self-tapping screw in case you decide to fix your scooter at the side of the road?

Are you saying the scooter is unrideable without helicoils to fix poor connection?
How much current do you draw? Somehow I doubt it is the hundreds of amps other guys do for inverters.
I'd clean out the hole and JB-weld a stainless stud in it.

We have pictures, just not the kind we share with you! ;)
Here's your gratuitous picture, scroll down for helicoil:

It averages 20 amps and can top out at 60 amps for a couple of seconds.
Yes I carry some tools but not a lot.
Unrideable in the sense that it stops when it can't get electricity to the motor yes.
I have jammed aluminum foil into the hole and it has helped. But it is not a great solution of course.

HAHA on the picture :p
If I had a self tapping screw I might not need helicoils LOL.
 
Sounds good and all, but what about conductivity though?
Once you use locktite or an epoxy you cause resistance or even stoppage of the electrical flow.
How did you prevent this from happening?
I wouldn't worry at all about that.
The path out the top of busbar, through stainless nut or bolt head, down through stainless bolt or stud is such high resistance that it hardly any current goes through it. The flat busbar pressed against terminal carries all the current (assuming you fixed the native oxide issue.) One is long (well, a couple millimeters), skinny, resistive material. The other is zero length and large area.
 
Back
Top