I swapped the OEM microwave oven in my Jayco trailer for a Panasonic NN-SD372S 950 watt inverter-based microwave purchased and delivered from Staples (out of pocket was $70 because of my wife's Staples rewards.) I intended to reduce the startup demand on my 12v-120v 2K watt Kisae inverter. The result exceeded my expectation. 1. I can reduce the draw by setting it a lower power - it draws less but does continuous heat above the lower threshold (don't recall, but seldom go that low) - in contrast to the on-off of the OEM unit - starts right up with no sag! 2. The bezel is nearly a perfect fit. I shimmed it with 3/16 chloroplast covered in aluminum seal tape.
Trailer - Jayco Jayflight 24RBS.
Process:

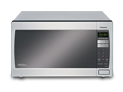
Panasonic unit installed in OEM location with OEM bezel.

Panasonic unit open and on inverter power

You might want to read this some sunny day.....

Trailer - Jayco Jayflight 24RBS.
Process:
- Remove the OEM unit and take off the bezel and top duct add-on - save bezel, duct, and screws for reuse.
- Measure the height from the bottom of Pansonic and add shims for feet - I had to add 5/8 inch wood under the metal shelf the OEM unit sits on.
- Remove the metal shelf and add wooded shims.
- Test height with Panasonic in place and bezel loose fit in front. My screw holes for the front bezel lined up perfectly.
- Add the bezel to the Panasonic front and reuse the bezel to microwave mounting screws and suitable shims (3/16 chloroplast and aluminum tape). I drilled small pilot holes and tested for interference. CAREFUL! You don't want to drill into electronics on the right front side!
- Test the fit again on the metal shelf.
- Admire your work - you do admire your work, don't you? Especially if everything is going together better than conceived.
- Measure for the interference of ducting to be added to the left interior side. I had about one-inch clearance. Note the Panasonic is not designed for built-in (neither was the OEM). You need to duct the exhaust air out the top like the OEM - but up the side, because there is no top vent like the OEM.
- Borrow from your SO some aluminum roof flashing - yes, she did have this in her stash (she tried heat pressing a picture on a sample). Cut the flashing into a duct-shaped thingy to duct exhaust air up the side into the reused duct placed in nearly the same place as the OEM unit. Your results may vary based on skill, tools, sheet metal bending experience. I had a Work-mate clamp that helped me make bends and used metal shears, but the stuff was so thin a scissors would have been sufficient.
- Put the oven and ductwork together with VERY liberal use of aluminum tape. Don't hold back - go wild with the tape to get all leaks sealed up. Oh yeah, you may need a piecing of flashing from the bezel to the setback OEM top duct.
- Put the oven in the wall and screw in the bezel to hold the oven in place.
- Smoke test - meaning plug the thing in and make sure no smoke comes out.
- Admire your work and test with a coffee cup with water. Oh yeah, you might want to read the Panasonic instruction book.
- Admire your work again and get the SO to admire it with you as it starts and runs fine on the inverter. As Zonker Harris said to Doonesberry decades ago, "Take her out for a spin. Go wild, Son!"
Panasonic unit installed in OEM location with OEM bezel.
Panasonic unit open and on inverter power
You might want to read this some sunny day.....