• Have you tried out dark mode?! Scroll to the bottom of any page to find a sun or moon icon to turn dark mode on or off!

diy solar

diy solar

Thicker Wires Top Balancing makes huge difference!!

chrisski

Solar Boondocker
Joined
Aug 14, 2020
Messages
6,229
Location
Central AZ
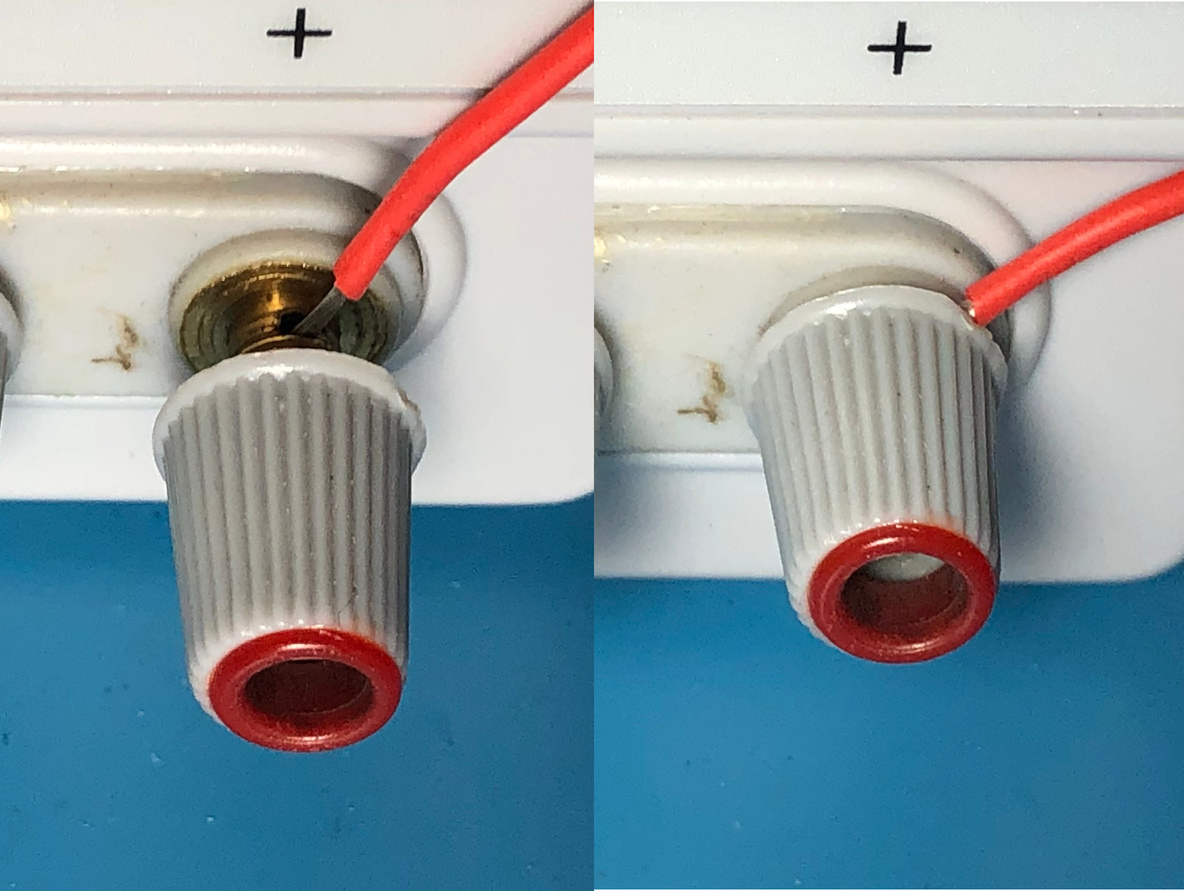
I made thicker leads for my Bench Top Power supply, and this made a huge difference while charging the batteries.

Went from 3.6 amps in Constant Voltage with the tiny terminals that came with the power supply to 10 amps in constant current mode for the 10 AWG wires. This should cut down charge time significantly.

This is the Power Suppy I got, I think its the same one Will Recommends:


To make the new cables, I simply used 12 inches of 10 AWG Wire with an auto parts store 1/4" ring terminal crimped on each end of the wire.
 
I can second this with the exact same materials, 3.5a with the stock cables and full 10 amps with the better cable, although I’m letting it run at 80% because who knows with these PSU
 
I can second this with the exact same materials, 3.5a with the stock cables and full 10 amps with the better cable, although I’m letting it run at 80% because who knows with these PSU
Silliest thing for me was the cables which came with the Power Supply were banana clips, and I spent about an hour figuring a 10 AWG to Banana Clip connection before I realized the Power Supply attachment just screwed off to a 1/4" stud and I was happy to see I had everything I needed.

I'm charging a 25 ah battery now and after an hour, went from constant current to constant voltage which is about what I'd expect for a battery shipped at 20% - 50% charged.
I would just like to bring this back up to say that I did the same thing! :ROFLMAO: Thanks to this thread!!
 
I learned this the hard way. Lower voltage needs much better connections.
 
It's mentioned here too:

 
To make the new cables, I simply used 12 inches of 10 AWG Wire with an auto parts store 1/4" ring terminal crimped on each end of the wire.
Did you keep the stock male plug that goes into the supply?
Trying to picture your wire.
 
Did you keep the stock male plug that goes into the supply?
Trying to picture your wire.
Ring terminals on both ends. The 'joke' here is that several of us didn't realize that the power supply terminal unscrew completely so you can put the ring terminal on it.
 
....not me.
lol today years old. So ring terminals on both ends and 10 wire should unlock the 10a capability of my dc suppy?

Yep. You can unscrew the banana plug and fit a ring terminal behind, like this:

bindingpostwire-1.jpeg
 
Even though I have good #10 AWG wire with ring terminals on each end, I found that plugging in the banana connector with alligator clips on top of that also helps. Two paths, less resistance.
 
Thanks for all the advice, I swapped out the alligators for some #6 awg w/ ring terminals I had lying around. I set it to 3.65v and hooked it up. It immediately jumped to CC mode at 3.49v and ~10amps. The multimeter is reading 3.369v, is this normal and to be expected? Thank you!
8F6D0B88-6C04-421B-B1CB-86CDFD229E07.jpeg4D3790A0-D037-465A-A8E8-F69B6C937820.jpeg
 
I set it to 3.65v and hooked it up. It immediately jumped to CC mode at 3.49v and ~10amps. The multimeter is reading 3.369v, is this normal and to be expected?

Yes, that's fine. Remember: don't adjust your supply while it's hooked up.
Also, all the way to 3.65V is not really necessary - you could do 3.55V just as well.
 
Thanks for all the advice, I swapped out the alligators for some #6 awg w/ ring terminals I had lying around. I set it to 3.65v and hooked it up. It immediately jumped to CC mode at 3.49v and ~10amps. The multimeter is reading 3.369v, is this normal and to be expected? Thank you!
Did your original, smaller wires get warm?

Those extra 5 amps went somewhere on something so short. Perhaps 15 watts of loss. I can't remember if my original, small power supply wires got warm.
 
Those extra 5 amps went somewhere on something so short.
There are no '5 extra amps". In his original set-up, the power supply was in Constant Voltage mode and limited the current to hold the voltage.
In the new set up the power supply is in Constant Current mode and supplies a lot more current.
 
I represent that remark.
redface3.gif
Even worse, some work this way and some don't. My Riden 6012 and 6018 have jacks that don't unscrew all the way, so I had to use spade lugs. It wasn't until someone told me that I realized they had listened, and the ones on the 6024 do indeed unscrew allowing the use of ring terminals. So, don't feel lonely.
 
I built a top balancer but it was way too much work. Good for 80 amps @ 3.65 volts. Gets it done in hours, not a week. F74B63F1-67F1-4739-9991-EBDA0045A3F8.jpeg2B1C748C-982B-4E0F-B510-C09E2EF8784C.jpeg
 
Last edited:
That’ll probably work, but you better have a secondary/backup voltage shutoff. Don’t trust anything. Voltages near finish can rocket up in seconds.
 
It may not act like a true cc/cv power supply. Some switching power supplies can be fickle. You don’t want fickle around thousands of dollars worth of cells. You get what you pay for.
 
this thread reminded me of another thing to upgrade:
tonight >>> I just changed the banana plug and alligator clamps on the Riden 6024 to 10AWG silicone wires with 30amp rated copper ring terminals and the difference was truly amazing... when I turned it back on with the same settings the watts charging went up 4 times (vs the banana clip and alligator clamps) and was instantly on constant current vs constant voltage....
I turned the voltage back down to 3.40 for overnight charging of the new LF280k version 3 cells.... I am charging two cells at a time connected in parallel.... in preparation for top balancing....
the red and black silicone-insulated pure copper wire was tinned also, >>>> but the only thing was getting all of the tiny strands in the terminals was a small struggle.
I used a 10-ton hydraulic crimper with 6mm dies and it worked great...
Tomorrow, I will add the heat shrink to the exposed copper to improve it a bit...
I made them 24-inches long as I find it sometimes a challenge locating the benchtop Riden 6024 in a good location and I think you will benefit from the extra length.... maybe even longer would have been better... just my opinion for more comfortable positioning of things! 🤔
thanks for the reminder.....
 

diy solar

diy solar
Back
Top