


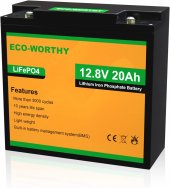
A friend purchased a older TailG electric scooter for a deal however the batteries were no longer holding charge. We assumed it was the batteries but after disassembly of the charger it has 2 blown capacitors. This was not discovered until after purchasing 4 LiFePo4 batteries to replace the originals with and a charger compatible with those batteries that had a built in BMS.
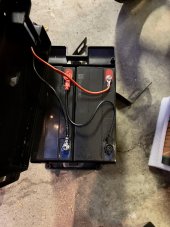
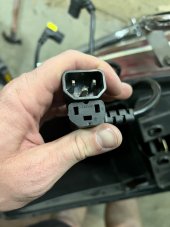
The batteries were ran in a configuration of two separate series and bridged by the charge cable that also attached to the scooter. After initial charge of all batteries and hooking up to the scooter the it ran like a champ. However the new charger did not work, we are assuming it had a configuration error.
To ensure that we are using one that will work correctly we are reaching out to the forum for its knowledge and expertise.
Included are images showing the new batteries as well as a crude diagram of how the original wiring was performed. From what we've watch on the forum's YouTube it appears we may be able to use a variable DC Power Supply to perform charging as the batteries all contain their own BMS.
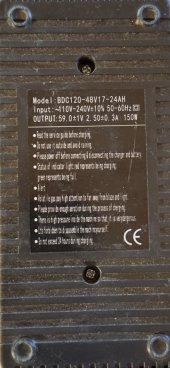
Each battery is 12v, 20ah, and linked together in series. When checked by multimeter we see 52.6v. Included last in the series of images is the original charger showing the specifications. Included image of the battery, and link where was sourced.
tl;dr
What charger would be right for this type of battery build?
The batteries were ran in a configuration of two separate series and bridged by the charge cable that also attached to the scooter. After initial charge of all batteries and hooking up to the scooter the it ran like a champ. However the new charger did not work, we are assuming it had a configuration error.
To ensure that we are using one that will work correctly we are reaching out to the forum for its knowledge and expertise.
Included are images showing the new batteries as well as a crude diagram of how the original wiring was performed. From what we've watch on the forum's YouTube it appears we may be able to use a variable DC Power Supply to perform charging as the batteries all contain their own BMS.
Each battery is 12v, 20ah, and linked together in series. When checked by multimeter we see 52.6v. Included last in the series of images is the original charger showing the specifications. Included image of the battery, and link where was sourced.
tl;dr
What charger would be right for this type of battery build?
Attachments


Last edited: