jgriffin
New Member
- Joined
- Jan 28, 2021
- Messages
- 46
Hey everyone. This is my first attempt at a Solar Power System (Hence the 36v!). I’m too stubborn to give up on it, so I’m going to be updating my progress as I go.
Equipment purchase so far:
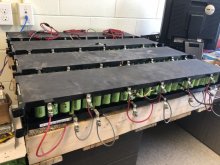
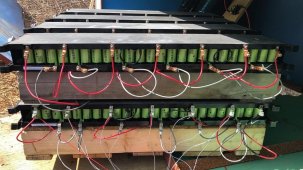
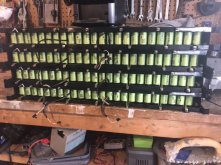
8 - A123 used Hybrid bus modules. 96 LifePo4 Cells, 12s8p. Originally rated just shy of 750 wh, but expecting 450-500 usable. If more, great! Will run between 3.0 and 3.55v.
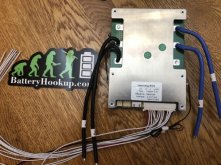
12s Smart BMS with low voltage cutoff.
3kw Reliable 36v Inverter (Very limited options!).
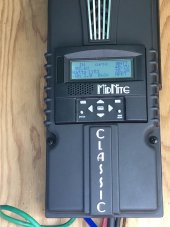
Renogy Rover 60 amp mppt charge controller.
21 - Silfab 265 watt mono B-Grade solar panels. Because of my remote location, it’s best just get a pallet and sell off what I don’t need. I’m thinking a 3s3p configuration should work, each panel open voltage is 38v, and just over 9 amp. 4s would put me at 152v open voltage, better safe than sorry.
Cheap A/C variable rate charger. Some various breakers, gauges, Bluetooth adapter for BMS are on the way. Anyone shopping in Canada, look out for hidden FedEx fees getting stuff from the US! Ouch.
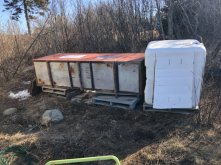
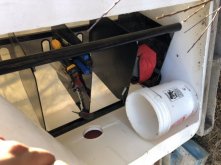
We typically use IBC cages for firewood, and the plastic inside gets tossed. I fashioned out a door quickly and stuffed an entertainment rack destined for the landfill into it. This was going to be my initial place for batteries and equipment. My father come along, shook his head, and convinced me to use a metal shipping crate his tarp shed arrived in. Much better idea. I’ll rigid foam insulate an area big enough for the equipment, put up some plywood, attach things properly.
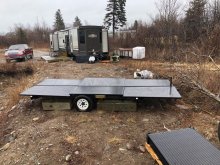
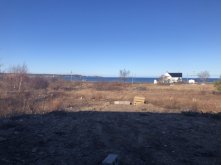
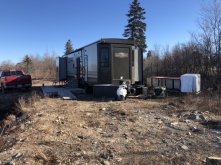
We’re on an island in Southern New Brunswick, Canada. It’s actually geographically closer to Maine. This is for my in-laws who have been having some health issues lately, so I’m trying to make things as easy as possible for them.
The RV was on a nearby property for years, but this is the first year for this lot in particular. I’m hoping to figure out a gravity fed IBC system for water, want to avoid using a pump if possible.
Any and all feedback is greatly appreciated! I’d like to thank Will for sharing his wealth of information to us all. I’m actually a lineman who works on the grid daily, so this is a new and exciting challenge!
Equipment purchase so far:
8 - A123 used Hybrid bus modules. 96 LifePo4 Cells, 12s8p. Originally rated just shy of 750 wh, but expecting 450-500 usable. If more, great! Will run between 3.0 and 3.55v.
12s Smart BMS with low voltage cutoff.
3kw Reliable 36v Inverter (Very limited options!).
Renogy Rover 60 amp mppt charge controller.
21 - Silfab 265 watt mono B-Grade solar panels. Because of my remote location, it’s best just get a pallet and sell off what I don’t need. I’m thinking a 3s3p configuration should work, each panel open voltage is 38v, and just over 9 amp. 4s would put me at 152v open voltage, better safe than sorry.
Cheap A/C variable rate charger. Some various breakers, gauges, Bluetooth adapter for BMS are on the way. Anyone shopping in Canada, look out for hidden FedEx fees getting stuff from the US! Ouch.
We typically use IBC cages for firewood, and the plastic inside gets tossed. I fashioned out a door quickly and stuffed an entertainment rack destined for the landfill into it. This was going to be my initial place for batteries and equipment. My father come along, shook his head, and convinced me to use a metal shipping crate his tarp shed arrived in. Much better idea. I’ll rigid foam insulate an area big enough for the equipment, put up some plywood, attach things properly.
We’re on an island in Southern New Brunswick, Canada. It’s actually geographically closer to Maine. This is for my in-laws who have been having some health issues lately, so I’m trying to make things as easy as possible for them.
The RV was on a nearby property for years, but this is the first year for this lot in particular. I’m hoping to figure out a gravity fed IBC system for water, want to avoid using a pump if possible.
Any and all feedback is greatly appreciated! I’d like to thank Will for sharing his wealth of information to us all. I’m actually a lineman who works on the grid daily, so this is a new and exciting challenge!
Attachments
-
 E890DB03-84AF-40D7-91E5-A2F13B05A2D2.jpeg93.9 KB · Views: 50
 -
 5FC00A8E-95BC-4356-9ECA-44185EE4E24E.jpeg101.3 KB · Views: 46
 -
 91D4F1C8-419D-43F2-B26B-F1D05E1A3D3F.jpeg52.2 KB · Views: 41
 -
 BC7FAA17-7F60-454F-839D-CD3CEB7F4AE7.jpeg111.7 KB · Views: 37
 -
 15FF4433-BF0C-47D4-A3C5-B25EC19BF464.jpeg62 KB · Views: 41
 -
 EA2E7A92-789E-436E-BE11-4F647D78CD5F.jpeg112.9 KB · Views: 48