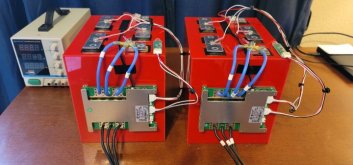
You are using an out of date browser. It may not display this or other websites correctly.
You should upgrade or use an alternative browser.
You should upgrade or use an alternative browser.
Xuba cells with Laser welded bus bars
- Thread starter pmtco2
- Start date
90 days??? Sheesh. Most of us were getting the delivery in about 45 days.

Maersk Essen Arrives in Mexico with Collapsed Containers
The Maersk Essen arrived this week at an anchorage at Mexico’s Port of Lazaro Cardenas after losing some 750 containers overboard as it sailed across the Pacific Ocean earlier this...
 gcaptain.com
Quick update, it's been almost 90 days since I ordered these packs from Xuba. Received a note from them this week stating the cargo ship had an "accident" and will be in Mexico for repairs until sometime in March.
Bleh.
Latest reports are it's repaired and heading towards LA. ETA in LA port on march 4th.
They are currently checking if they can bypass the port queues at LA to speed things up (LA Port is supposed to be congested atm)
ArthurEld
Solar Wizard
Welded is probably ok if done right. Probably less trouble than screws.
If they are already top balanced, just connect and use for 10 years.
If they are already top balanced, just connect and use for 10 years.
Fascinating study that isn't behind a pay wall. Thanks for sharing. Now if I could just afford (and power) a 4 kilowatt industrial laser. The benefits of laser welding outweigh the downside if done properly (in particular for high corrosion environments like high humidity coastal environments). But the key is the phrase "done properly". Judging by the quality of the one example that I have seen from Xuba, that is not likely.Yeah, I was curious about how laser welding works, and stumbled across this:
https://www.mdpi.com/2313-0105/6/3/47
Those appear to be "lap welds". I won't pretend that I have read the whole document yet, but it looks like it was just recently published.
I think the key here, since these batteries will be mounted inside a travel trailer, is keeping the cells from jiggling independently of one another. Too much of that nonsense, and either the weld or the cell terminal itself will just break loose. If they are gonna jiggle, they need to jiggle as a whole pack.
If I compress the packs slightly, and then mount them with some type of vibration absorption foam between the packs and the floor of the trailer, it should be enough.
I don't plan on any off-roading with the trailer obviously, but washboard roads are the worst and I have seen the havoc they can wreak on the inside of a travel trailer.
ArthurEld
Solar Wizard
Fascinating study that isn't behind a pay wall. Thanks for sharing. Now if I could just afford (and power) a 4 kilowatt industrial laser. The benefits of laser welding outweigh the downside if done properly (in particular for high corrosion environments like high humidity coastal environments). But the key is the phrase "done properly". Judging by the quality of the one example that I have seen from Xuba, that is not likely.
I couldn't wait for cheap simple batteries. But they will be here one day
Packs finally arrived!!
Little over 100 days to get them to Texas.
They look to be in really good shape, I can see intact QR codes on the cells peeking through the outer plexi case. They are very solid and feel like the cells are are secured inside somehow. And, you can see what appears to be some kind of goop (adhesive?) oozing out the top in one of the pics.
Gonna put a BMS on one of them and charge it up!
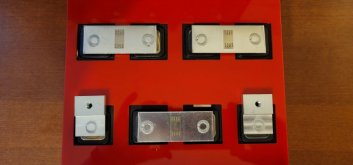
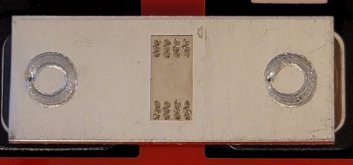
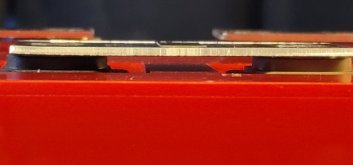
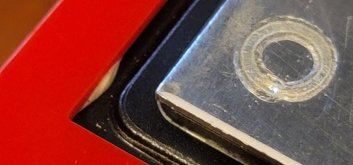
Little over 100 days to get them to Texas.
They look to be in really good shape, I can see intact QR codes on the cells peeking through the outer plexi case. They are very solid and feel like the cells are are secured inside somehow. And, you can see what appears to be some kind of goop (adhesive?) oozing out the top in one of the pics.
- Pack 1
- Whole Pack Voltage - 13.06
- Cell 1 - 3.27
- Cell 2 - 3.26
- Cell 3 - 3.27
- Cell 4 - 3.23
- Pack 2
- Whole Pack Voltage - 12.86
- Cell 1 - 3.21
- Cell 2 - 3.21
- Cell 3 - 3.21
- Cell 4 - 3.21
Gonna put a BMS on one of them and charge it up!


Top balance is done on Pack 1.
Pack 1 Voltages (after 24hrs)
Just for kicks, I did a little test. I made a couple sets of my own test leads, and I did a little head-to-head with the banana plugs that came with the power supply.
I made a set of leads with rings on both ends, but I also wanted to try these 10a rated pure copper alligator clips:
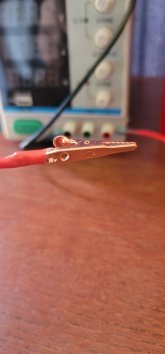
So for the following test, the same cell is being charged, and same PS settings for both tests:
Factory leads (alligator clips)
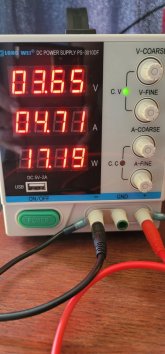
Homemade leads (12AWG wire, ring connector on the PS, copper alligator clips)
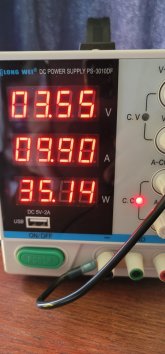
It’s interesting to me that I can get pretty much full 10amps from the PS just using copper alligator clips clamped onto the battery terminals (well, in my case….bus bars). It says to me that the surface area of the attachment to the battery is not critical to getting full current.
What is it that sucks about the factory leads then? The wire? The stainless alligator clips? The connection to the PS?
Pack 1 Voltages (after 24hrs)
- 3.37
- 3.43
- 3.42
- 3.49
Just for kicks, I did a little test. I made a couple sets of my own test leads, and I did a little head-to-head with the banana plugs that came with the power supply.
I made a set of leads with rings on both ends, but I also wanted to try these 10a rated pure copper alligator clips:

So for the following test, the same cell is being charged, and same PS settings for both tests:
Factory leads (alligator clips)

Homemade leads (12AWG wire, ring connector on the PS, copper alligator clips)

It’s interesting to me that I can get pretty much full 10amps from the PS just using copper alligator clips clamped onto the battery terminals (well, in my case….bus bars). It says to me that the surface area of the attachment to the battery is not critical to getting full current.
What is it that sucks about the factory leads then? The wire? The stainless alligator clips? The connection to the PS?
The Long Wei supplied alligator leads are much better than most.Top balance is done on Pack 1.
Pack 1 Voltages (after 24hrs)
Thanks to LuthJ for the top balance procedure, worked flawlessly.
- 3.37
- 3.43
- 3.42
- 3.49
Just for kicks, I did a little test. I made a couple sets of my own test leads, and I did a little head-to-head with the banana plugs that came with the power supply.
I made a set of leads with rings on both ends, but I also wanted to try these 10a rated pure copper alligator clips:
View attachment 41496
So for the following test, the same cell is being charged, and same PS settings for both tests:
Factory leads (alligator clips)
View attachment 41497
Homemade leads (12AWG wire, ring connector on the PS, copper alligator clips)
View attachment 41498
It’s interesting to me that I can get pretty much full 10amps from the PS just using copper alligator clips clamped onto the battery terminals (well, in my case….bus bars). It says to me that the surface area of the attachment to the battery is not critical to getting full current.
What is it that sucks about the factory leads then? The wire? The stainless alligator clips? The connection to the PS?
Despite that, I have been using 10 gauge copper wire with ring connectors and find that the power supply will stay in constant current mode much longer, the better the connection.
Of all the cheap power supplies, you got the one with the best vendor supplied leads. If you must use alligator clips, you picked the right supply.
Thread 'Cheap power supply for top balancing (tested and works well).' https://diysolarforum.com/threads/cheap-power-supply-for-top-balancing-tested-and-works-well.19846/
Top balance is done on Pack 2.
Pack 2 Voltages (after 24hrs)
Pack 2 Voltages (after 24hrs)
- 3.34
- 3.43
- 3.38
- 3.38
I'm hoping you ordered 170AH packs?Top balance is done on Pack 2.
Pack 2 Voltages (after 24hrs)
Also completed capacity test on Pack 1, it was over 178ah (!!) when I stopped the test at 12.2v before it hit the BMS low voltage cutoff. Possible I could have pushed it to 180ah if I let it go all the way to 12v.....but I didn't really see any point in that.
- 3.34
- 3.43
- 3.38
- 3.38
176ahI'm hoping you ordered 170AH packs?
Thermodynamical
:̸̢̤̩̹͙̞̲̫̓̽
- Joined
- May 26, 2020
- Messages
- 36
I've been looking forward to this thread; thanks for taking one for the team and risking buying them. I hope they end up working out since this is kind of a newer thing here.
Thanks, I really appreciate that, especially as a lifepo4 newb.
Also, an update....
Pack 2 tested out to 180ah!!
I have noticed the voltage differential on both of these packs seems to be pretty good, as in less than 10ma differences between the cells.
If I didn't mention it before, these packs weren't top balanced, but they were pretty close. After charging up both of them at 10a with the BMS attached until one cell hit 3.65, it only took about 20 mins (give or take) per cell to bring the others up to the same state.
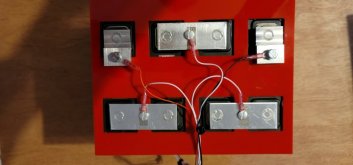
Another pic, showing how I attached the BMS leads. Aluminum chicago screws holding the leads to the bus bars, FYI.

Thermodynamical
:̸̢̤̩̹͙̞̲̫̓̽
- Joined
- May 26, 2020
- Messages
- 36
Good stuff. Nice looking setup. Did you by chance test internal resistances out of curiousity?
I did not, I don't have a tester that can do that unfortunately.Good stuff. Nice looking setup. Did you by chance test internal resistances out of curiousity?
Similar threads
- Replies
- 18
- Views
- 1K


