Oh yes. Zip-Chem recommended by Boeing, the builder of 737-MAX.  . There is this; NO-OX-ID A-Special = https://www.amazon.com/gp/product/B00HDF9EXE/ref=ppx_yo_dt_b_asin_title_o04_s00?ie=UTF8&psc=1
You are using an out of date browser. It may not display this or other websites correctly.
You should upgrade or use an alternative browser.
You should upgrade or use an alternative browser.
DIY Busbar
- Thread starter Mrdanielmh
- Start date
Ampster
Renewable Energy Hobbyist
I spent many years offshore sailboat racing where stainless fasteners connecting into aluminum spars was a constant concern and safety issue so i agree it needs to be addressed in the design phase.Having spent many years in the Navy Avionics world, then living in Florida, corrosion is an ever present destroyer.
Galvanic corrosion in particular needs to be addressed in the design phase it needs only moisture in the air like humidity to come about.
I am more concerned about tensile strength of stainless holding my aluminum buss bars to the aluminim terminal tops where I want the greatest surface area to conduct heat and electricity. It actually serves my purpose if there is some corrosion that creates friction or even some galling because I do not want the studs to turn when torqueing them to their Nm spec. I wasn't able to find aluminum studs anyway. My pack will be in a cabinet in an enclosed garage whose air has less humidity than the surrounding air. I am confident in my design but do encourage others to follow your suggestions.If you think that "sealing" your battery posts eliminates the opportunity for galvanic corrosion, read about F16 jets falling out of the sky due to the design mating tin pins to gold sockets inside mil spec "sealed" connectors.
Last edited:
You didn't read the article I linked then.I tried but can find no reference to failure of tin pins mated to gold sockets.
Towards the end of the article, it refers to MIL-L-87177A which is SuperCorrA. I have a can of this that I use. It's a little better than the ZipChem, but not 4X the price better.

Just an FYI post below - hopefully helpful to some. Note electricity and water are involved as well as acid - make sure you know what you are doing and if you don't, then don't do it, or at least don't blame me if you hurt yourself. Wear gloves and eye protection and don't zap yourself.
I've seen quite a few comments in response to people proposing DIY busbars from copper pipes citing concern over long term oxidation of the exposed copper. I've had a go this week at tinning some DIY busbars made from copper pipe to address this concern - see below.
I found it to be very cheap and easy and the results were surprisingly good. The below is from 1/2 inch pipe from a hardware store. OD= 12.7mm, ID= 10.88mm, so total copper cross sectional area = 33.7mm. Based on this link, the ampacity of the full cross section is probably somewhere around 180A. I'm also planning to do some with 3/4 inch pipe which will have a 57mm cross sectional area for an ampacity of 250A.
Planning on doing some tests in the next few weeks to test resistance and how much they heat under load.
My process pretty much followed the one shown on Hackaday here.
Equipment list (cost in Aussie dollars, so take about a third off for USD):
- 5L hydrochloric/muriatic acid (32% acid by volume)= $15
- Old USB cable = free
- Old icecream container = free
- 100gm of tin granules from ebay =$12 - would do a lot of bars
- Say 1m of small gauge wire = nearly free
- 1.5m length of 1/2inch copper pipe = $12
- Some electricity = nearly free
Total cost = about AU$40 but lots of tin and acid left over
Process:
1) Melt some tin on a spoon and pour out onto baking paper to make 2 x rough tin bar anodes (don't need to be a nice shape, just have some surface area and be able to connect to a wire). You can skip this step if you've bought tin strips - I couldn't find any.
2) Dissolve some tin - I probably did about 40g - in a few hundred ml of acid - think I used about 350ml. Suggest leaving outside as gas is produced in the process here. Took a couple of days for me but I think I could have used much less tin. Once the tin has mostly dissolved, make a 1:10-ish mix with the tin/acid electrolyte and water - this is your plating solution.
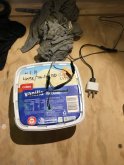
3) Prepare your plating vessel. I just used an old ice cream container with 4 holes drilled in the top that I could use to suspend the anodes and busbar through. You want to locate the holes so that you can suspend one anode on each side of the busbar to get even plating distribution and save having to turn the busbar around during plating. See photos.
4) Cut your USB cable and connect 2 small gauge wires to the positive and 2 small gauge wires to the negative. Put the positive wires through the appropriate holes in the lid and connect to your tin anodes - I just drilled small holes in my tin and twisted the wires through. You obviously want the length to be such that the anodes are suspended in the solution when you're plating.
5) Prepare your busbar. I used the below process for my results.
- Cut appropriate length of pipe;
- Squash with vice and/or hammer;
- Sand with fine grit sand paper;
- Sit in un-diluted acid for about a minute to pickle;
- Put in water bath to wash acid off.
4) Put negative wires through the remaining holes in the lid and connect to the bus-bar. I just connected the wires through the holes that I'd drilled in the busbar, but the wire then blocks the tin from plating the area under the wire, so had to move the wires a couple of times to get a full coating. Next time I think I'll solder the wires to the ends of the bar and then cut and sand off afterward.
5) Put the lid on. The busbar and tin anodes should all be suspended in the solution, with the bar between the two anodes.
6) Plug in the USB cable and let the magic happen. Note in my process I had a lot of large grain tin crystals (see them sitting in the bottom of the container) form on the bar during plating. I suspect this is either due to me dissolving too much tin to begin with, or the pH of my solution being sub-optimal, but it's not a big deal. I just found I had to periodically rub off the crystals to make sure I got a good even coating. And I'll reuse the tin in the base of the container.
7) Once you're happy with how thick the plating looks (about 4 hrs for me), take the bar out, rub off any crystals (and keep for reuse!), wash solution off in water bath, sand back with fine grit paper to make it nice and shiny.
And that's it. A bit of effort, but quite fun and now I'm set up, very quick and cheap to do more.
Ice cream container wiring setup (1A plug)
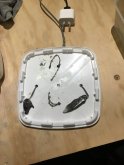
Underside of lid - wires connected to 2 anodes (post plating of 2 bars) and bare wires to be connected to busbar
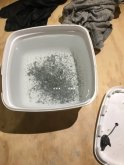
Tin crystals left over after plating 2 bars
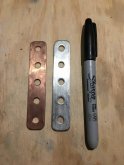
Un-plated on the left, Finished product on the right
I've seen quite a few comments in response to people proposing DIY busbars from copper pipes citing concern over long term oxidation of the exposed copper. I've had a go this week at tinning some DIY busbars made from copper pipe to address this concern - see below.
I found it to be very cheap and easy and the results were surprisingly good. The below is from 1/2 inch pipe from a hardware store. OD= 12.7mm, ID= 10.88mm, so total copper cross sectional area = 33.7mm. Based on this link, the ampacity of the full cross section is probably somewhere around 180A. I'm also planning to do some with 3/4 inch pipe which will have a 57mm cross sectional area for an ampacity of 250A.
Planning on doing some tests in the next few weeks to test resistance and how much they heat under load.
My process pretty much followed the one shown on Hackaday here.
Equipment list (cost in Aussie dollars, so take about a third off for USD):
- 5L hydrochloric/muriatic acid (32% acid by volume)= $15
- Old USB cable = free
- Old icecream container = free
- 100gm of tin granules from ebay =$12 - would do a lot of bars
- Say 1m of small gauge wire = nearly free
- 1.5m length of 1/2inch copper pipe = $12
- Some electricity = nearly free
Total cost = about AU$40 but lots of tin and acid left over
Process:
1) Melt some tin on a spoon and pour out onto baking paper to make 2 x rough tin bar anodes (don't need to be a nice shape, just have some surface area and be able to connect to a wire). You can skip this step if you've bought tin strips - I couldn't find any.
2) Dissolve some tin - I probably did about 40g - in a few hundred ml of acid - think I used about 350ml. Suggest leaving outside as gas is produced in the process here. Took a couple of days for me but I think I could have used much less tin. Once the tin has mostly dissolved, make a 1:10-ish mix with the tin/acid electrolyte and water - this is your plating solution.
3) Prepare your plating vessel. I just used an old ice cream container with 4 holes drilled in the top that I could use to suspend the anodes and busbar through. You want to locate the holes so that you can suspend one anode on each side of the busbar to get even plating distribution and save having to turn the busbar around during plating. See photos.
4) Cut your USB cable and connect 2 small gauge wires to the positive and 2 small gauge wires to the negative. Put the positive wires through the appropriate holes in the lid and connect to your tin anodes - I just drilled small holes in my tin and twisted the wires through. You obviously want the length to be such that the anodes are suspended in the solution when you're plating.
5) Prepare your busbar. I used the below process for my results.
- Cut appropriate length of pipe;
- Squash with vice and/or hammer;
- Sand with fine grit sand paper;
- Sit in un-diluted acid for about a minute to pickle;
- Put in water bath to wash acid off.
4) Put negative wires through the remaining holes in the lid and connect to the bus-bar. I just connected the wires through the holes that I'd drilled in the busbar, but the wire then blocks the tin from plating the area under the wire, so had to move the wires a couple of times to get a full coating. Next time I think I'll solder the wires to the ends of the bar and then cut and sand off afterward.
5) Put the lid on. The busbar and tin anodes should all be suspended in the solution, with the bar between the two anodes.
6) Plug in the USB cable and let the magic happen. Note in my process I had a lot of large grain tin crystals (see them sitting in the bottom of the container) form on the bar during plating. I suspect this is either due to me dissolving too much tin to begin with, or the pH of my solution being sub-optimal, but it's not a big deal. I just found I had to periodically rub off the crystals to make sure I got a good even coating. And I'll reuse the tin in the base of the container.
7) Once you're happy with how thick the plating looks (about 4 hrs for me), take the bar out, rub off any crystals (and keep for reuse!), wash solution off in water bath, sand back with fine grit paper to make it nice and shiny.
And that's it. A bit of effort, but quite fun and now I'm set up, very quick and cheap to do more.
Ice cream container wiring setup (1A plug)

Underside of lid - wires connected to 2 anodes (post plating of 2 bars) and bare wires to be connected to busbar

Tin crystals left over after plating 2 bars

Un-plated on the left, Finished product on the right

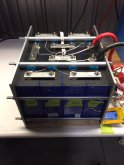
I decided why not just overkill it. I used this 0.25" x 1" tin plated copper busbar:
https://www.onlinemetals.com/en/buy...edge-110-h02-tinned-full-round-edge/pid/23802
I bought a 72" bar to optimize shipping vs. material cost. I used less than half, but who knows I may build another pack. Cut to length and drilled holes. Price including shipping worked out to about $40 for my 1P8S 24V setup. To me it was worth the extra cost.
PS don't critique my BMS wiring, this is on the bench and will get better wiring when installed in my van.

Your chart seems to be at odds with everything I found when I was researching ampacity of bus bars. Most resources indicate 1.0A per mm2 of aluminum, and 1.6A per mm2 of copper.I found it to be very cheap and easy and the results were surprisingly good. The below is from 1/2 inch pipe from a hardware store. OD= 12.7mm, ID= 10.88mm, so total copper cross sectional area = 33.7mm. Based on this link, the ampacity of the full cross section is probably somewhere around 180A. I'm also planning to do some with 3/4 inch pipe which will have a 57mm cross sectional area for an ampacity of 250A.
Im not saying that you can't run 250A through that bus bar, but I'm pretty sure you are going to have a temperature rise that could get dangerous if you have any combustible materials nearby.
I look forward to seeing your test results. Please don't forget to monitor your temperature rise of the bus bars.
I hope anyone who tries to do their own electroplating follows all the safety precautions. The disposal of your waste is also very important. Research the environmental impact of this before you start. This stuff is dangerous.
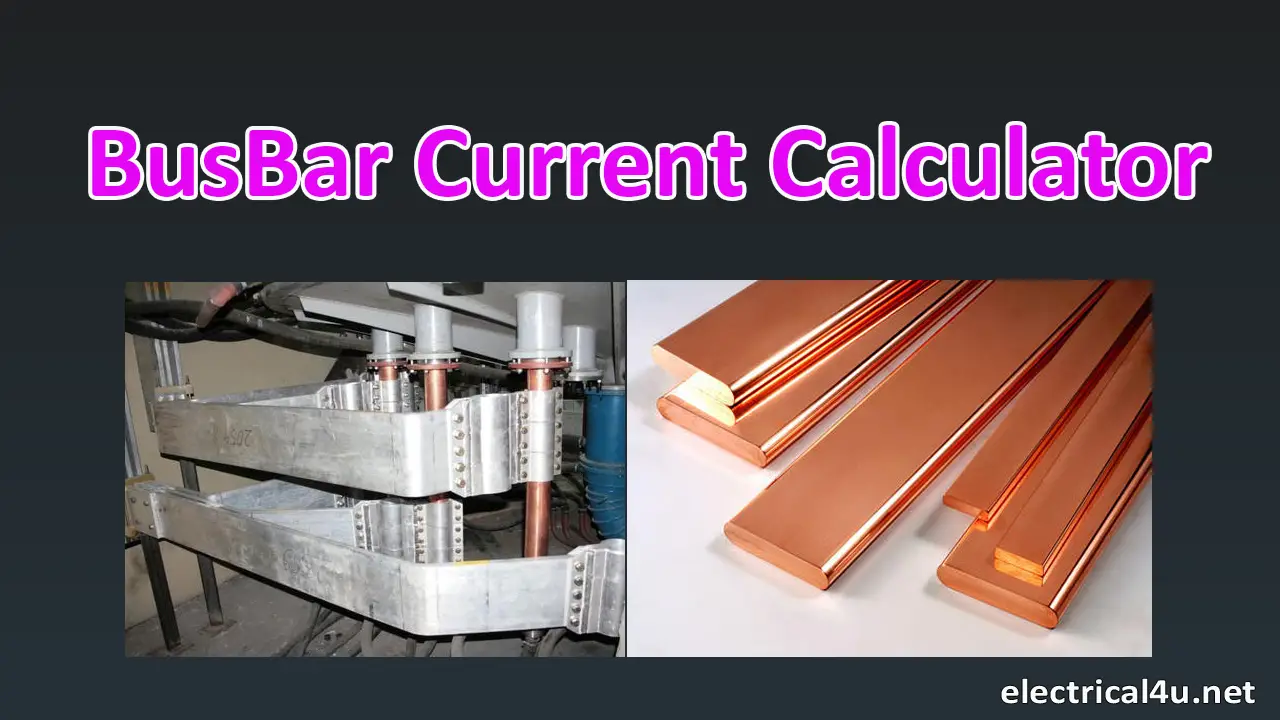
To provide a reference for my statement in post #27, I am providing a link to the bus bar calculator that I found to be useful.
 www.electrical4u.net

Busbar Current Calculator Online | Electrical4u
Enter the breadth and thickness of the busbar; do not enter the length of the busbar. Then press the calculate button, you get the aluminium or copper busbar
 www.electrical4u.net
Something that I've been pondering for my upcoming build.
Aluminum busbars instead of copper; cheaper , lighter and easier to work. The very first aluminum busbars were installed in 1895 at the Niagara Alcoa works, and were rated for 20,000 amps so they work.
True, aluminum has about twice the electrical resistance, but the service cable from the utility company into your house is aluminum wire, as are the wires for the high voltage power lines.
Dealing with the galvanic corrosion issue, if you nickel plate the copper lugs (easy to do at home) it prevents the corrosion.
Anyway, that's my plan.
Aluminum busbars instead of copper; cheaper , lighter and easier to work. The very first aluminum busbars were installed in 1895 at the Niagara Alcoa works, and were rated for 20,000 amps
True, aluminum has about twice the electrical resistance, but the service cable from the utility company into your house is aluminum wire, as are the wires for the high voltage power lines.
Dealing with the galvanic corrosion issue, if you nickel plate the copper lugs (easy to do at home) it prevents the corrosion.
Anyway, that's my plan.
I use nothing but aluminum buss bars with nickel bolts on copper studs and have not seen any corrosion ever. Here in California I am 30 miles from the ocean so we do get a small amount of salt air in the mix as well.
Make sure to use the right aluminum alloy. Most common AL stock is not going to be high enough Al content, so its conductivity is significantly lower.
Noalox is designed for aluminum when in contact with copper. I have not used it in this application myself, but I bet its more than enough protection in a dry environment. Galvanic corrosion requires moisture to become significant.
Noalox is designed for aluminum when in contact with copper. I have not used it in this application myself, but I bet its more than enough protection in a dry environment. Galvanic corrosion requires moisture to become significant.
Last edited:
Your chart seems to be at odds with everything I found when I was researching ampacity of bus bars. Most resources indicate 1.0A per mm2 of aluminum, and 1.6A per mm2 of copper.
Im not saying that you can't run 250A through that bus bar, but I'm pretty sure you are going to have a temperature rise that could get dangerous if you have any combustible materials nearby.
I look forward to seeing your test results. Please don't forget to monitor your temperature rise of the bus bars.
I hope anyone who tries to do their own electroplating follows all the safety precautions. The disposal of your waste is also very important. Research the environmental impact of this before you start. This stuff is dangerous.
I used the Blue Sea ampacity table for wire. 4/0 wire has a cross section area of 107 mm^2 and an ampacity of 445A for 105C insulation and 30C, and 378A when in an engine room which means 50C. This is from the ABYC standard used for marine applications. I trust it.Your chart seems to be at odds with everything I found when I was researching ampacity of bus bars. Most resources indicate 1.0A per mm2 of aluminum, and 1.6A per mm2 of copper.
So what's a summary of a good plan where I buy stuff online and am willing to drill and cut, but not eager to flatten pipe?
1) 1" copper with plating from online metals?
2) stainless studs and nuts?
3) some goop? Do I need some goop or is this going to make it last 30 years instead of 10?
Is there an all aluminum solution that eliminates the goop need?
1) 1" copper with plating from online metals?
2) stainless studs and nuts?
3) some goop? Do I need some goop or is this going to make it last 30 years instead of 10?
Is there an all aluminum solution that eliminates the goop need?
Ampster
Renewable Energy Hobbyist
No, aluminum oxidizes faster than copper but is easier for me to work so that is why I use aluminum buss bars. I have accumulated a 30 years supply of NoAlox because I keep misplacing it and buying another tube for the next project. I also use it on my bussbars on my service panels.Is there an all aluminum solution that eliminates the goop need?
John Frum
Tell me your problems
- Joined
- Nov 30, 2019
- Messages
- 15,233
I'm using dual rated aluminum mechanical lugs and NoAlox.Dealing with the galvanic corrosion issue, if you nickel plate the copper lugs (easy to do at home) it prevents the corrosion.
So far so good.
Time will tell.
I use 1/4 inch 6061 aluminum bought at a local metal yard cut it with a carbide tipped blade and my chop saw. Drill it with a standard metal drill bit. I have absolutely no corrosion or any other problems nuts and studs are as clean as the day i installed them a year ago well at least they were when I disassembled my original one and made a new one this week. I'm sorry if i am going against the recommendations of the pointy heads here that have to live by the books but it all works with no problems at all. This is the beauty of not knowing better.
6061 has great corrosion resistance. However its 25% lower conductivity than 6101 or similar alloys. So it should be sized 25% larger than 6101 or pure aluminum conductors.
Dry environment corrosion is painfully slow (like decades). Take a look at a residential breaker box indoors which is air conditioned and has aluminum ground bus bar, Typically they look fine.
Dry environment corrosion is painfully slow (like decades). Take a look at a residential breaker box indoors which is air conditioned and has aluminum ground bus bar, Typically they look fine.
Similar threads
- Replies
- 4
- Views
- 224
- Replies
- 4
- Views
- 346


