diy solar

diy solar

Just having fun... (please comment... I'm new to this)

Is this what you are referencing...

See these DIY power banks? What you want is the circuit board in them w/o the case. The USB ports are on the board. So you literally just connect your cell and then you can plug in a charger or load into the USB ports. Super simple. You will need to create your own case, though. But, you can get it running in seconds. You'll want to add a quick disconnect for your cell, such as an XT-60 connector. So, you'd solder one one end of that connection to the board. The other end to loose wires you would then bind to your cell posts. Then you plug in your battery with the XT-60 and it's live!
 
See these DIY power banks? What you want is the circuit board in them w/o the case. The USB ports are on the board. So you literally just connect your cell and then you can plug in a charger or load into the USB ports. Super simple. You will need to create your own case, though. But, you can get it running in seconds. You'll want to add a quick disconnect for your cell, such as an XT-60 connector. So, you'd solder one one end of that connection to the board. The other end to loose wires you would then bind to your cell posts. Then you plug in your battery with the XT-60 and it's live!
Here is an example. But shop around. You can get more ports on a single board, and some have nice displays. I'd look for one that showed the voltage of your cell if possible, and and easy way to turn on/off. If it doesn't come with a switch, you can simply add one to your connection between your quick disconnect and where you solder one end to the board. Otherwise, you'd have to disconnect the cell every time you are not using it. And the board could have an idle draw, especially if it has a display.

I don't know if these boards have any kind of LV protection for the cells. But, you could experiment if they don't say. Just never let the cell go below 2.5V. You could even test that, perhaps, with a single 18650 in case the test kills the cell. lol
 
Also, those super cheap $20 "MPPT" solar chargers with USB ports on them work really well. I've plugged in a 100W panel and charged all my phones directly on the port. But, if you create a power bank, you could actually charge it with a solar panel.

The only thing is I'm afraid to try two panels in series with those units, because they probably are not really MPPTs. The voltage could blow them. But, I've had no issue with a single 100W panel.
 
New
Here is an example. But shop around. You can get more ports on a single board, and some have nice displays. I'd look for one that showed the voltage of your cell if possible, and and easy way to turn on/off. If it doesn't come with a switch, you can simply add one to your connection between your quick disconnect and where you solder one end to the board. Otherwise, you'd have to disconnect the cell every time you are not using it. And the board could have an idle draw, especially if it has a display.

I don't know if these boards have any kind of LV protection for the cells. But, you could experiment if they don't say. Just never let the cell go below 2.5V. You could even test that, perhaps, with a single 18650 in case the test kills the cell. lol
New project!
 
Last edited:
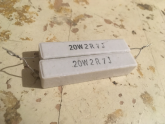
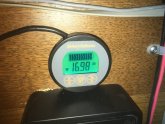
So first thing I did was to bring down the voltage of each cell to about 3 volts each with this...
1575238069028.png

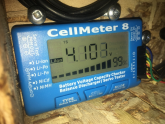
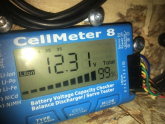
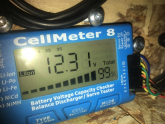
The i used my CellMeter to balance the cells to 0.01 volts of each other. The voltage displayed is incorrect I brought them down to 3.0X volts each which is the minumun=m documented

1575238272764.png

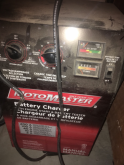
Then I charged the battery pack at 12 volts and 2 amps using a conventional car battery charger...
9j=keeping a good eye on it to not overcharge)
1575238470173.png

...and brought the battery pack up to 12.3 volts.
1575238349009.png

The I used the cell meter to re-balance the cells to 4.1x each... the max of each cell is 4.2 volts
1575238272764.png
 

Attachments

  • 1575238156560.png
    1575238156560.png
    649.8 KB · Views: 0
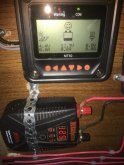
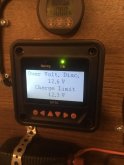
Also my MP50 is not showing the battery charged correctly...

IMG_1012.jpeg


I am not sure what setting I could have got wrong... I have set the charge limit to 12.3 so it should show me 100% at 12.3.

The shunt it configured that way and I see it display correctly
IMG_1011.jpeg
 
Paul.Barrette, what is the rope for along the ground? Glad I can just let my ducks and chicken free road no need for fencing saves me some work...
 
Paul.Barrette, what is the rope for along the ground? Glad I can just let my ducks and chicken free road no need for fencing saves me some work...
I am assuming that you are talking about the large rope in this photo...
AAB68D02-A1C5-455C-9F59-83DC57E978F5_1_105_c.jpeg

These are for the movement of my chicken coops. They are called chicken tractors and they are based on the plans of Farm marketing solutions...

Every day, I move the chicken tractor forward by pulling on this rope. This ensure that my chickens are always on clean and fresh grass. See the following video:
 
Yes ... that is what I want the maximum to be.

I have three lithium Ion cells that are rated to a max of 4.2 volta each and I do not want to exceed 4.1 volts each... hence the reason I set 12.3 volts for the battery pack.

That is what I set on the MP 50 bit the battery icon show it almost empty... but with a smilly face ?
Voltage display is what counts, the charger is on 'Float' so you get the happy face.
The battery icon is set up for Lead/Acid and won't show 'Full' until you hit around 13.2 volts, which would be bad for the batteries.
 
Limitation in my opinion... you should be able to configure the MP50 like the shunt.

(Just saying)

Thanks all for your input.

I'm goint to make a USB charger with my extra cell since I am 3s now..... photos to come.
 
Back
Top