diy solar

diy solar

Outback MX 60 soft button failure

OzSolar

Whatever you did, that's what you planned.
Joined
Jan 5, 2021
Messages
2,826
Location
Southwest MO
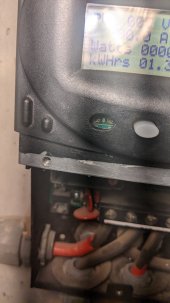
Does anyone have any easy tips for fixing the pesky prone to fail buttons on the Outback MX60? I'm talking about the predecessor to the Flex max 60.

I've got two units with useless buttons. Or does anyone know of an alternative to the pricey Outback Mate Programming tool? I can use it in lieu of the units buttons to program but don't have one of them.

1670424429351.png
 
Also had the same problem of a key no longer making contact, so I did an inelegant thing and 'cut' the problem soft key out.
Hope the attached pictures show what I did. I just used a skinny screwdriver to poke holes in the silicone and take the soft key out through the front. Then I put a couple copper 'leads on to make contact. I probably might go and get some silver paste to make a hopefully longer lasting solution, but this seemed way easier than disconnecting everything and disassembling the whole charge controller. Seems to make contact now, but have to press harder than the other keys.
 

Attachments

  • PXL_20230102_030452125.jpg
    PXL_20230102_030452125.jpg
    47.3 KB · Views: 16
  • PXL_20230102_030319980.jpg
    PXL_20230102_030319980.jpg
    107.6 KB · Views: 16
FYI, You don't have to short the traces on both left and right sides of center.

Not that it makes all that much difference with the nifty tool you made
 
FYI, You don't have to short the traces on both left and right sides of center.

Not that it makes all that much difference with the nifty tool you made
That's good to know. I actually think I'll try and use some conductive fast drying paste because I'm worried the copper isn't 'springy' enough and might eventually wear out the traces on the circuit board.
But, for now it lets me add in the battery I want to add.
 
The conductive pad on the soft key is common in remote controls, calculators, etc. If you have a junk one somewhere, you can scavenge a pad from it. Glue that to the end of dowel, pencil, chopstick, etc to reach into the hole.

If you use the conductive paste, make sure it can't flake off and become loose in the device.
 
I had the same problem with FM 80, sent it into Outback and refurbed/repaired for flat rate of 90$
That was my original hope as I've sent many back to them over the years to get fixed. Getting a hold of them was the first thing I did but was immediately told don't they support models that old and referred me to a distributor to purchase of FM80. :(

FWIW: I just got a Classic 250 back from Midnite that had blown FETS. Somewhere around $225 to get that replaced.
 
FYI, You don't have to short the traces on both left and right sides of center.

Not that it makes all that much difference with the nifty tool you made
Sorry, I'm not following. Are you saying short across the center rectangle to the left or the right trace?

Or perhaps it's short the interlocking fingers of the left or right trace?

Thank you


1672678206725.png
 
Sorry, I'm not following. Are you saying short across the center rectangle to the left or the right trace?

Or perhaps it's short the interlocking fingers of the left or right trace?

Thank you


View attachment 127511
What I meant was that left and right interlocking fingers are in parallel so only either the left or either the right need to be shorted. If you can get an Ohm meter in there I think that is what you'll see.

Also, a q-tip swab with alcohol rubbing on those fingers should clean them up.

These things are not always the easiest to take apart and put back together. That is what I remember as I have done that many times.

The FM80 keypads are the same as for the MX60

boB
 

diy solar

diy solar
Back
Top