diy solar

diy solar

Caravan LIFEPO4 Power System Upgrade

matthewnz

New Member
Joined
Jan 7, 2020
Messages
26
Hello all, I thought I would share my project with you. I have a 2004 caravan with 150W solar and a sealed lead acid battery 12V system.

I’m going to upgrade the battery to a 160Ah LIFEPO4 battery I made out of prismatic cells. I’m also going to replace some other components, including a new Victron 100/30 MPPT controller, a Victron 10A AC battery charger, and a new fuse distribution block as well as some other bits and pieces.

I’m not planning on upgrading the solar panel, but I will if I need to. I won’t have an inverter because I have no need for one. I have a 90L 12V compressor fridge and I’m going to convert the filament lighting to LED. Apart from charging phones and a fan (no AC) I don’t have high draw devices.

I welcome any constructive feedback or questions!
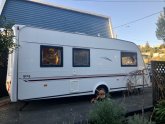
EFD0FE3F-C332-4E1D-956A-6A9C6DE66298.jpeg
Elddis Odyssey 505

Battery
After watching lots of videos, mainly by Will Prowse, I decided to make my own LIFEPO4 battery. The main reason for this decision was cost. I also enjoy working with electronics so I thought it would be fun. I managed to find four used 160Ah prismatic cells on TradeMe, which is the New Zealand equivalent of eBay. I know it’s a risk buying second hand, but they were very cheap (US$200) and had come from a piece of medical equipment, which hopefully means they were replaced as part of a scheduled replacement program and not because they had failed. My caravan power needs are modest and if I have to run them at reduced capacity, that’s ok. I can go down to 100Ah without much trouble.

I bought a 4S 100A BMS recommend by Will. I’ll need to balance the batteries before I connect them to the BMS.
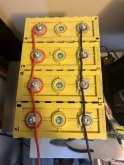
66C20800-5603-4148-A6CA-12B5F1836B0D.jpeg
Batteries connected in parallel before I top balance them

Next steps are:
  • Finish balancing the cells
  • Connect BMS
  • Construct battery case for cells and plywood backing for power system components
  • Install new solar controller, battery charger, fuse block and other controllers
  • Upgrade lighting to LED
  • Test it out

Stay tuned for updates!
 
Welcome to the forum , M. Project looks interesting. Our ( us in the southern hemisphere ) power requirements are much different from our cousins in North America where they have ‘houses on wheels‘ requiring small power stations to run their equipment ;) . I am following your build with interest as our caravan fridge is a Dometic absorption type running on gas or 220v. I have never tried to run it on gas whilst towing and do not know if it is wise ? The problem is that during a 4 - 6 hour journey the goods in the fridge start getting warm. I am working on a 100 Ah portable battery box and Victron inverter for the fridge when towing. We do camp ‘off grid‘ sometimes , then the fridge runs on gas and the rest of the van on the built in 105Ah 12v battery system. I have also converted all the lighting to LED type.
We have 240 watts of solar on the Prado’s roof that we can connect to the caravan battery system but no solar on the roof of the van yet.
I use the same BMS for all my testing and posted a review in that section.
I suggest that once your batteries are balanced that you do a few ‘ charge / discharge ‘ cycles to determine the capacity in Watt Hours. This will help in future planning.
 
Last edited:
Welcome to the forum , M. Project looks interesting. Our ( us in the southern hemisphere ) power requirements are much different from our cousins in North America where they have ‘houses on wheels‘ requiring small power stations to run their equipment ;) . I am following your build with interest as our caravan fridge is a Dometic absorption type running on gas or 220v. I have never tried to run it on gas whilst towing and do not know if it is wise ? The problem is that during a 4 - 6 hour journey the goods in the fridge start getting warm. I am working on a 100 Ah portable battery box and Victron inverter for the caravan for the fridge. We do camp ‘off grid‘ sometimes , then the fridge runs on gas and the rest of the van on the built in 105Ah 12v battery system. I have also converted all the lighting to LED type.
We have 240 watts of solar on the Prado’s roof that we connect to the caravan battery system but no solar on the roof of the van yet.

We had a 3 way absorption fridge but we had trouble with it not getting cold enough. The most cost effective option for us was to replace it with a 12V compressor fridge and it’s been great. When we had the 3 way fridge I looked into powering it on 12V but it turned out to have a huge current draw. An absorption fridge on 12V will use more than 10A compared to a 12V compressor fridge using about 2A. This is because an absorption fridge needs to heat an element which is efficient for a gas flame, but not for a 12V heating element. I highly recommend a 12v compressor fridge, it is simpler and cheaper!

All the best
 
We had a 90lt 12v compressor fridge / freezer on a ‘slide out‘ in our off road caravan which worked great. The Dometic in the Jurgens is an upright single door unit and a replacement compressor type is hard to find to fit the space , otherwise I will have to do some alterations to the cabinetry.
 
Cell Balancing
I'll say at the outset that I am on a budget! I don't mind spending money on good quality components that will have ongoing use, but I don't want to spend lots of money on things I will use once (e.g. power supply).

I tested the cells and they were all within 0.01V of each other. But as you will know LIFEPO4 cells have a large "plateau" and even if they are very close in voltage to each other, their state of charge might be quite different. So I will need to top balance the cells.

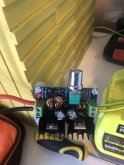
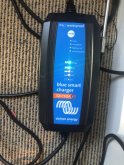
I needed a variable DC power supply that could supply between 3 and 4V DC. I bought a very basic DC-DC variable supply for US$10 and connected it to a Victron BlueSmart 12/10 charger. I discovered this charger could be put into "power supply mode" meaning it didn't change into bulk or absorption modes. But it couldn't be set below 12.4V so I still needed my cheap variable power supply.

I measured the voltage on the power supply output and set it to 3.5V. I then connected it to the cells (which were still connected in parallel). I measured the voltage at the cell terminals and it had dropped to 3.29V, which was to be expected with my very cheap power supply.

The cheap power supply also got very hot but at the time of writing, was not in flames! I will leave this set up and come back and check the voltage periodically. The Victron charger tells me it is supplying 3.2A at 14V, meaning I have about 45 watts going into the battery (minus what is being lost in heat).

IMG_8541.jpg
Victron charger in power supply mode

IMG_8540.jpg
Super cheap variable DC power supply

IMG_8543.jpg
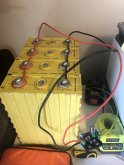
Cells charging. Note the DIY cell connectors, I have ordered some proper copper connectors but they have not yet arrived.
 
Cell Balancing - Continued
I followed these instructions for top balancing . It took 2.5 days with my cheap little DC power supply to get the cells up to 3.45V. Then I upped the charge voltage to 3.7V and carefully measured the terminal voltage until it reached 3.65V. I disconnected the charger and let it sit for an hour, it dropped below 3.5V so I connected the charger again and brought it back up to just under 3.65V, then disconnected the charger and waited another hour. This time it didn't drop below 3.5V (see chart below). Cells balanced!

I put the cells in series to bring it up to 14V and then connected a 12V 50W halogen bulb to discharge the battery to something below full charge, because it'll be a week or so before I put the BMS on and connect everything up.

I know... still have the wire terminal connectors. The solid copper ones should arrive in a couple of weeks.

voltage graph.JPG
Graph of voltage after I brought it up to 3.45V, when I increased the charge voltage to 3.7V. After disconnecting the first time the voltage dropped below 3.5V so I reconnected and tried again. Second time stayed above 3.5V.

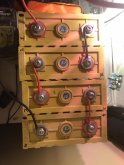
IMG_8602.jpg
Battery connected in series. Measures 14V now.

IMG_8603.jpg
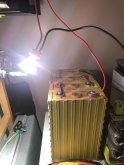
Attached a halogen 12V 50W bulb to discharge the battery a little bit overnight
 
Cell Balancing - Continued
I followed these instructions for top balancing . It took 2.5 days with my cheap little DC power supply to get the cells up to 3.45V. Then I upped the charge voltage to 3.7V and carefully measured the terminal voltage until it reached 3.65V. I disconnected the charger and let it sit for an hour, it dropped below 3.5V so I connected the charger again and brought it back up to just under 3.65V, then disconnected the charger and waited another hour. This time it didn't drop below 3.5V (see chart below). Cells balanced!

I put the cells in series to bring it up to 14V and then connected a 12V 50W halogen bulb to discharge the battery to something below full charge, because it'll be a week or so before I put the BMS on and connect everything up.

I know... still have the wire terminal connectors. The solid copper ones should arrive in a couple of weeks.

View attachment 13874
Graph of voltage after I brought it up to 3.45V, when I increased the charge voltage to 3.7V. After disconnecting the first time the voltage dropped below 3.5V so I reconnected and tried again. Second time stayed above 3.5V.

View attachment 13872
Battery connected in series. Measures 14V now.

View attachment 13873
Attached a halogen 12V 50W bulb to discharge the battery a little bit overnight
Nice progress !
 
Hey Matthew,
Where about in NZ are you. I have built my Caravans system electrical system from the ground up and have gathered quite a bit of data on balancing my cells and solar performance. Also done a lot of experimenting on solar charge setting. I build the system on the bench first and used a single 300W panel as a charger as it was way more powerful than any AC battery charger I had available. I have used Victron gear exclusively and now have quite a bit of experience in configuring it.
It looks to me like you have a great set up for the price.

I live in Welly (Raumati) and I travel round the North Island in the Caravan quite a bit. If you wanted to have a look at what Ive done let me know.

regards

Jon
 
Thanks for the fridge discussion. One reason I added an inverter to my setup was to run the 2-way absorption unit in our trailer when on the road. The biggest problem with running on propane while traveling is that the flame will blow out (at least mine will). I haven't tried the fridge yet on the inverter, so I'll have to report back later.
 
Thanks for the fridge discussion. One reason I added an inverter to my setup was to run the 2-way absorption unit in our trailer when on the road. The biggest problem with running on propane while traveling is that the flame will blow out (at least mine will). I haven't tried the fridge yet on the inverter, so I'll have to report back later.
Hi Dash_ , I have the same problem. Also Dometic absorption unit that runs on propane / 230v AC. Is there not a safety shut off when the flame goes out ? Always been to scared to tow with fridge on propane. Currently working on running it on a 1000VA inverter connected to a 100Ah LFP pack.
Just a bit of a hassle to move the inverter to the RV every time since it is also my main test unit in the workshop.
I'm on the tail end of a long battery/inverter install in my trailer (mostly waiting on shipments and warm/dry weather), and I'm anxious to try out the fridge. All that is left to do is install the battery monitor and inverter control panel in the wall. Exciting!

I hope there is a safety shut off!
 
Hi Dash_ , I have the same problem. Also Dometic absorption unit that runs on propane / 230v AC. Is there not a safety shut off when the flame goes out ? Always been to scared to tow with fridge on propane. Currently working on running it on a 1000VA inverter connected to a 100Ah LFP pack.
Just a bit of a hassle to move the inverter to the RV every time since it is also my main test unit in the workshop.
I must remember to use the correct terminology with our North American friends : Here we call gas 'petrol' and propane is 'gas' Just now you get a scare when I tell you I have a 'gas' fridge ! ;):LOL:
 
Imaging a petrol fridge with a pull start

I can imagine that.
An automotive Air conditioner could be bodged to a small engine with a v belt, some duct tape and prodigious swearing.
Add an insulated box and a thermister and you have a fridge.
 
Hey Matthew,
Where about in NZ are you. I have built my Caravans system electrical system from the ground up and have gathered quite a bit of data on balancing my cells and solar performance. Also done a lot of experimenting on solar charge setting. I build the system on the bench first and used a single 300W panel as a charger as it was way more powerful than any AC battery charger I had available. I have used Victron gear exclusively and now have quite a bit of experience in configuring it.
It looks to me like you have a great set up for the price.

I live in Welly (Raumati) and I travel round the North Island in the Caravan quite a bit. If you wanted to have a look at what Ive done let me know.

regards

Jon

Hi Jon, good to hear from you. I’m in Wellington as well. How do you find using solar with Wellington “sun”?
 
Last edited:
Putting it Together
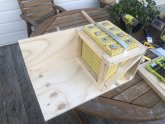
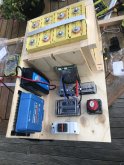
Still waiting on a couple of parts, but now that the cells are balanced I can begin putting it together. Today I made a box for the battery and components, tomorrow I’ll wire everything up. Everything will go under one of the seats in the caravan.

1DF47D73-CA07-45E1-B4EA-7CEE3FD9723C.jpeg
I want the battery to be secure while driving

2F18FF8C-4B2C-4848-98F0-27C6FF128749.jpeg
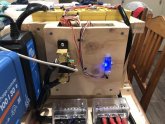
Components screwed in, except for BMS. The small slit in the wood above the BMS is for the temperature sensor

A special thanks to Overkillsolar, who sent me a replacement Bluetooth module and balancing wires for the BMS after my young kids misplaced mine!
 
Last edited:
Fridge update: I ran the absorption fridge in my trailer for 5 hours on battery/inverter, and it used 95aH! Half my capacity! I'm sure a compressor unit would take less power, but I would lose the propane option for boondocking weekends. With this setup, I'll have to charge up the battery with the generator when I arrive at the campsite.

I don't plan to install solar panels on the camper - at least for now. The roof is 5 years old and inching closer to replacement, so I don't want to mount panels there yet. We've been looking at the flexible options, but they are tough to find and expensive. May get a suitcase unit just to be able to add something - I could lay it down in the back of the truck while we drive to try to recoup some of the fridge power use.
 
My absorption fridge draws 300w when on AC. Not something I want the inverter powering. Propane is much more efficient. A 12v compressor might be better, but I'm not there yet.
 
Wiring It Up
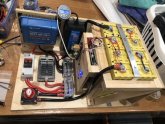
Everything is now wired up, the only components I’m waiting on are the terminal connectors and terminal caps. With the COVID restrictions, delivery is slow. I switched it on and... it worked!

The BMS and all the Victron components connected to my phone with no problems. I decided to buy a battery monitor which cost a bit extra, but I like the idea of being able to monitor actual current going in and out of the battery instead of trying to estimate usage based on voltage. As you’ll be aware, with the flat voltage discharge curve of LIFEPO4 batteries that can be very inaccurate.

I used the AC charger to charge the battery fully, and then disconnected the charger. I connected two 50W 12V halogen bulbs and left it on overnight until the BMS disconnected when the first cell dropped to 2.5V. The battery gave 150Ah usable capacity before this happened, which although slightly less than the 160Ah notional capacity is pretty good considering they are second hand cells I bought very cheaply!

One thing in a bit unsure of is that although I top balanced the cells, when the BMS turned off due to low cell voltage cutoff one cell was at 2.5V and the other cells were still at about 3.15V. That is a big difference in cells. I welcome ideas - but I think this difference is because of the flat discharge curve that drops rapidly as it gets empty. Even though there is a big difference in voltage, in fact the cells are still pretty close to all being discharged but cell one dropped down the curve and the BMS cut off before the other cells could do the same. I hope that’s what happened, because the alternative is that the cells are out of balance! I guess I’ll know next time I fully charge the battery, if it doesn’t take 150Ah before the BMS cuts out I’ll need to rebalance. I’m charging it now to bring it to to about 50% and the cell voltages quickly returned to 0.03V of each other so fingers crossed.

Next step is to install in the caravan!

CDC4BB39-4A19-4908-AE7A-3665A86FF858.jpeg
All wired up!

2893699D-1F05-4C4E-B70E-5489DB8FA730.jpeg
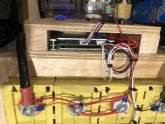
BMS is secure

6763582A-46DD-4501-9F42-FA46439504DA.jpeg
Battery monitor and Bluetooth dongle for BMS

1EB730CD-6CE0-4679-B986-3CC80AA62C93.png
Big difference in cell voltage when fully discharged!

8AEC6B9C-F076-47DD-93CC-CB07B773E867.png
Nearly 150Ah capacity
 
Last edited:
Is this just a 'testing' setup ? Are you going to replace those thin wires with proper busbars ? Better to run a thick red cable from the positive of the battery to your isolator and to your + terminal block to avoid confusion.

Yes definitely going to replace them with proper solid copper bus bars! Still waiting on them to arrive.

Good point about using red wire for the positive terminal but 2AWG wire is expensive and I’ve only got black. I compromised by using red heatshrink.
 
Great stuff. Sorry , I deleted my post but you were too quick for me. I went back and re-read your post and realised that you are waiting for busbars.
I agree , the price of cable is horrendous and using red heatshrink is a great idea. I sometimes just cover the ends ( about 60mm or so ) with the appropriate colour as most of the time the rest of cable disappears into paneling anyway.
Glad to see that your bluetooth app is working great as well. Mine also worked perfectly from first switch-on but had to play around with all the options on the app.
 
Last edited:

diy solar

diy solar
Back
Top