diy solar

diy solar

Advice needed regarding crimping large Anderson SB175 connectors

smieglitz

New Member
Joined
Mar 4, 2024
Messages
20
Location
48640
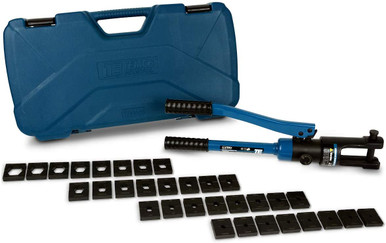
For my DIY power bank build I planned on utilyzing large Anderson SB175 to connect between two separate toolboxes (one housing chargers and the other holding a 230ah 12v battery and 2000w psw inverter). I'm using Windy Nation 2AWG welding cable and some Powerwerx #2 Anderson connectors for the Anderson SB175 housings. My first attempt at constructing the connection cables has left me with questions and wishing to hopefully obtain some helpful hints.

First attempt at stripping the cable ended badly (cut some shreds and tore the heat shrink) but by the second try I was getting good cuts and stripping. Then I attempted crimping the connectors and they came out of the hydraulic hand crimper distorted but seemingly tight with a good crimp that was holding. Got some heat shrink over the connector and cable and then found I couldn't insert the connector lug into the SB175 housing. Seems I need 3 hands to hold the housing, insert the lug and cable, and depress the springy housing contact. After many attempts at insertion, the crimp began to fail. I suspected the distortion of the lug was enough to prevent the combination from traveling inside the housing and seating properly. (I experimented and was easily able to insert and then remove an uncrimped/unheat-shrunk lug into the SB175 housing without any problem.) So, I decided to remove some of the distorted metal from the crimp and was able to fit the lug into the connector sans heat-shrink. I did have to screw the housing down to get better leverage while inserting the connector and I think that will also help to keep the cable from bending near the lug and maintain the crimp strength.

I'm assuming that isn't a best practice so looking for advise on how to fit everything together. I've attached a pic of the two cable ends with crimped connections. One shows how I removed some of the protruding metal and sanded it down to the copper. My questions include whether it is OK to insert these crimped and sanded connectors into the housings without using heat shrink on them or at least just where the cable meets the connector? Would vinyl electric tape be an acceptable substitute? Is the bared copper a problem and should I use some anti-corrosion gel on them to help prevent oxidation? And, am I overdoing the crimp? Should those connector lugs distort so much or would a lesser crimp pressure be sufficient? And finally, should the connector lug be oriented any certain way in the crimper so the resulting flat part of the crimp lines up with the blade or should it be at a different angle/perpendicular?

I'll attach a pic of the crimped lugs. One end shows the extent of the crimp (crimped 3 times over the length of the lug) and the other shows a more even shape after sanding it down a bit.

TIA for any guidance and tips you can provide.
Anderson SB175 crimp.jpg
 
Last edited:
To me, it looks like the cable was a loose fit in the connector and the die you have used is to small for the connector?

Was the cable a tight fit / did it completely fill the socket?
 
I’ve done several of those, it should just snap in. You don’t need to depress the spring clip in the plastic part to in sent it, only to remove it. Your crimps look like the die was too small. Try turning the connector 90° In your crisper and apply just enough pressure to flatten those wings that have formed on the sides.
 
The wings of the crimps should be flat with the heads, so you got that right.

I always do my crimp, then re-crimp 1 size down just to make sure it's tight.

No need for heat shrink on those, the housing does all your insulation for you.

If I could see anything wrong with the crimps in the photos, it would be that the wire size looks a little small for the crimps, but otherwise they look fine.
 
To me, it looks like the cable was a loose fit in the connector and the die you have used is to small for the connector?

Was the cable a tight fit / did it completely fill the socket?
Hmmm, I have no previous experience to gauge the fit. I wouldn't say the match was "tight" since I could rotate the connector over the wire strands with no problem, but I wouldn't call it "loose" as in sloppy. It seemed to match well and fill the socket. The wire gauge designation matched the connector at both 2AWG.

I'll try a different, larger die initially as you have suggested and also try to crimp some #2 cable lugs instead of the Anderson #2 connectors to see if those might be OK with the same die. I need to connect the mating pair of SB175s to some busbars so that may help me evaluate the fit better.

Thanks very much for your input.
 
I’ve done several of those, it should just snap in. You don’t need to depress the spring clip in the plastic part to in sent it, only to remove it. Your crimps look like the die was too small. Try turning the connector 90° In your crisper and apply just enough pressure to flatten those wings that have formed on the sides.
Thanks for the feedback. I'll try a slightly larger crimp die initially. Also appreciate the tip about rotating the connection to flatten the wings rather than sanding them down. One of those "I wish I would have thought of that" moments for me.
 
The wings of the crimps should be flat with the heads, so you got that right.

I always do my crimp, then re-crimp 1 size down just to make sure it's tight.

No need for heat shrink on those, the housing does all your insulation for you.

If I could see anything wrong with the crimps in the photos, it would be that the wire size looks a little small for the crimps, but otherwise they look fine.
I'll try a slightly larger crimp die for the initial crimping. That seems to be the general recommendation so far. Then re-crimp with the smaller die as you suggest.

I appreciate your feedback concerning the insulation and orientation of the resultant wings. Thanks.
 
... One shows how I removed some of the protruding metal and sanded it down to the copper. ...
My guess is if material is removed at that part of the connector, the crimp will be weaker.
 
Crimps with that large a wings -
You didn't have the lug completely filled with wire. What brand wire was it?

Also, is your hydraulic crimper one of the cheap $40 ones off amazon? A great many of those have the dies mis-marked. I.e. they are metric dies but marked in AWG. So nothing is ever quite right.

Crimp once with a size larger and turn to the next flat and crimp with the smaller size. Move over and do it again. If you have room to do it three times your dies may be to narrow.
I'm using Windy Nation 2 AWG welding cable and Anderson 2 AWG lugs from the Powerworx SB175 kit. The crimper is a 12-ton hydraulic crimper that was $70 on Amazon [marked as "AMZCNC Professional Hydraulic Crimping Tool with 12 Ton Output Pressure and 9 Standard US Dies (Crimps 8 AWG to 4/0 AWG)"]. The dies are marked as AWG. The crimper seemed to be in the middle range price-wise on Amazon. I'm trying to buy quality items (e.g., Blue Sea switches and breakers, etc.) even though lots of Chinese-manufactured items at lower price points are offered on Amazon.

I'm wondering if it is possible that I applied too much pressure to cause such flared wings. I really leaned into with my upper body with one jaw of the crimper on a tablertop rather than just stopping when it became difficult just using both hands. I did a couple more crimps today using the next size larger dies followed by the smaller size and they came out much better today even though I used less pressure. Also did a few smaller SB50 connectors today and the wire fit for those lugs was slightly better though not significantly so IMO.

FWIW, I didn't have any problems today inserting the connecters into the respective SB175 or SB50 housings. I also invested in some Anderson SB175 strain relief cable clamps for the connectors I'll be connecting/disconnecting between the two toolboxes so that should help keep the crimps secure and intact.
 
"AMZCNC Professional Hydraulic Crimping Tool with 12 Ton Output Pressure and 9 Standard US Dies (Crimps 8 AWG to 4/0 AWG)"].

Chinese brand, mis-marked jaws. Some sizes will be closer than others. They name themselves hoping people will think they are associated with Amazon when they aren't. You can either return it and buy a Temco branded one or measure the jaw hole and compare to AWG measurements then once you know how far out they are and grind down both side until they are right. Most of the harbor freight versions are about the same difference. There are a few true marked brands that aren't as expensive as Temco but they are close enough to not matter. Look for tooling from an industrial supply or like this


This is the one I have

They sell just the dies, but I am not sure they would fit your tool.

I'm wondering if it is possible that I applied too much pressure to cause such flared wings. I really leaned into with my upper body with one jaw of the crimper on a tablertop rather than just stopping when it became difficult just using both hands.

I do exactly this with mine, they get noticibly harder when they are done.
Wings can be caused by to little wire in the lug, wrong size dies, lugs that are to thick or thin. I think we know what the issue is.

FWIW, I didn't have any problems today inserting the connecters into the respective SB175 or SB50 housings. I also invested in some Anderson SB175 strain relief cable clamps for the connectors I'll be connecting/disconnecting between the two toolboxes so that should help keep the crimps secure and intact.
 
Chinese brand, mis-marked jaws. Some sizes will be closer than others. They name themselves hoping people will think they are associated with Amazon when they aren't. You can either return it and buy a Temco branded one or measure the jaw hole and compare to AWG measurements then once you know how far out they are and grind down both side until they are right. Most of the harbor freight versions are about the same difference. There are a few true marked brands that aren't as expensive as Temco but they are close enough to not matter. Look for tooling from an industrial supply or like this


This is the one I have

They sell just the dies, but I am not sure they would fit your tool.


I do exactly this with mine, they get noticibly harder when they are done.
Wings can be caused by to little wire in the lug, wrong size dies, lugs that are to thick or thin. I think we know what the issue is.
Thanks very much for your explanations and recommendations. I'll pick up the Temco one you have. It looks like it will cover all the large crimping projects I may be doing.

I think you've identified the variables that caused the problems I was having. I attempted a few more connections today and got a few that were really loose. When I examined the connecting lugs, I discovered a few were much thinner-walled than others that worked better. They had an "A" stamped on them but no size stamp. I mistakenly thought they were part of the Anderson stuff I purchased from Powerwerx but they must have come with some knockoffs I bought (different colored housings sourced from Amazon). In contrast, the Anderson lugs were more silvery-white with significantly more robust walls and the size designation stamped on them. So, I'm hoping the cable I purchased is not undersized but rather the problems were caused by thin-walled lugs and improperly sized dies.

Since I am a total noob at all this, can you also recommend some wire? I had read good reviews about Windy Nation welding cable but now I'm wondering how it compares to other brands/types and if it contributed to the problems I experienced. Any recommendation or confirmation that the cable I have is quality stuff would be appreciated.

Thanks again for taking the time to respond in such a detailed manner.
 
I generally use windy nation welding wire. The other stuff I have used that is good is Shirbly brand.

Do yourself a favor and get a wire size guage. There will be some deviation depending on wire type, i.e. fine stranded welding wire is bigger than course THHN. They will be close though.

I have read good things about https://www.batterycablesusa.com/

The silver white you are seeing on the real anderson pins is silver oxide. The real deal has a thick coating of pure silver plating.
 
If you crimp a lot of various size cables, wings are inevitable regardless of that dies you use. Not all lugs/connectors are "standard" either, so one die may be too big and the next too small even if it is proper awg size die.

As others have noted in similar wing threads, I use various thicknesses of shim stock between the die and the lug to accommodate mismatches to avoid large wings.


I agree to a point - unless the cables are exactly right and the lugs are nice UL listed ones with the right thickness of walls and the dies are the right size you will get wings.

Somtimes wings happen anyways, but they should never be excessive. For that I turn the connection to the next flat and crimp again. I have read where somone said not to do that, but they didn't give a reason why not. And, so far they haven't answered when I asked why not.
 
It's because when the wings get crushed in it loosens the previous squish.
I've thought about this over the years and settled on the following:
When closed, the dies leave a (repeatable) 2D area.
If you are able to crimp the cable/connector perfectly, the result will be 100% metal within the crimp area
If you end up with wings, some of the metal has escaped and (assuming the cable/connector/die was a perfect match to start with) there must be voids in the crimp area.
If you can rotate the connector and include the wings in the next crimp with no material escaping, it has to be a better result.

I'm wondering if it is possible that I applied too much pressure to cause such flared wings. I really leaned into with my upper body with one jaw of the crimper on a tablertop rather than just stopping when it became difficult just using both hands.
Careful doing that.
I've got a crimper that sounds the same.
It was the only vaguely appropriate tool I had to hand one day when I observed the safety line (StSt cable that stops a pump dropping to bottom of a bore) was loose. So I selected appropriate jaws and leaned on the tool hard.
The only thing that happened was the hydraulic crimper blew a seal.

Yes, it was the wrong tool for the job, but my point is it's not hard to overload them (if you try) and then you have a puddle and another thing to fix.
 
If you can rotate the connector and include the wings in the next crimp with no material escaping, it has to be a better result.

If I get wings, I don't even worry about it. I always have heat shrink over it, so it does not matter. I consider it an aesthetic issue more than a bad crimp.

Even if rotating the connector to get rid of the wings does not worsen the contact. I still don't like that it can fatigue and weaken the metal of the connector/lug that has already been stretched. I had tried doing that once on a smaller connector, and the barrel part cracked.
 
I found and purchased this extensive set of dies from Temco. There's a + size in addition to the standard size dies and a huge variety of sizes.

 
Back
Top