


carguy4471
New Member
- Joined
- Jul 3, 2021
- Messages
- 32
The story:
I just purchased a new Wolf Pup 14CC. It comes with a “juice pack” that includes a 50 watt solar panel and a solar controller that looks like it cost $12.
I will be adding an additional 150 watts of solar, swapping the battery out for two 100ah lifepo4 batteries (one battleborn, one off brand). I’ll be adding a 2000 watt renogy inverter to one outlet I’m going to install in the travel trailer. The solar controller will be replaced by a Victron 100/30. Battery monitoring will be a Victron 712. The stock converter charger will be swapped over to a WFCO lithium compatible unit. The overall goal is to be able to leave the batteries in year round in MN (the battleborn is heated the off brand will get a heating pad of some sort or get pulled during the winter). Ideally the solar will be able to keep the batteries topped off and heated battleborn warm all winter. I’m hoping I can get 3-4 days of boondocking out of the rig. I do have a 100 watt portable I can use to supplement or a genny if really needed.
Everything is ordered and ready to go. I start installing tomorrow. It’s still winter so I’ll be taking my time but I have to start by creating a mounting board for everything in the storage compartment. I’ll be putting photos and updates here if anyone cares to follow along. All comments and criticism is welcome.

An advertising photo of the same camper I purchased.

My new rig on it’s way home. I got to purchase it on my birthday this year so that was pretty fun.

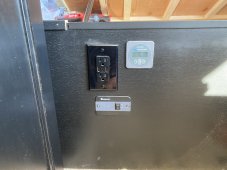
The storage compartment where everything will go. The mounting panel will wind up behind the dinette on the right side of the photo.

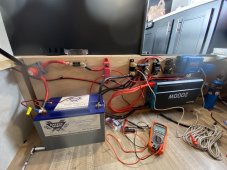
The pile of goods sitting in the living room waiting for a new home. I think the only thing not in the photo is the 250amp ANL fuse that should be in the mail tomorrow.
The only part of the project that’ll have significant wait is the solar panels. I’m not trying to mount them until it warms up in a few months. Everything else is going to go in as time allows. I should be able to make progress each week and update the thread. I posted the wiring schematic in another thread if anyone is interested in checking that out, nothing too fancy.
Thanks for having a look. Wish me luck!!
I just purchased a new Wolf Pup 14CC. It comes with a “juice pack” that includes a 50 watt solar panel and a solar controller that looks like it cost $12.
I will be adding an additional 150 watts of solar, swapping the battery out for two 100ah lifepo4 batteries (one battleborn, one off brand). I’ll be adding a 2000 watt renogy inverter to one outlet I’m going to install in the travel trailer. The solar controller will be replaced by a Victron 100/30. Battery monitoring will be a Victron 712. The stock converter charger will be swapped over to a WFCO lithium compatible unit. The overall goal is to be able to leave the batteries in year round in MN (the battleborn is heated the off brand will get a heating pad of some sort or get pulled during the winter). Ideally the solar will be able to keep the batteries topped off and heated battleborn warm all winter. I’m hoping I can get 3-4 days of boondocking out of the rig. I do have a 100 watt portable I can use to supplement or a genny if really needed.
Everything is ordered and ready to go. I start installing tomorrow. It’s still winter so I’ll be taking my time but I have to start by creating a mounting board for everything in the storage compartment. I’ll be putting photos and updates here if anyone cares to follow along. All comments and criticism is welcome.
An advertising photo of the same camper I purchased.
My new rig on it’s way home. I got to purchase it on my birthday this year so that was pretty fun.
The storage compartment where everything will go. The mounting panel will wind up behind the dinette on the right side of the photo.
The pile of goods sitting in the living room waiting for a new home. I think the only thing not in the photo is the 250amp ANL fuse that should be in the mail tomorrow.
The only part of the project that’ll have significant wait is the solar panels. I’m not trying to mount them until it warms up in a few months. Everything else is going to go in as time allows. I should be able to make progress each week and update the thread. I posted the wiring schematic in another thread if anyone is interested in checking that out, nothing too fancy.
Thanks for having a look. Wish me luck!!


") Although I’d probably remove that antenna and put a 100W there myself.
Although I’d probably remove that antenna and put a 100W there myself.