


You are using an out of date browser. It may not display this or other websites correctly.
You should upgrade or use an alternative browser.
You should upgrade or use an alternative browser.
using 12v devices while maintaining the simplicity of an All-in-one System
- Thread starter Wohl
- Start date
Russ
New Member
- Joined
- Oct 1, 2019
- Messages
- 184
Thanks for that info Will !!Yeah nissan leaf battery capacity tests are always horrible. mainly because temperature management system on the nissan leaf was badly designed and nissan even admitted it in a service bulletin.
no trusted source yet for valence. RT batteries have great bms and usually are great used. I am not sure about xp series.
utah dealer is MPP USA. Super cool guy and they should have inventory soon. I have been going through maximum solar lately though because MPP USA has been out of stock. both are good vendors. Dont buy from the other random chinese vendors though. Lots of junk for sale.
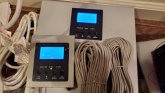
Mounting the 24v unit: I'm still in the temping/layout phase but I did mount my unit last night. My 4x4 gets bumpy and I want as much stability and protection for this as I can craft.
I used grey air conditioner sealing foam (crushes to nearly nothing) across the top and bottom on the back of the unit for cushion.
The side panels have the little diagonal "wall" that I consider a great place to mount some 1x1 L-brackets; self-drilling sheet metal screws. Just make sure you're piloting in the correct spot (not inside the box). This was before I read about the center-bottom screw hole, but I think this is much more reliable for my situation. I may repilot for a bolt/lock nut in the future but this will get me goin'.
Also added some stainless plates and washers over the top mounts; not going anywhere!
.jpg")
.jpg")
.jpg")
I used grey air conditioner sealing foam (crushes to nearly nothing) across the top and bottom on the back of the unit for cushion.
The side panels have the little diagonal "wall" that I consider a great place to mount some 1x1 L-brackets; self-drilling sheet metal screws. Just make sure you're piloting in the correct spot (not inside the box). This was before I read about the center-bottom screw hole, but I think this is much more reliable for my situation. I may repilot for a bolt/lock nut in the future but this will get me goin'.
Also added some stainless plates and washers over the top mounts; not going anywhere!
Russ
New Member
- Joined
- Oct 1, 2019
- Messages
- 184
Thanks !Its USA-MPP-SOLAR thats the seller from utah
Russ
New Member
- Joined
- Oct 1, 2019
- Messages
- 184
Post some pics later if you canMounting the 24v unit: I'm still in the temping/layout phase but I did mount my unit last night. My 4x4 gets bumpy and I want as much stability and protection for this as I can craft.
I used grey air conditioner sealing foam (crushes to nearly nothing) across the top and bottom on the back of the unit for cushion.
The side panels have the little diagonal "wall" that I consider a great place to mount some 1x1 L-brackets; self-drilling sheet metal screws. Just make sure you're piloting in the correct spot (not inside the box). This was before I read about the center-bottom screw hole, but I think this is much more reliable for my situation. I may repilot for a bolt/lock nut in the future but this will get me goin'.
Also added some stainless plates and washers over the top mounts; not going anywhere!
View attachment 657
View attachment 658
View attachment 659
Yep. It seems to work well with just a slight delay. It can only be surface mounted, and is kind of ugly, but those are both things I can deal with so I can bury that fan as far from my ears as possible in my little trailer.Wow this is awesome!! I had no idea that this screen and remote switch exists. very cool!!!
Attachments
K7WMC
Van-dweller Evangelist
- Joined
- Sep 26, 2019
- Messages
- 51
@Will Prowse, for the MPP PIP 800 watt inverter charger. Do you know what size should the Lugs for the battery cable terminals verses the Inverter cable terminals should be on each end of the cable? Does it even matter because the reason I'm asking is The Amazon website does ask whether it is 5/8 or 3/8 for the terminal lugs? I used the link on the Mobile Solar Made Easy website to buy the cables on Amazon but it is asking for sizes on each end of the cable.
The choices are:
1. 3/8 in. Lug on one cable end + 5/16 in. Lug other cable end
2. 3/8 in. Lugs both ends
3. 5/16 in. Lugs both ends
I just wanted to clarify before ordering. I will be using Battleborn batteries... Thanks in Advance.
The choices are:
1. 3/8 in. Lug on one cable end + 5/16 in. Lug other cable end
2. 3/8 in. Lugs both ends
3. 5/16 in. Lugs both ends
I just wanted to clarify before ordering. I will be using Battleborn batteries... Thanks in Advance.
K7WMC
Van-dweller Evangelist
- Joined
- Sep 26, 2019
- Messages
- 51
I will be remembering the "blue painters tape trick" when putting the cover back on and when the time comes. I have left it off for now until I connect the peripherals.Correct. There is a screw hole on the bottom, It's hidden well, but there is one lower mounting hole on that unit. I know it's there because I put a screw through it. And in fact when Ian sent it to me he made note of that.
I will also add that Will commented in his video that putting that face plate back on can be difficult. Just stick it on with painters tape, put the screws in and take the tape off.
Not sure if you bought yours yet Russ. To buy from Ian directly go here. https://usa-mpp-solar.com/Looks like Maximum Solar is 494.00 plus 99.00 shipping
eBay charges sales tax in my state now too. I got mine with no tax and free shipping!
Watts247 - Ian Roux
New Member
- Joined
- Nov 1, 2019
- Messages
- 48
Russ, you have to buy the inverter thats made for the specific battery voltage, there are no switches for this.I was going to order a MPP Solar but have a couple questions.
Did you have to pay about 125.00 just for shipping?
If you have a 24 volt or 48 volt model does that mean you have to have 2 or 4 batteries to make it work? Does it mean it will operate with 1 battery and has the capability to put more batteries in series to get to 24 or 48 volts?
Some MPPT's will work with 12 volt or 24 volt systems and that is why I ask?
Buy from the US, so your support and warranty is in the US
All the best
Ian
Watts247 - Ian Roux
New Member
- Joined
- Nov 1, 2019
- Messages
- 48
P.S. usa-mpp-solar is not charging sales Tax - YET, plus its free shipping.Not sure if you bought yours yet Russ. To buy from Ian directly go here. https://usa-mpp-solar.com/
eBay charges sales tax in my state now too. I got mine with no tax and free shipping!
Watts247 - Ian Roux
New Member
- Joined
- Nov 1, 2019
- Messages
- 48
Thanks Will, we do have stocks for now, but its the crazy season upon us.That vendor knows what hes talking about, I know him personally. I have not linked to his units lately because he has been out of stock. He for sure did not mix up parallel/series connection.
Best
Ian
K7WMC
Van-dweller Evangelist
- Joined
- Sep 26, 2019
- Messages
- 51
You will like it. It is made very well. I still haven't mounted the 400 watts of solar panels on the roof of my RV van, and has been the biggest challenge for me so far figuring out how to mount the panels. I'm likely going to go with an aluminum panel rack. So my all-in-one is not operational yet. I'm very excited to get it working.
Watts247 - Ian Roux
New Member
- Joined
- Nov 1, 2019
- Messages
- 48
Dont drill holes in your roof, use acetone to clean the roof and the panel frame, and use marine silicone, drill a hole in the side of the panel for the wires, and let them come down the refrigerator vent (no holes anywhere in that roof please, those panels will stick like chocolate dessert to a pick nick blanket if cleaned properly, and the right adhesive is used)You will like it. It is made very well. I still haven't mounted the 400 watts of solar panels on the roof of my RV van, and has been the biggest challenge for me so far figuring out how to mount the panels. I'm likely going to go with an aluminum panel rack. So my all-in-one is not operational yet. I'm very excited to get it working.
Russ
New Member
- Joined
- Oct 1, 2019
- Messages
- 184
I never thought about Series not adding amps or Parallel adding amps. Never thought about amps at all. So if I have 2 Valence 12v 138 ah in parallel I have 276 amps... hmm..You've got it backwards. Wiring in series adds voltage but keeps amperage the same. Parallel keeps voltage the same but adds the amperage.
Russ
New Member
- Joined
- Oct 1, 2019
- Messages
- 184
Did not want to go down the refrigerator vent but that may be the best way. I was going to pay an RV shop to mount and run the cable but now I may do it myself. After you finish mounting them I hope rain water would run under them and not get trapped. My last trailer was totaled by the insurance company. It sat for a few months just parked on a parking pad and I did not check it. Went in one day and mold was on the walls.Dont drill holes in your roof, use acetone to clean the roof and the panel frame, and use marine silicone, drill a hole in the side of the panel for the wires, and let them come down the refrigerator vent (no holes anywhere in that roof please, those panels will stick like chocolate dessert to a pick nick blanket if cleaned properly, and the right adhesive is used)
Ian my 800 watt should be here Monday. Looking forward to getting it
K7WMC
Van-dweller Evangelist
- Joined
- Sep 26, 2019
- Messages
- 51
I have a Ford Transit Van. It has been converted into an RV the roof is metal. There are factory mounting holes in the Roof of the Van that are currently covered. I have ordered an aluminum rack to hold the solar panels 4x100 Watts of panels. The rack is an AluRack. And should be able to hold all my panels. This rack will be secured at the factory mounting points in the roof. The mount are threaded nuts that are welded into the steel ribs of the van. And will be sealed by the mounting rack system. I have no refrigerator vent. So I will have to make a hole for the cables that go down to the charge controller... The Alurack is due to arrive on November 14th. I will post an update on the progress...Dont drill holes in your roof, use acetone to clean the roof and the panel frame, and use marine silicone, drill a hole in the side of the panel for the wires, and let them come down the refrigerator vent (no holes anywhere in that roof please, those panels will stick like chocolate dessert to a pick nick blanket if cleaned properly, and the right adhesive is used)
Last edited:
I'm going to be mounting solar panels, light bars and corner lights on my van and will be using a roof gland like this one on Amazon. Obviously get one that will work for your wire size and config. Make sure you seal with some Dicor self leveling sealant to keep it watertight. Here the link and I get nothing out of it. Some folks also run wires in through rear camera housing if your transit has such.
K7WMC
Van-dweller Evangelist
- Joined
- Sep 26, 2019
- Messages
- 51
Thanks, yes I have the Camera housing you're speaking of on my Transit 250 by my rear doors. I may do just that, and pass my cables through the housing with the Gland you've already mentioned.I'm going to be mounting solar panels, light bars and corner lights on my van and will be using a roof gland like this one on Amazon. Obviously get one that will work for your wire size and config. Make sure you seal with some Dicor self leveling sealant to keep it watertight. Here the link and I get nothing out of it. Some folks also run wires in through rear camera housing if your transit has such.
Wafflecone
New Member
- Joined
- Nov 16, 2019
- Messages
- 3
No one replied to this??Hi! Enjoying the videos very much and along the way learning lots of stuff i wondered about all my life! Very grateful. I'm thinking about these nice All in one systems
and love the fact that i might only need 6 cables, but i am wondering how i would connect 12v devices.
Assuming i have a 12v battery system, when i connect a fuseblock to the same battery system i suddenly have to worry about over-draining the battery again, which i guess i could solve with adding a Battery Protect. I was under the impression i could get away with not using a Battery Protect since the All-in-one device already has safety mechanisms in place; as long as i am routing everything through the All-in-one Device that is. Is there an elegant way to incorporate a 12v fuseblock without too much complication while using the battery safety-mechanisms of the All-in-one Device?
All i can think of is somehow connecting it to the regular house-style 220v (european) outlets but then i would have to step it down to 12 v again. Seems like a waste to convert 12v to 220v and then back to 12v.
In case i had a 24v battery system i guess i could use a little grey step down 24v-to-12v-box but i again would wonder where to connect it.
I'd appreciate any ideas.
MrNatural22
?SW sunshine =⚡️⚡️lit up thru the darkness✌️
Looks like this went off topic from the OPs questions starting at the first response on and never addressed the question asked by Wohl who hasn’t been back since 10/29 ?
Similar threads
- Replies
- 2
- Views
- 355
- Replies
- 3
- Views
- 270
- Replies
- 0
- Views
- 79
- Replies
- 5
- Views
- 360