sijones2010
Solar Enthusiast
- Joined
- May 31, 2021
- Messages
- 130
Yep that's the one.Alight. Back at my cabin for the week and ready to flash the new hotness. Assume this is the link to use: https://github.com/sijones/DiyBatteryBMS
Yep that's the one.Alight. Back at my cabin for the week and ready to flash the new hotness. Assume this is the link to use: https://github.com/sijones/DiyBatteryBMS
In the platformio.ini there is a line that has .\src which tells it where to find the source. Try ./src, might be mac needs it in a different way.Thanks,
Chose my correct ESPDEV platform and connection but keep keeping this error on MacOs. Might have to find a PC to try.
View attachment 217733
Error: Nothing to build. Please put your source code files to the '/Users/youcantseethis/Desktop/DiyBatteryBMS/.\src' folder


nice catch.Have you tried pinging it?
Also (I might be misunderstanding something) but isn't 192.168.4.1 the address of your DHCP server and not the ESP32?
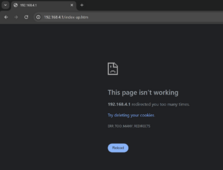
what esp device are you using?If you look at the instructions you connect to the ESP WiFi (which works) then put in 192.168.4.1 to bring up the initial config page. The initial config page is not loading. Yes ping to 192.168.4.1 works. You can see that the ESP is also issuing my device an IP, the .5 address.
on first boot if the flash doesn't have any wifi details it defaults to creating a AP, it's default address is 192.168.4.1 and then gives out ip addresses in that subnet.Have you tried pinging it?
Also (I might be misunderstanding something) but isn't 192.168.4.1 the address of your DHCP server and not the ESP32?
if i said the AP code has been in since 2022 would it make it any better!LOL.. I'm obviously still thinking in 2022 terms, without all this new-fangled AP functionality

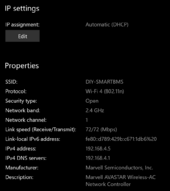
If the upload of filesystem image isn't doing anything or you don't know what i mean try this.I have flash erase using Google chrome but maybe you have better steps/erase flash than I do. It’s definitely in AP mode as I can connect to the DIY-SMART BMS ssid and receive an IP from it.
These are the ESP32 boards I have: https://a.co/d/4A1sQoj
This board has been running the non-UI V1 code for months.


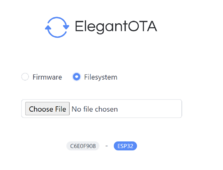
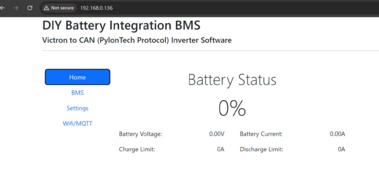
it already is in the wiki under install softwareUgh, forgot about the platform IO upload file system secondary task. Working now. Thanks for your help. @sijones2010 do you mind putting that step in the instructions. I completely forgot about it.
View attachment 217821
Damn. lol. I need to lay off the bourbon on Saturday nights.it already is in the wiki under install software, says 2 steps to complete.
Do you have a can bus adapter connected?Just running v2 of this ESP stand alone, not connected to inverter. Noticed in the UI if you go the page to update MQTT settings and reboot, the ESP does not come back online, need to physically force a reboot through power off. Might wait to put this into production.
I’ll look at it in a bit. Yes have CAN adapter attached.Do you have a can bus adapter connected?
Do you have the console serial on to be sure it's not rebooted?
After clicking reboot what is the state in the console serial log?
It works for me so am wondering what's different.


