diy solar

diy solar

16kw DC Solar with Sol-ark 15k

Keep in mind the tax credit is non-refundable, which means if your actual tax liability is less than the credit, the difference is carried forward and its value falls with inflation until it is used up in future years.
Yes.
Tax credit not refund.
Yup.
I doubt that would mean it is your costs, for example, your looking at about 10K for having a ground mount array ( vs roof mounted ) based on your number of panels and the msrp of the racking you mentioned the manufacture. ( Add in concrete and other materials to dig, mix, pour, brace and shipping )

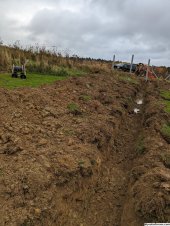
Then there is distance, further away, costs go up fast, you need trenching, conduit, wire which is expensive.

My point is not that I am suggesting you are wrong, it's that you do not have your own spreadsheet of costs for your proposed system, so you really don't know. In any solar system, it starts with full plans and bill of materials and labor and quotes on all parts, as every installation is unique.

Getting the money and permits are the last step in the process, from what you have wrote you need a costed BOM.
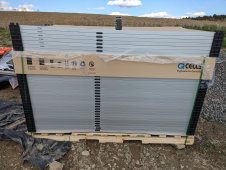
I did create a sheet and exaggerated some material costs so I know a "no more than" cost barring any crazy increases of materials. Ground mount is a Sinclair set up, so just under 6k for that not including shipping which is bundled for everything from the seller (panels, mount, inverter, materials).
No quite. 19kW DC PV can be changed connected, but there is a max of 15kW delivered to battery and ac. Anything above that is wasted. There are also threads talking about problems getting over 13kW with DC solar. If panels are oriented so that max 13kW at any one time, then that is fine. Otherwise, I recommend anything over 13kW be ac connected PV.
Hmmmm ok interesting. Will have to look.
Personally I would ditch the adjustable tilt for the panels and put that towards a battery, you will love it when the solark switches over the battery during a power outage. You will feel like a king in the hood LOL
The increase in production being in the northeast is more important to me right now over battery backup tho they'll be next on my list "to do"
 
No quite. 19kW DC PV can be changed connected, but there is a max of 15kW delivered to battery and ac. Anything above that is wasted. There are also threads talking about problems getting over 13kW with DC solar. If panels are oriented so that max 13kW at any one time, then that is fine. Otherwise, I recommend anything over 13kW be ac connected PV.
Mine has hit 17.9kW from DC panels before. I'm not sure what the limit is but it's at least 18kW.
 
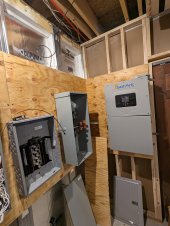
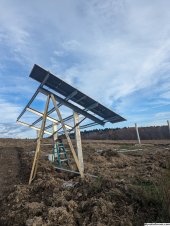
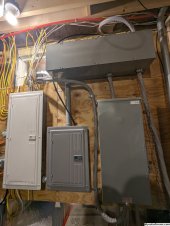
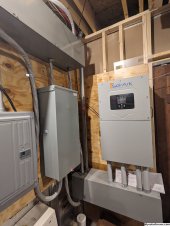
Little further along, have all the wiring, disconnect and xfer switch in place. Sol-ark is "powered up" though I'm using the xfer to bypass house load at the moment since I do not have the solar in place yet. Kind of backwards compared to some probably, waiting on "heavy" equipment to get the sinclair ground mount installed.
 
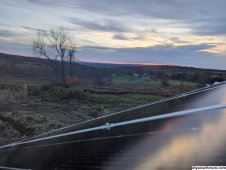
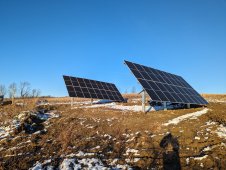
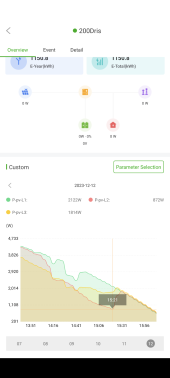
Not preferred but needed to do it...tree was shading one of the ground mounts, can tell when I the tree was removed...I knew shading was not good, but that level of reduction was not what I would have thought.PXL_20231212_203517367.jpg

PXL_20231212_200722055.jpgPXL_20231212_202631238.jpgScreenshot_20231212-191708.png
 
No quite. 19kW DC PV can be changed connected, but there is a max of 15kW delivered to battery and ac. Anything above that is wasted. There are also threads talking about problems getting over 13kW with DC solar. If panels are oriented so that max 13kW at any one time, then that is fine. Otherwise, I recommend anything over 13kW be ac connected PV.
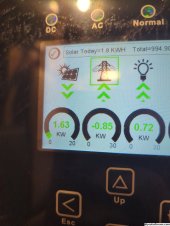
So far have consistently hit 14+ kw from the PV array when the sun is shining, had a couple blocks of over 15kw from PV per the sol-ark the other day
 
Did you pound the Sinclair posts or dig holes and pour concrete? Just curious, as I'm starting to look into mounting systems and they're somewhat local to me.
 
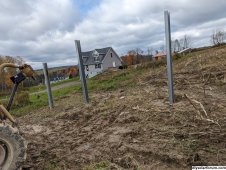
Drilled holes, but I used a 9 inch diameter auger to reduce the amount of disturbed soil. Still solid though! Pounding would have been my choice but I went full DIY route and couldn't find anyone local that has the equipment.
 
Drilled holes, but I used a 9 inch diameter auger to reduce the amount of disturbed soil. Still solid though! Pounding would have been my choice but I went full DIY route and couldn't find anyone local that has the equipment.

Good to know, was it engineered for 9 inch diameter holes? I'm just trying to figure out what route to go. I've got an excavator with a 12 inch auger setup, so something I could put in with that would be easiest.
 
Good to know, was it engineered for 9 inch diameter holes? I'm just trying to figure out what route to go. I've got an excavator with a 12 inch auger setup, so something I could put in with that would be easiest.
Technically engineered for 24 inch hole. I didn't reach out to Sinclair to inquire about smaller hole, maybe should have. It's upright and holding strong, already have had two wind storms with gusts 40+ and it's tilted at 48 degrees so it was a sail haha.
 
You should be mounting your inverter on cement backerboard, not wood
Disagree. Both my Outback Radian 8k and my Luxpower 12k are mounted on plywood. Neither manufacturer specifies nor asks for cement board or prohibits plywood. In fact, the requirements are that you mount into a concrete block or poured masonry wall or stucco wall or into a wood framed wall and into the studs. The actual wall material can be drywall, concrete board or plywood. I would avoid drywall and cement board if possible. Both of those have little to no water resistance and can crumble. Plywood will hold up, is easy to drill, can be finished if desired and can be easily repaired with another piece or patched with many materials and even bondo. Plus it is superior for holding screws compared to drywall and cement board.

"Cement board is a type of material you can use to back tile or stone on your walls, countertops and floors. Although it functions similarly to drywall, there are a few reasons some builders prefer working with cement board."

"
Cement Board
Like the fiber cement boards, these can be difficult to cut. The difficulty comes not so much from the stiffness but the edges that crumble. It does take some getting used to. Additionally, they're heavy which makes them hard to hold on to the wall while you start your screws."

"Yes, HardieBacker® 1/4" Cement Board is deemed noncombustible when tested to ASTM E 136 and can be used in conjunction with other noncombustible materials around a fireplace. This does not mean that clearances to combustible building materials can be reduced by using HardieBacker 1/4".

Will anyone reading this post please share their experiences with their approved inverter catching fire by itself and burning up the mounting wall and their home?
 
Did you pound the Sinclair posts or dig holes and pour concrete? Just curious, as I'm starting to look into mounting systems and they're somewhat local to me.
Hey, check out using a 12 inch Sola tube placed to a depth required for your locality and pour concrete around a 2 inch schedule 40 galvanized pipe wrapped in 10ml PVC tape where it meets the concrete. You can easily dig the holes with a mini excavator rental with a 12" auger attachment and an extension if you need to go deeper than 36 inches. And then buy a cement mixer or hire a contractor to fill your holes.
 
Good to know, was it engineered for 9 inch diameter holes? I'm just trying to figure out what route to go. I've got an excavator with a 12 inch auger setup, so something I could put in with that would be easiest.
Just use the 12" auger and 12" sola tube and schedule 40 2 inch galvanized pipes. Drill all the holes, set the tubes. Using a string, set the 4 corner posts in concrete, plumb them up and make certain they are square. After a day, put a string around the four corner pipes a couple of inches from the top of the posts (near where the top of the array would be) pulled tight enough to make it level. Now, fill all of the holes with pipes and cement, have them just abut the string which makes them inline with the corners and plumb them up and the array is done and set to perfection. Eazy peezy. Now put a string from front to back on the corner posts to create the angle of the array and ground clearance you desire. So for a 40 degree angle facing South, put the string lower on the front corner post, but above any snow, fence shadow etc. Then the other end of the string to the back row post higher and measure the angle with an angle protractor (finder). Adjust the string up and down on the posts to achieve your angle and height on the posts. make with a marker, remove the string, cut the posts to height with a portable band saw. Do this for the other side of array. Then run string from top of corner posts to the other corner post in the same row and cut off the posts in the row between the corner. Now all posts should be at same height. Connect your crossing posts in the rows using Hollaender connectors to 2 inch galvanized pipe. Then lay your solar rails (Superstrut is all you need) across the pipes and the angle you set up from front to back is created and perfect! Will last 100 years!
 
Just use the 12" auger and 12" sola tube and schedule 40 2 inch galvanized pipes. Drill all the holes, set the tubes. Using a string, set the 4 corner posts in concrete, plumb them up and make certain they are square. After a day, put a string around the four corner pipes a couple of inches from the top of the posts (near where the top of the array would be) pulled tight enough to make it level. Now, fill all of the holes with pipes and cement, have them just abut the string which makes them inline with the corners and plumb them up and the array is done and set to perfection. Eazy peezy. Now put a string from front to back on the corner posts to create the angle of the array and ground clearance you desire. So for a 40 degree angle facing South, put the string lower on the front corner post, but above any snow, fence shadow etc. Then the other end of the string to the back row post higher and measure the angle with an angle protractor (finder). Adjust the string up and down on the posts to achieve your angle and height on the posts. make with a marker, remove the string, cut the posts to height with a portable band saw. Do this for the other side of array. Then run string from top of corner posts to the other corner post in the same row and cut off the posts in the row between the corner. Now all posts should be at same height. Connect your crossing posts in the rows using Hollaender connectors to 2 inch galvanized pipe. Then lay your solar rails (Superstrut is all you need) across the pipes and the angle you set up from front to back is created and perfect! Will last 100 years!

That's all great, but doesn't do much when you need a permit to build the mount, especially when you need engineering drawings.
 
Back
Top