diy solar

diy solar

4S 272/280ah enclosure suggestion

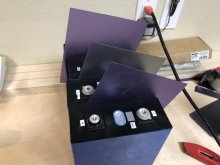
I am getting ready to put my cells together. I am using the hose clamps. I will put a piece of HDPE (cutting board) about 1/4 thick on both ends to protect the cells. And I am going to use the very thin flexible cutting board HDPE between the cells
 
I am getting ready to put my cells together. I am using the hose clamps. I will put a piece of HDPE (cutting board) about 1/4 thick on both ends to protect the cells. And I am going to use the very thin flexible cutting board HDPE between the cells
Good suggestion on the cutting boards. I have a new multipack of the thin/cheap cutting boards on the way with the intention of placing them between cells to isolate them from each other. I will probably use some old ones from the kitchen for the pack and upgrade the kitchen set with the new ones.

Maybe I can fashion a BMS cradle out of one of those thicker cutting boards... you’ve got me thinking. Just not sure if I need everything rigidly mounted or if it would be better to have everything floating and packed tightly with closed cell foam... With road vibration I’m leaning towards the vibration isolating closed cell foam.

-uberpixel
 
Good suggestion on the cutting boards. I have a new multipack of the thin/cheap cutting boards on the way with the intention of placing them between cells to isolate them from each other. I will probably use some old ones from the kitchen for the pack and upgrade the kitchen set with the new ones.

-uberpixel
Definitely what I would call a "pro tip".

That was my plan too. Look honey, I bought you all new cutting boards. Its not even Christmas or your birthday :cool:
 
Soooooooo if you discover you need more ventilation.... then what? How do you ventilate when exposed to the elements, which may include hurricane force winds and rain, as you are driving?
LOL.
Technically hurricane force winds begin at 74 mph but my mind is thinking 150 mph. 74mph winds wont break glass let alone destroy a house.
If he is driving 74 mph with a trailer he is speeding... A lot. Arent trailers limited to 55?
Finally its on the tongue between the vehicles and out of the airflow.
My point: chuckled at the dramatics of the terminology, but I doubt it reflects reality.
He could lose the lid and put a screen door on it. We did it in the navy all the time on submarines.
J/K
In free parts of the world, trailers are not limited to 55mph. So yes, I drive at hurricane force
 
In free parts of the world, trailers are not limited to 55mph. So yes, I drive at hurricane force
In California definitely 55 limit. Trucks and vehicles pulling trailers. Cant speak for the other 49, or Canada, or the EU.
Given our current political leadership I cant say for sure its the free world, but its close enough.
 
In California definitely 55 limit. Trucks and vehicles pulling trailers. Cant speak for the other 49, or Canada, or the EU.
Given our current political leadership I cant say for sure its the free world, but its close enough.
nope... you guys are far from free in komiefornia :oops:
 
I’m thinking maybe I’ll pick up some of this pultruded fiberglass angle (link) instead of using aluminum.
Just curious if you ever tried this fiberglass angle . . . I'm thinking about using it as well.
 
Just curious if you ever tried this fiberglass angle . . . I'm thinking about using it as well.
I ended up skipping the compression straps and fiberglass angles. My application (small RV) will only ever charge/discharge at up to 0.3C. At those rates it seemed that compression may not be significantly beneficial in extending battery life.

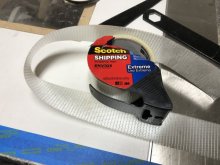
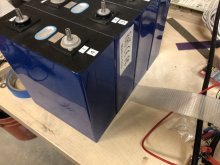
Instead, I just used a fiber reinforced packaging tape to bind the cells with thin cutting board sheets placed between the cells for insulation.

I’ve finished my build and will post the final product with pictures shortly.

-uberpixel
THANKS. Looking forward to seeing the final pack.
 
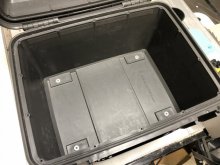
TLDR - My conclusion - the Seahorse SE540 is an excellent enclosure for a 4S 280ah sized LiFePO4 prismatic cell build with the JBD BMS. Only concerns would be the vertical space is limited (or very efficiently used) if you need to add padding below or above - 20mm studs are probably too long - I used 16mm. Also, with the handle on the side of the case, and with how heavy it is, it's a bit awkard to pick up and move around. Also, without having lived with it for a while, I have no idea if there will be any sort of cooling/ventilation issues, but for my application I don't plan to push the battery or BMS very hard.

Other conclusions - I ditched the breaker from the initial design and just added the low voltage (logic) switch to turn the BMS on and off (or Bluetooth/iPhone app). I'll have a main disconnect and breaker in the trailer instead.

So... Why this battery and this particular enclosure?

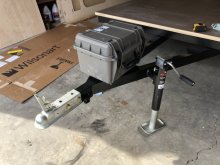
I'm building a Teardrop Trailer and wanted something that would let me boondock (camp off-grid) for 3-4 (5?) days without the need to recharge (solar can come later if needed). The 280ah should be plenty for my low power needs and will hopefully give me the duration I'm looking for. With the weight of the galley (cooler/stove/etc) at the back of the trailer, I wanted to push the battery weight onto the front (tongue) of the trailer. This exposes the battery to the elements so, I needed something that was durable and well sealed. This Seahorse case looked like a clean and secure way to accomplish my goals.

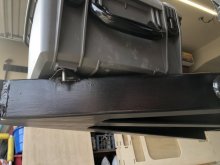
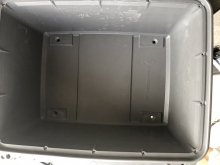
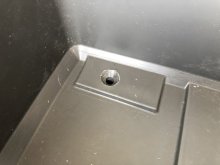
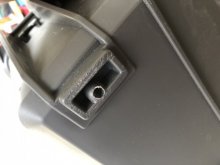
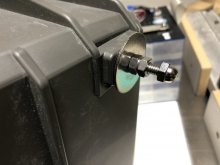
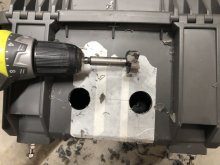
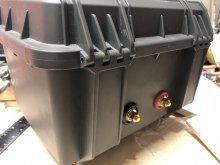
Here's a few images of my planned installation and how I modified the case. There are molded features in the bottom for you to screw into from inside, but I just drilled through, added a countersink and will use this to bolt directly to the trailer. Downside is that these bolts are basically permanently captured (unless I disassemble the battery) - I have some threaded bumpers on order from McMaster to use when the battery isn't on the trailer.

More images of box modifications and the internals coming soon...

-uberpixel
Photo Mar 13, 3 03 25 PM.jpgPhoto Mar 13, 2 43 17 PM.jpgPhoto Mar 13, 2 43 26 PM.jpgPhoto Mar 13, 3 03 00 PM.jpegPhoto Mar 13, 3 03 03 PM.jpegPhoto Mar 13, 3 03 10 PM.jpgPhoto Mar 20, 4 47 12 PM.jpegPhoto Mar 20, 4 47 29 PM.jpg
 
Last edited:
When you finish would appreciate an image showing how the bms mounts and the wiring to the output terminals. Am duplicating this build x2. Using big zip ties for compression. Im in san diego gonna contact these guys see if I can will call these save on shipping.
 
When you finish would appreciate an image showing how the bms mounts and the wiring to the output terminals. Am duplicating this build x2. Using big zip ties for compression. Im in san diego gonna contact these guys see if I can will call these save on shipping.
Will do. I’ll try and post the rest of the pictures later tonight.

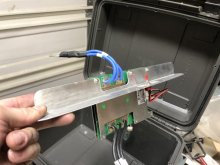
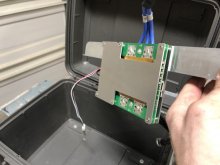
I ended up using a 1.25x1.25x.065 aluminum angle to mount the BMS. May be over-engineered a tad, but why engineer it any other way? Seems to be working well so far and doubles as an extra heat sink. I’ll post pictures and a template for the part if you’re interested in duplicating.

-uberpixel
 
Here's a dump of pictures - mostly self explanatory - but if you have specific questions let me know and I can explain what I did...

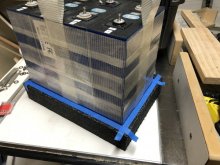
Key suggestions - make yourself lifting straps to pull the battery out of the box - I saw that on a "Steve S" post and it's brilliant. You will be putting this thing in and out, and it's heavy and awkward. I made mine by doubling up the shipping tape sticky side to sticky side and then looping under the battery while wrapping it with tape.

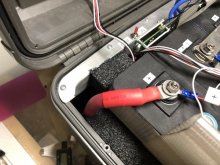
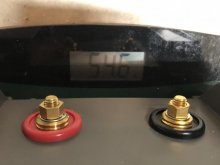
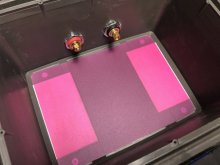
Be sure to put your bulkhead terminals low enough to avoid contacting the BMS. I used these [link] from Fastronix because they were relatively short. Also, don't forget to tape your temp probe in place before you get too many wraps of tape on there...

-uberpixel
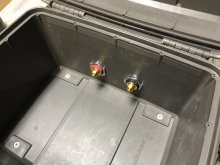

Photo Mar 14, 5 56 41 PM.jpgPhoto Mar 16, 10 22 39 PM.jpegPhoto Mar 16, 10 22 47 PM.jpegPhoto Mar 20, 5 18 20 PM.jpgPhoto Mar 20, 5 18 31 PM.jpgPhoto Mar 20, 5 47 57 PM.jpegPhoto Mar 20, 6 07 34 PM.jpegPhoto Mar 20, 6 17 55 PM.jpg
 
Last edited:
And some more...

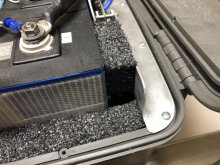
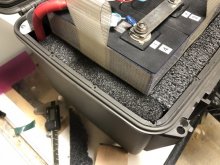
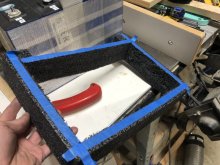
I leveled the base with 3mm plywood scraps and put two layers of 2mm craft foam on the bottom covered with a thin cutting board. I used one of my favorite tools - double sided carpet tape to help keep all the foam in place. As mentioned previously, there is not a lot of vertical space, and you will likely need 16mm studs or bolts short enough to clear the lid. You'll see the clearance in the next group of pix.

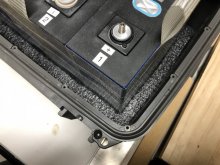
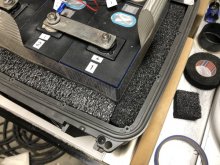
I also had some closed cell foam laying around that I used to create a spacer ring around the base of the battery leaving room for the bulkhead terminals on the back side of the case. This keeps the battery from moving around and gives it a bit more vibration isolation.

-uberpixel
Photo Mar 20, 6 27 15 PM.jpegPhoto Mar 20, 6 27 43 PM.jpegPhoto Mar 20, 6 33 22 PM.jpgPhoto Mar 20, 6 50 13 PM.jpegPhoto Mar 20, 7 22 41 PM.jpgPhoto Mar 20, 7 27 11 PM.jpgPhoto Mar 20, 7 29 55 PM.jpegPhoto Mar 20, 7 30 01 PM.jpeg
 
And more...

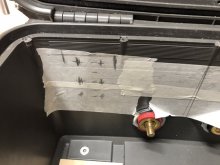
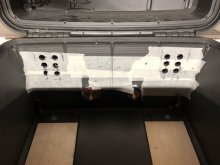
Notice how I put the vent holes inside the natural hood that's molded into the back. This should provide a good weather shield to keep any rain out of the box. I was going to drill a bigger hole and then decided that several smaller holes would keep mice out. Not sure if the holes will help with cooling, but I was worried that if the cells vented for any reason, the case is so tight that could rupture violently without some vents. I needed a right angle adapter to drill the holes inside the box.

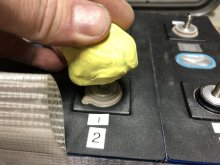
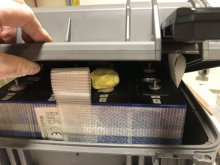
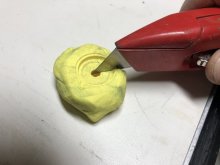
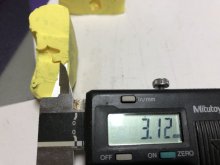
I used some crafting clay to check the vertical clearance (again, 4mm of foam underneath and 16mm studs) and found that it's mighty tight at only 3mm clearance to the lid. Should be enough...

-uberpixel
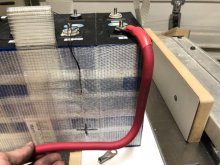
Photo Mar 21, 5 49 37 PM.jpgPhoto Mar 21, 5 49 46 PM.jpgPhoto Mar 21, 5 54 04 PM.jpegPhoto Mar 21, 5 54 14 PM.jpegPhoto Mar 21, 6 04 58 PM.jpgPhoto Mar 21, 6 05 07 PM.jpgPhoto Mar 21, 6 05 49 PM.jpgPhoto Mar 21, 6 07 44 PM.jpeg
 
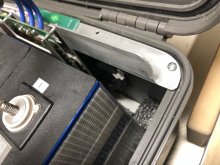
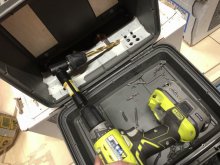
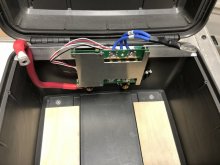
One of the cool things about these cases is that they have a bunch of molded in holes for adding interior panels. I took advantage of those holes to mount the aluminum angle that holds the BMS in place.

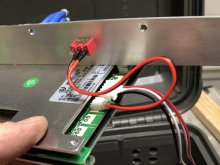
I've attached (to this post) a PDF of the 1:1 template I used to cut out the part - set your printer to custom scale 100% and then cutout and stitch the pieces together (it's too big for an 8x5x11" sheet). For shaping the aluminum I stuck the pattern to the aluminum with contact cement and then used a stationary sanding wheel (I use a 10" disk on my table saw) and a scroll saw. I think I used #6 x 3/8" sheet metal screws to attach to the box and M4 (I think?) machine screws to attach the BMS to the angle (taking advantage of the threaded standoffs already on the BMS).

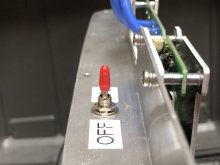
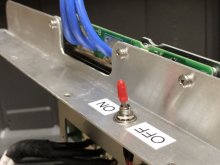
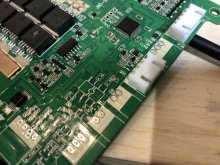
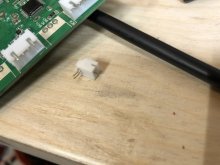
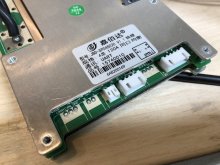
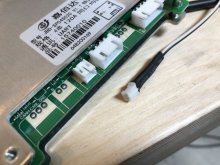
You can also see how I added the optional on/off hardware switch. In my case I had to solder a header onto the BMS, but some are sold with the header already. As I suspected, the board worked as expected with the addition of the header and switch - they just went cheap on mine and omitted the header for some reason.

-uberpixel
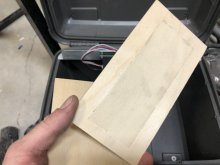
Photo Mar 21, 6 22 37 PM.jpgPhoto Mar 21, 6 22 41 PM.jpgPhoto Mar 21, 6 22 47 PM.jpgPhoto Mar 21, 6 55 03 PM.jpgPhoto Mar 16, 6 49 40 PM.jpgPhoto Mar 16, 6 49 56 PM.jpgPhoto Mar 16, 7 01 20 PM.jpgPhoto Mar 16, 7 24 22 PM.jpeg
 

Attachments

  • DWG_Battery_Plate_final.pdf
    24.5 KB · Views: 25
Last edited:
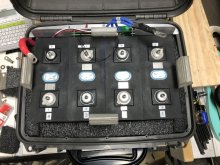
Finally, I packed another row of foam around the top of the cells to keep them from rocking around - including putting some foam between the aluminum angle and the cells. I considered adding a more rigid bumper to ensure there wouldn't be any metal on metal contact, but this seems pretty secure.

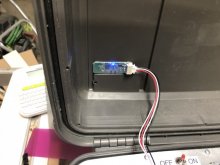
The Bluetooth module is stuck to the lid with VHB for the time being, but I may make a plywood tab that's screwed into the lid to keep it secure.

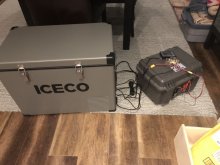
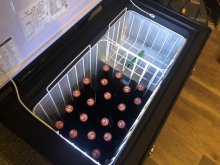
All in, it weighs 54.6 lbs. I have it set up on an endurance test with my cooler to see how many days of cold beer I can get out of it...

-uberpixel
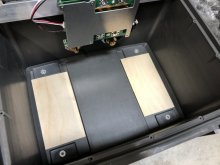
Photo Mar 21, 6 54 55 PM.jpegPhoto Mar 21, 6 55 00 PM.jpgPhoto Mar 21, 6 55 05 PM.jpgPhoto Mar 20, 7 38 13 PM.jpegPhoto Mar 21, 6 55 07 PM.jpgPhoto Mar 21, 6 59 47 PM.jpegPhoto Mar 22, 8 08 50 PM.jpgPhoto Mar 22, 8 09 03 PM.jpg
 
I should add, this is my first battery build. I'm open to criticism and suggestions and by no means warrant or endorse my work as correct or proven... But, hopefully somebody else finds some part of this useful.

Please share your questions or build pictures if you make one!

-uberpixel
 
Thanks for those pictures this is going to save me a lot of trouble stumbling through this project. I see you have the iceCo freezer I thought about that it looks like one of the better Chinese Brands, but then I finally said oh what the hell and bought the National Luna dual control. $1300 but you get what you pay for.
Previously I had a whynter that lasted 3 yrs and then after that a costway which was a real piece of dung.
 
Finally, I packed another row of foam around the top of the cells to keep them from rocking around - including putting some foam between the aluminum angle and the cells. I considered adding a more rigid bumper to ensure there wouldn't be any metal on metal contact, but this seems pretty secure.

The Bluetooth module is stuck to the lid with VHB for the time being, but I may make a plywood tab that's screwed into the lid to keep it secure.

All in, it weighs 54.6 lbs. I have it set up on an endurance test with my cooler to see how many days of cold beer I can get out of it...

-uberpixel
View attachment 42452View attachment 42453View attachment 42454View attachment 42459View attachment 42455View attachment 42456View attachment 42457View attachment 42458
Dude this is awesome and love the ICECO I have been using their fridges for good while. I have one in my car at all times freezer and fridge. So I would like to hear some test how long that battery pack powers that fridge? I ran mine with no charge over a week. that is with one side 0F and other at around 34F.
 
Dude this is awesome and love the ICECO I have been using their fridges for good while. I have one in my car at all times freezer and fridge. So I would like to hear some test how long that battery pack powers that fridge? I ran mine with no charge over a week. that is with one side 0F and other at around 34F.
Dont know about you but I LOVE the dual temp/control units and dont know how I got by with the freezer only model. There really wasnt an effective way to keep things at different temps.
National Luna uses dual controls that seem to pipe refrigerant to coils individually to each side. I had considered engel, but they just use a fan between compartments.
The Iceco that has dual controls, how does it distribute the temp?
I have the VL60 in the back of my car and its keeps temps really well. The smaller GO20 I also had and was ok just felt it wasn't insulated enough for what I needed.
But as to how it distributes the temp think its done via a valve that distributes between the "Zones".
 
I should add, this is my first battery build. I'm open to criticism and suggestions and by no means warrant or endorse my work as correct or proven... But, hopefully somebody else finds some part of this useful.

Please share your questions or build pictures if you make one!

-uberpixel
Looks really good, nice and compact.

In the picture, it looks like the bms might take the force of the battery shifting in that direction as the foam is compresses. In a mobile trailer, the foam will be acting as a shock absorber and the battery will the moving around a bit even with foam trying to hold it in place. You might consider adding some wood strips or something between the battery and box on the BMS side that limits the movement. This would ensure that the wood constrains the battery movement rather than the BMS. You might already have something under the foam doing that, but just a suggestion. Those BMS's are pretty sturdy, but they shouldn't be your "bump stop" for battery movement.
That’s a valid concern and something I have been thinking about. It’s hard to tell from the pictures, but there’s nothing but airspace (about 1/2”) between the actual BMS and the cells. I placed some foam between the aluminum angle “rail” and the cells to keep them from rocking into the BMS, but as I mentioned previously, some sort of rigid bump stop mounted to the rail and in contact with the cells would ensure that there isn’t physical contact between BMS and the cells.

With my current layout of foam, I have a continuous band on 3 sides and some smaller blocks on the BMS side, so the only direction the cells want to move is toward the BMS (unfortunately), but it’s tough to tell if it’s really a problem or not.

The box itself will be mounted “the long way” on my trailer tongue so any braking or inputs will not put the BMS in danger, but side inputs could be a concern.

And for those distracted by my cooler picture, it’s a new Iceco VL45 single zone. So I can’t really attest to its performance or quality. I have it set to 36F on “min”. Endurance test is on day 3 and I’ve been opening it up randomly to simulate actual use. The beer and cooler was warm at the start so it ran for a bit to get down to temp. I’ll let you know how far it will go.

-uberpixel
 
Last edited:

diy solar

diy solar
Back
Top