MarcoWasRight
New Member
- Joined
- Aug 22, 2022
- Messages
- 66
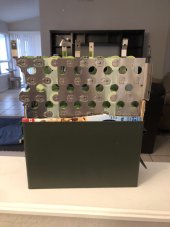
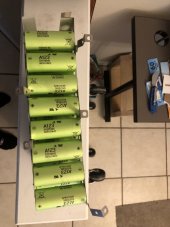
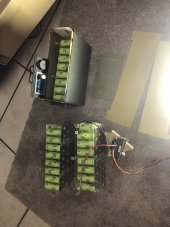
So I picked up one of these electric bus modules. After recently getting screwed on eBay with some Headways I wasn’t very optimistic but the price was too good to pass up since the seller was guaranteeing 90% capacity. At a 3A load (Sorry only have a DL24 and didn’t want to push it to 4A) I got 100.1%/97.9% on the first discharge. Second discharge was 100.5%/98.1% (Ah/Wh). First test was around 3.58V to 2.5V. The second discharge was 3.60 to 2.55V. Pack is fairly well balanced, I did just a little work in two groups that. The pack was shipped at 39.6V so just shy of nominal 3.3V.
The most popular use of these packs is to keep 3 whole and chop up another one to add the 12V blocks to the full ones for a classic 16S LiFeP04.
My mom has been complaining about not having enough light for cooking when my parents go glamping with their friends so I was originally going to build a 4S pack out of LG MJ1’s to power a 70W COB LED panel through an XYS3580 but I didn’t like the thought of giving my mom Lithium Ion even if I was going to put it in a metal box. I’ve had the can for a couple weeks ($15 Harbor Freight) and something told me I could squeeze a 12V M1B pack in it.
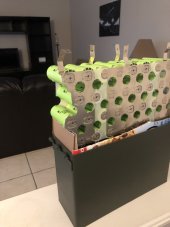
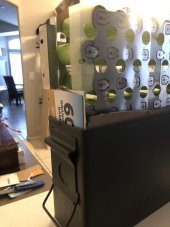
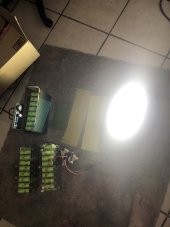
Looks like if I use the middle pack or chop off the spot for the bus bar on this end piece it will slide right in. Using a granola bar box to simulate the thickness of some epoxy resin board I have still packed away in a box. My plan is to use one of these 4S8P packs to power the buck boost converter in the lid of the can. The XYS3580 has been a really user friendly way of safely powering a 7000 lumen floodlight down to much more manageable levels. I’ll likely adhere the LED panel to the outside of the ammo can and look at putting a layer of clear acrylic over it. I’ll route the wiring into the can using some rubber grommets that are oversized so if a cell vents it has at least two holes to escape.
Just thought I’d share this perfect fit with you guys. When I’m done with cutting up the pack I’ll mount the middle third into the can and take a stab at mounting the converter in the lid. Still need to order some thermal pads and/or thermal tape to secure the LED to the can.
The most popular use of these packs is to keep 3 whole and chop up another one to add the 12V blocks to the full ones for a classic 16S LiFeP04.
My mom has been complaining about not having enough light for cooking when my parents go glamping with their friends so I was originally going to build a 4S pack out of LG MJ1’s to power a 70W COB LED panel through an XYS3580 but I didn’t like the thought of giving my mom Lithium Ion even if I was going to put it in a metal box. I’ve had the can for a couple weeks ($15 Harbor Freight) and something told me I could squeeze a 12V M1B pack in it.
Looks like if I use the middle pack or chop off the spot for the bus bar on this end piece it will slide right in. Using a granola bar box to simulate the thickness of some epoxy resin board I have still packed away in a box. My plan is to use one of these 4S8P packs to power the buck boost converter in the lid of the can. The XYS3580 has been a really user friendly way of safely powering a 7000 lumen floodlight down to much more manageable levels. I’ll likely adhere the LED panel to the outside of the ammo can and look at putting a layer of clear acrylic over it. I’ll route the wiring into the can using some rubber grommets that are oversized so if a cell vents it has at least two holes to escape.
Just thought I’d share this perfect fit with you guys. When I’m done with cutting up the pack I’ll mount the middle third into the can and take a stab at mounting the converter in the lid. Still need to order some thermal pads and/or thermal tape to secure the LED to the can.