diy solar

diy solar

Beware of the APEXIUM BOX Connectors

Thaidaffy You blatantly implied that I was acting suspect which of course distracts people from helpful facts.
Obviously your understanding of grammar and sentence structure is worse than mine, I simply stated the terminal looked to be sanded from from looking at the photo it may or may not be, but from the photo it looks that way which would mean your making yourself look more suspect.

Almost every post in this whole thread made by you has been edited and reformatted, from mine and others point of view you are implicating yourself.
 
Do you have this defect connector in your possession now or are the pictures still coming from professional solar installer.?

Got the dead on pictures of both mating surfaces for bus bar and connector mating surfaces like was asked for on 18 June 2024?

You offered to sell some of those connectors that you are calling defect?

What are you going to do with the so-called bad connectors from the 30 apexium diy boxes that you bought? Why did you edit out the 30 boxes?

Are you going to upgrade and change out all the connectors you identified as defective?

Did you talk to professional solar installer about the less than quality crimp the kind you agreed about wasn’t so good?
Ahh, back to the crimp. The biggest concern for many including myself!!

At first the crimp wasn't a concern of mine but was a major concern of many people on this forum. I resisted the possibility but eventually started questioning it myself! I love the great feedback from this forum.

So I did talk to the Solar Installer and question the crimp. I have determined the crimp was good, after it was explained to me that a pneumatic crimping tool was used and the damaged connector was placed in a vice and the attempt to remove the wire from the socket didn't work. The crimp was good! Believe it or not!.
 
Last edited:
If you have one of the original undamaged connections and a Vernier/micrometer some measurements of the connection would be interesting, the plastic likely gives a tight connection but how are the tolerances on the actual contact surfaces.
Edit: Or better yet measure multiple from your stock to see how much variation there is.
 
Obviously your understanding of grammar and sentence structure is worse than mine, I simply stated the terminal looked to be sanded from from looking at the photo it may or may not be, but from the photo it looks that way which would mean your making yourself look more suspect.

Almost every post in this whole thread made by you has been edited and reformatted, from mine and others point of view you are implicating yourself.
If you have one of the original undamaged connections and a Vernier/micrometer some measurements of the connection would be interesting, the plastic likely gives a tight connection but how are the tolerances on the actual contact surfaces.
Edit: Or better yet measure multiple from your stock to see how much variation there is.
I guess that I don't understand this forum? Its not allowed to edit post?

The measurement with a micrometer is a good idea. What do you think the tolerance should be?
 
Last edited:
That is the bottom of the bussbar. I figure that most people realize there is a top and bottom view. I guess you don't know anything about these batteries because there is a lock washer between the bolt and flat washer. These are the original unaltered photos below. Anybody who is reading this thread please disregard all the nonsensical conjecture and realize the potential hazards that can happen.
View attachment 225753
View attachment 225754
Can you post a pic of a good connector fully plugged in?

I would think they seat against the bulkhead connector.
 
Can you post a pic of a good connector fully plugged in?

I would think they seat against the bulkhead connector.
Would explain alot if the connector wasn't fully seated and makes sense looking at the way the connector is in the first photo posted by op there's a distinct ring of carbon rather than just melting, suggesting there was an air gap inside.
 
I have thanked and acknowledged the great amount of input in this thread, if one person gets value from any of this. A good service has been done.

Thaidaffy You blatantly implied that I was acting suspect which of course distracts people from helpful facts.
Oh you def provided great value, you confirmed 100% that I’ll never use anything but lugs and bolts with washers for my high current connections.

My life isn’t that high paced that I can’t spend an extra 5 minutes to crank down with some ugga duggas vs plug in.
 
  • Like
Reactions: Zwy
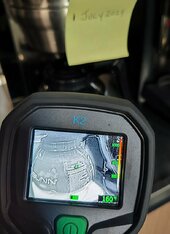
This is a relatively inexpensive and very reassuring way to sleep at night knowing that the nearly 200A running through the connectors I crimped (rated 360A) will not burn down the house. Strongly recommended. And recheck every few months.
Part of my regular maintenance schedule is waking around with my thermal to check everything. Takes 5 minutes.
 
Part of my regular maintenance schedule is waking around with my thermal to check everything. Takes 5 minutes.
I have to control all wires and connecting in the 4 weeks
The boat move around on the water and sometimes somting comes loose.
Last i had to do fridge its door that comes loose.
So i have to adjust and set it back on its place.

the cable come lose from the mmpt controller.
Well normal day to see of all things still works like it have to works.
 

diy solar

diy solar
Back
Top