diy solar

diy solar

Horsefly's 2nd Cabin battery build

Horsefly

Solar Wizard
Joined
Dec 12, 2020
Messages
1,822
Location
Denver, mostly
A couple of years ago I built an 8S 230Ah 24V battery for our cabin in the mountains of Colorado, replacing the AGM battery bank that had been there since 2017. I documented the details (with lots of photos) of the new battery build in this thread: Horsefly's Cabin Solar LiFePO4 Upgrade

One of the key requirements of the battery was that I wanted it to be self heating over the winter, so that if anyone showed up it would be ready to go. In the process of designing and testing the battery I found it was not difficult to keep the battery between 50°F and 60°F even when the ambient temperature outside the battery box stayed close to zero. The battery was installed in the spring of 2022 (getting rid of those nasty AGM batteries for good!), and it did its job through the challenging winter of 2022/2023.

This summer we've added some loads to our cabin, most notably an 18cf refrigerator, replacing the old 8cf absorption propane refrigerator we've had for a couple of decades. Although the existing battery might be able to handle the loads, I decided to build a second battery to put in parallel with the 2021 build.

In this thread I'll try and document what I did on the second battery.
 
Review of Battery #1
Here's a quick take on the first battery:
  • 8 230Ah Eve cells, wired as an 8S battery in two rows of 4 cells.
  • A roughly 24" x 24" box, 21" high built from 3/4" plywood, with casters on the bottom.
  • All four sides and the top and bottom were lined with 2" XPS (rigid foam) R10 insulation.
  • A 100A 8S Overkill Solar BMS and a Heltec capacitor-based active balancer (these 2 items were replaced with a 200A JK BMS with built in active balancing).
  • A Victron Smart Shunt to provide an accurate SoC for the battery in operation.
  • A somewhat over-engineered heating circuit:
    • 2 12V, 12W silicone heating pads, taped to the bottom of a 1/4" aluminum plate that the cells sat on.
    • Thermostat #1, tied to the temperature at the top of the cells. This turned on when the temperature fell below 50°F and turned off when the temperature rose to 60°F.
    • Thermostat #2, tied to the temperature at the bottom of the cells. This thermostat is meant to prevent the overheating of the bottom of the cells before the top of the cells reached the desired temperature. I think I had this thermostat set to turn off at 95°F, and turn back on when the temp fell below 80°F.
    • A Thornwave Labs Smart Shunt, used to turn off the power to the heating circuit if the battery voltage fell below around 26V. This was to prevent running down the battery completely using the heating.
    • So the idea was that heat would be enabled only if the top of the battery fell below 50°F AND the bottom of the battery was below 95°F, and the battery voltage was above 26V.
Lessons Learned for Battery #2
One of the first things I realized was that using the Thornwave Labs Shunt to turn off the heating circuit if the battery got low was a bad idea. The shunt couldn't handle much power itself, so I had it turning an SSR (Solid State Relay) On an Off, and that all consumed more power than I really wanted. I then stumbled upon the Victron Smart Battery Protect, which was perfect.

I also realized during testing that the two small 12W heaters were perfect the job, and would warm the cells slowly enough that thermostat #2 was not really required. During heating the bottom of the cells were never more than a few degrees warmer than the top of the cells.

Finally, I incorporated an SoC battery monitor (JuncTek) outside of the individual battery. This provides a nice color display of the SoC, and with multiple batteries in parallel it can provide the total SoC instead of just for the one battery.
 
With the lessons learned on Battery #1 I simplified the design for Battery #2. Although I liked the Lexan window above the cells in Battery #1, I also left that out of Battery #2. The result is a smaller box that otherwise has all same features.

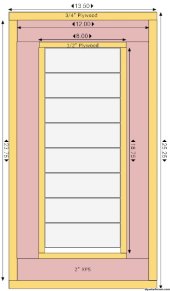
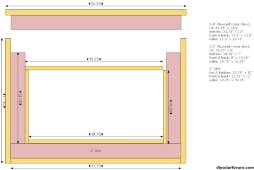
The design is an outer box and an inner box. The outer box is made from 3/4" plywood and provides the main structure of the battery box. The inner box is made from 1/2" plywood, and is just to house the cells. Between the two boxes on the bottom an all four sides is the same kind of 2" XPS rigid foam insulation. I actually had enough XPS left over from the Battery #1 to build Battery #2.

New230BatteryBox-TopView.jpg

The inner box also had a hinged lid. The top of that lid is where the BMS and all the heating circuitry (except the heating pads) would be placed. Then there was a lid for the overall outer box of 3/4" plywood and covered in more 2" XPS insulation.

New230BatteryBox-SideView.jpg
 
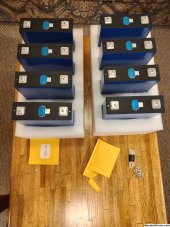
I bought the 8 230Ah Eve cells from Docan, from their Houston warehouse. This was my second order of cells from Docan, and I was very happy with both orders. I used my EBC-A40L tester to test each cell's capacity, and they all tested above the spec 230Ah.

IMG_20230730_200818138_HDR.jpg

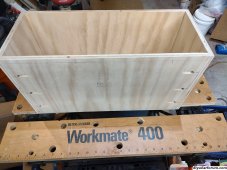
I started building the inner and outer boxes. I used pocket screws and glue for all the joints on both boxes. Here's some early shots of the inner box (for some reason I forgot to take any in-progress photos of the outer box):

IMG_20230801_175221085_HDR.jpg
IMG_20230801_175234303_HDR.jpg
 
I partially painted the inner box (mostly just the top and inside, since the outside would not be visible), then started putting in the stuff that had to go into the bottom of the box: Silicone insulated pads (kitchen trivets), the heating pads, and the aluminum plates that would be under the cells.

IMG_20230815_062117064_HDR.jpg

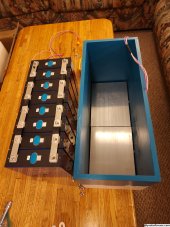
For size reference, here's the inner box sitting next to the cells that were all connected for top balancing:

IMG_20230815_062123952.jpg

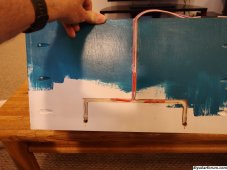
The wires from the heating pads had to come out on the side of this box. Since this would be enclosed in XPS, I used a router to cut a groove for the wires to run out from each pad, connect in the middle and run up to the top of the box.

IMG_20230815_062137546.jpg
 
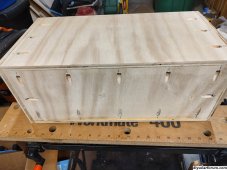
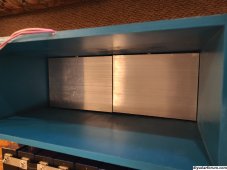
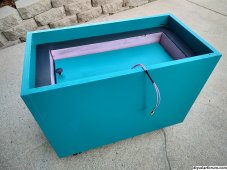
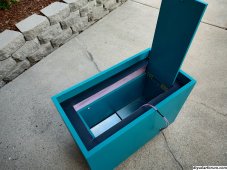
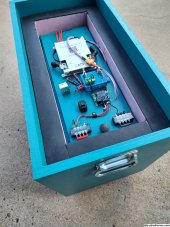
Now the story kind of skips ahead, since I didn't take any photos of the outer box being built. Here's the mostly-completed battery box, first with the lid for the inner box down, and then with it up.

IMG_20230816_172526047_HDR.jpg

IMG_20230816_172537259_HDR.jpg

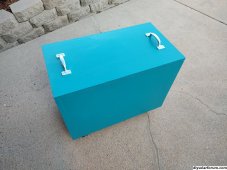
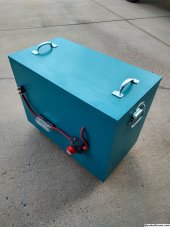
And here's the box with the outer-box lid in place. As I said earlier, this outer lid has XPS under it, so that XPS fully surrounds the inner box with all the cells.

IMG_20230816_172615667.jpg
 
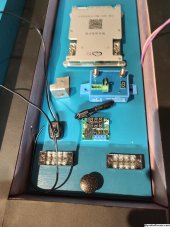
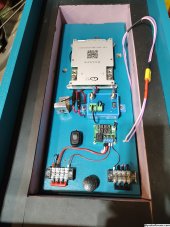
Now I started mounting all the electronics on the lid for the inner box, including the JK BMS, the thermostat, On/Off switches for both the BMS and the heater, and the Victron Smart Battery Protect.

IMG_20230817_080630990_HDR.jpg

IMG_20230819_072007138.jpg
 
On the left side of the box I ran the positive / red #2 cable out and ran through a disconnect switch and fuse, ending on a a 5/16" terminal post. I also ran the negative / black cable out the back of the box to another terminal post (no photo -sorry).

IMG_20230823_162239007_HDR.jpg


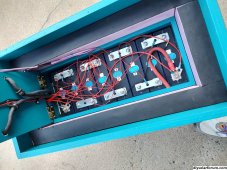
Here's shots after I completed wiring the BMS and putting the cells in place. Apologies for the messy wiring of the BMS sense leads, but this was temporary just to test the battery, as I quickly disassembled it and removed the cells for transport up to our cabin.

IMG_20230823_162328594_HDR.jpg

IMG_20230823_162341603_HDR.jpg
 
Looks like a good amount of work and effort. I would suggest getting some caster wheels form home depot/harbor freight and make it mobile.
 
Looks like a good amount of work and effort.
If you want to see lots of work - excessive amounts of work - look at my battery box build of 2021. One thing I did differently this time is that I didn't try and make the thing furniture quality. I made sure the boxes were precisely sized and square, and then just painted them.
 
One of the most impressive projects I've seen on the forum. Excellent work. Congrats!
 
@Horsefly Did you ever get this up on the mountain? What did you think of the new style welded studs on the EVE 230’s? I really like them compared to the old type welded studs. I like them so much I’m considering getting 32 more and selling the two sets of 16 I have from the earlier version.
 
I like it a lot.
Pretty soon, we're going to be seeing polished mahogany boxes with dovetail joinery
 
@Horsefly Did you ever get this up on the mountain? What did you think of the new style welded studs on the EVE 230’s? I really like them compared to the old type welded studs. I like them so much I’m considering getting 32 more and selling the two sets of 16 I have from the earlier version.
Yes, the new battery is up in running in parallel to the 2021 version. It was working well for the last month or so of the summer / fall season. I'm hopeful it will do fine through the winter, as the other one did last winter. The cabin is all winterized and closed up, so it will be May-2024 before I know for sure.

Yes the design of the studs and pads are much better now than they were in the original EVE230's we got back in the day. Much better contact.

Since the cells (not just EVE but all of them) are not manufactured with studs, and because the studs seem to look pretty much the same on all the cells we can buy, I've always assumed that there is some third party in Shenzhen that does this for all the surplus brokers that we are buying cells from. It would be interesting to get the truth from someone, but I'm not sure we can.
 
Back
Top