diy solar

diy solar

My 24v Stand alone system as UPS, Portable power station WIP

JJJJ

Aspiring apprentice
Joined
Feb 25, 2021
Messages
1,086
Last update 3/31, last post

This will be a work in process as I figure out the ins and outs of this methodology. Apologies if images are not visible to some, I am still learning.

This is phase I of a two phase project. The first part of the project included building what amounts to a UPS.
1675635224746.png
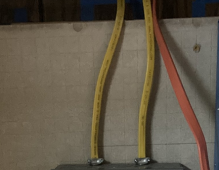
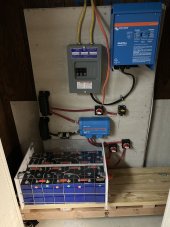
At the top of the photo you will see yellow and orange wire.

The orange is 10 gauge wire and runs from a dedicated subpanel with a shut off. Per forum instructions the neutral and ground are separate. This is the ac input and the voltage input will be adjusted accordingly in the Multiplus software.

The yellow wires are 12 gauge and run to a total of three dedicated outlets separate from the home which can be used for lighting, etc.
1675635273410.png

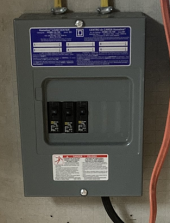
The ac box, while it shows three breakers, only has two 15 amp breakers active at this time. Again, the ground and neutral are separate.

It is hard to estimate the number of hours dedicated to the components below.

The back wall is a number of 2/4s vertically attached to wall studs and running to the concrete floor. At the top are 2 cross beams of 2x10 which create a very firm attachment point for the Victron inverter charger. I hope to post photos later on this. The framework is then covered and attached to 3/4 inch plywood. The plywood was then painted with a fire resistant/proof paint prior to be being covered by hardiboard.
1675635408863.png

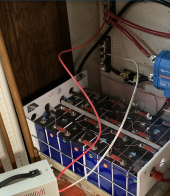
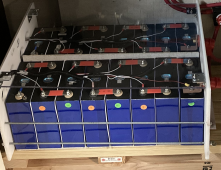
The batteries are two 24 volt units consisting of 8 CATL 302 amp cells. Each is attached to a separate Overkill BMS in the back. The sides are heavy duty vinyl. The top is 1/4 inch polycarbonate for protecting the packs. Between the batteries and under each is hardiboard. The cells have been insulated from each other to reduce possible cell leakage. At the positive terminal, a custom 90 degree pure copper bus bar has been placed which then feeds an attachment terminal on the side. While you see threaded rods on the sides, I elected not to utilize compression. The nuts on the ends are finger tightened only to allow a comfortable place for the batteries to rest.

The cart underneath is on 4 independent rollers and allows one to roll the batteries out of the storage area if any maintenance is needed.

1675635457594.png

The wiring for each battery runs to a dedicated shut off switch which were placed to permit maintenance if needed.
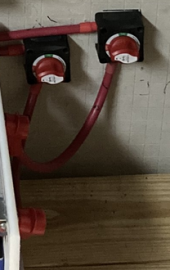
1675635509520.png

The batteries run to a Vicron Distributor which has fusing built in. Since it acts basically as a fancy bus bar, it helps to make sure that input and output from attached batteries both receive and distribute power evenly.
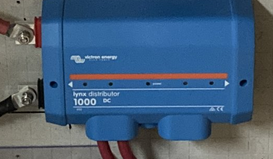
1675635557525.png

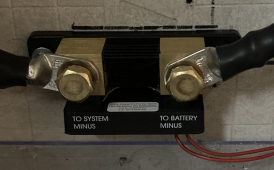
The negative terminal from the distributor runs to a Vicron Smart Shunt before attaching to a Victron 600 amp bus bar.
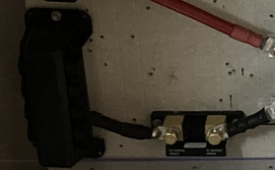
1675635592545.png

The positive terminal from the distributor also attaches to its own bus bar.

The bus bars are there in case 12v current is wanted in the future and to allow a future attachment point for the solar input which is scheduled for this year.
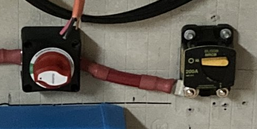
1675635729717.png

The positive bus bar runs to a master shut off switch before running to a breaker.
1675635663478.png

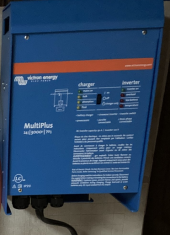
Not pictured is the charge controller (still in box) and the positive and negative lines to the inverter charger, which is the Victron 24v Multiplus system. This one is UL rated.

The wire from each battery is 1/0. Everything from the distributor on is 2/0. If I were working with 12v then these would be double thickness.

Most of the lugs are Selterm brand. The individual components are from Blue Sea and Victron.


D2DD80AF-6032-49CF-9A4B-36E276D6EB22.jpeg
 
Last edited:
Last night I wired the smart shunt to each battery. Originally I was going to tie into the common bus bars as a consolidation, but until additional batteries are tied in will use this approach. Will did a nice video on this unit, the Victron smartshunt.

1675855948097.png
 
Last edited:
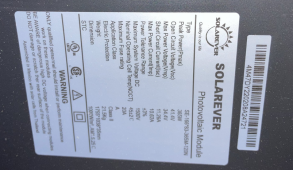
Because we are a single income household, purchases have been spaced out. I would love to live in the country where there are more options. Because I live in a more suburban area, my approach is more conservative. My startup will be modest. This is the back of the solar panel I have chosen.

1675857374670.png
 
Last edited:
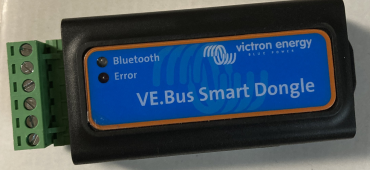
Many find themselves debating between the Cerbo and the Dongle. Since I do not need to access through the internet I chose the Dongle. It has basic programming features and temperature monitoring.

1675856185034.png
 
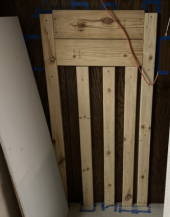
This shows the basic structure behind the hardiboard and 3/4 inch plywood. At the top I placed 2 2x10s securely tied into the 2x4 structure. Everything is tied into studs in the wall. Because the Multiplus carries a bit of weight, I tried to "overbuild" the structure to ensure a safe place to hang it.

1675857609910.png
 
Last edited:
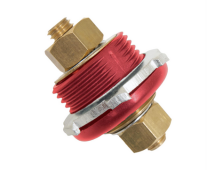
Here is the battery terminal that ties into the custom bus bar. Many thanks to @Steve_S for this resource. It comes from Summit Racing:

1675857894732.png
 
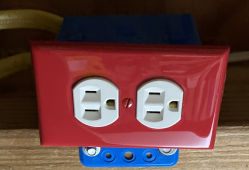
Here is one of the outlets from the inverter/charger. Because these are fed by the Multiplus I chose to use a red cover instead to make sure they stood out as a separate circuit:

1675858481239.png
 
One thing I have been careful about is recognizing my limits. When it came to wiring the subpanel and power distribution panel I had the assistance of a friend who has extensive electrical experience. The neutral ground discussions on the forum were also invaluable.

This friend also has extensive experience building batteries from scratch and has been very helpful critiquing the process as another set of eyes.
 
Thanks for sharing.

Out of interest:

Where did you purchase your batteries?
What was the cost of each battery?
What was the cost of shipping to your location?
Did you have any shipping or delivery problems, such as customs, or needing a customs broker?
What exact model of the Overkill BMS did you choose and why and it's cost and or a Link?

Also important, what tools or equipment were required to build your battery and so added to the cost?
Such as: hand tools
Important: What Charger did you purchase and use and it's cost(s) (with shipping?) Such as for top balancing.
What meter(s) did you require? Just a multimeter?
Any other "Build Tools or Equipment" you feel are a MUST Have to build your battery? Costs?

As I have not yet built my own battery, I'm not sure of all the Must Have equipment required that adds to the cost of the battery.
I would likely only build one 24V battery, larger than my present battery, but I am not sure it's worth having extra required build equipment and the costs, for equipment that I would not likely use again. I have crimpers, wire cutters, a good multi-meter and a few other things, but not a dedicated charger, other meters, analyzers, etc., for top balancing or load testing, etc.. Most tutorials or videos do not mention equipment costs, sources, shipping costs, etc. for the Extra equipment required for battery builds, or the people have more money than I do and so budgeting does not seem to be concern to them. Costs are a huge concern to me.

Due to budget and location in rural Canada, I am trying to decide on the value of importing and building a larger battery vs. other pre-built imported options. In Canada, we have few lower cost options and shipping, at least to my location can be quite expensive, even from the USA. Shipping to my location is often convoluted and has been in the past extremely stressful and compromising. I have never had shipping to my door. when I look at the buying from China options, they too are so varied, even from the several often mentioned sellers, either direct or through Alibaba. I have purchased from Alibaba before and it was not at all a pleasant experience.

Any further costs and equipment required or recommended for the build that you would care to share would be appreciated.
have a look here:


i don’t think it’s worth building your own battery.

if you’re close to the us border you can look at having product shipped to the us. Drive down,to,pick up and bring across the border. Canadians get screwed big time on cross border shipping.
 
have a look here:


i don’t think it’s worth building your own battery.

if you’re close to the us border you can look at having product shipped to the us. Drive down,to,pick up and bring across the border. Canadians get screwed big time on cross border shipping.
Thanks for the info. I don't live close to the USA border and to drive there and back adds to the cost of a battery.

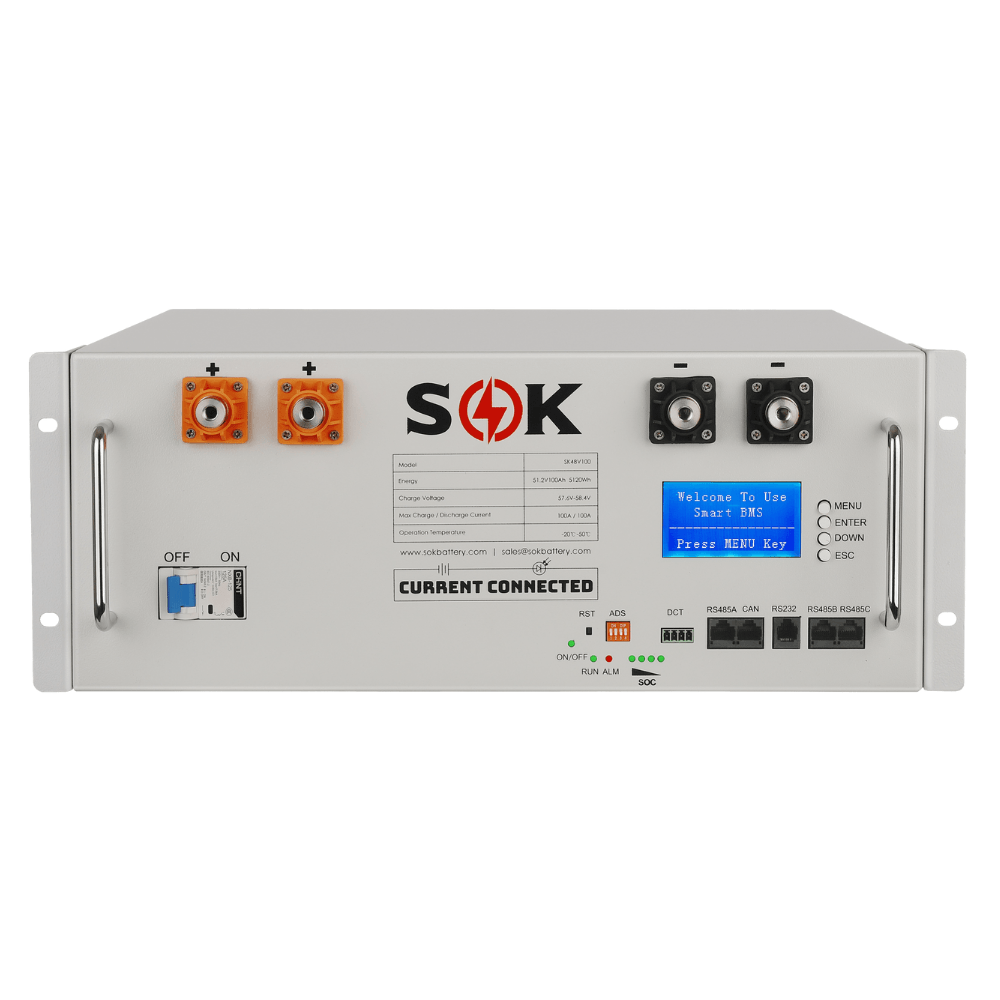
I have seen this server rack option before but it is quite expensive plus shipping, a bit low on features and capacity (no Bluetooth BMS at least) and not as good value as DIY, IF the extra equipment for DIY does not inflate the cost too much.

That is what I've been trying to list and to figure out the last few days but THE MUST HAVE equipment and costs for my access is still somewhat vague to me and the constant looking and comparison of the unknowns is getting tiresome.

At present, my rough estimate is that DIY would save me $200-400, which may not be worth the stress I'd encountered in the past to build my off grid system. This was due to sourcing and buying from China and all the BS that entailed, all the vague info, poor communication and documentation from suppliers, changed prices, horrid stressful shipping and delivery BS and bogus or difficult tech support BS. I despise dealing with the horrid practice of having to deal with the delays of time zones and frustrating unknown holidays or schedules and the insane to me practice of requiring Chinese sales people as middle persons for tech support.
I didn’t look too much into diy battery. To me it doesn’t seem worth the (cost savings???) I actually priced out higher to diy, and even at that I don’t know what I’m buying, and,from who. No thanks. 200-400 is not worth my hassle. It may be worth yours.

the link I posted are the best prices,for Canadians I’ve found so far. Most are obscenely over priced.
 
  • Like
Reactions: D71
This morning I activated both batteries. I then ran a multimeter test for each battery at:

1. The battery itself
2. The output from the Distributor
3. The bus bars after the distributor

I was able to test each battery since I was able to turn each on and off with its switch.

The readings at each level was identical. This was encouraging.
 
I am running the power supply on the bus bars. This is the same unit I used to do my balancing. It provides a simple test that mimics, albeit at a much slower rate, what the Victron will be doing in the future.

Both batteries are receiving a charge as expected. I wanted to top things off since the batteries have been setting around for a while.

1676209045510.png
 
Last edited:
Got things up and running today. Today was a nervous day as I checked and double checked things. Then there was trouble shooting to make sure that the AC wiring was proper and up to snuff.

All wiring from the batteries to the Victron Distributor is 1/0. Everything after the Distributor is 2/0. All wire is pure copper fine strand.


Long story short, it is working. Here is an updated photo. I can read the batteries, smart shunt and Multiplus readings on my IPad. I am toying with the purchase of a Cerbo Gx, although I really don't need to check things from another part of the world at this time.

1676846861709-png.135716
 
Last edited:
I just placed an order for components for the solar end of the project (phase II). I wanted to thank @SpongeboB Sinewave for his assistance. His Tech Todd was invaluable in walking through technical schematics to make sure the solar end of the project was sound. I also wanted to thank Luis at Naz Solar Electric (formerly Northern Arizona Wind and Sun) for taking the time to talk me through the purchase of needed equipment.
 
So I finished up adding my third pack of batteries. Have had these for a while but the old Overkill BMS was having a hard time getting them in balance. They are CATL 302s from an old EV pack teardown so were likely improperly matched from the beginning. I opted for the JK active BMS balancer which has a lot of discussion right now, so time will tell. I have since pulled the painter's tape off to clean things up.

3/31/23. So far the three batteries are working well together. The Jk active BMS appears to be keeping the cells reasonably close together. The other two Overkill BMS units are doing their job as well.

The nice thing about the Overkill units is that they seem to have a longer Bluetooth range and use less power as a passive balancer. On the other hand the JK unit is needed to keep the cells of the newer install in line. It will be interesting to see if the internal resistance of these cells align better over time.


1680085719843.png
 
Last edited:
Good job on your backup power system I'm liking the victron equipment as well I'm curious about your victron's power distribution box was that expensive and was it really necessary ? I'm interested in that out of curiosity because I just built a 16 lifepo battery bank that's at 48 volts and I did the diagonal power in and out on the bus bars trying to make it more even. I'm curious if these are worthwhile In a bigger battery system, so that distribution is able to handle two batteries correct? What is the voltage of that distribution unit can it handle 48 volts or are they specific to your voltage?
 
Back
Top