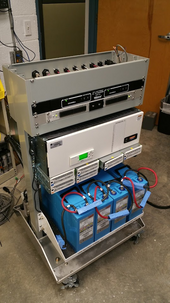
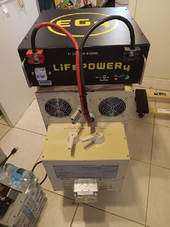
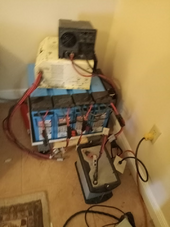
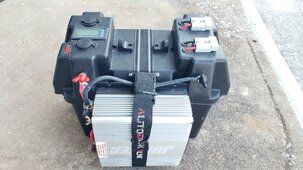
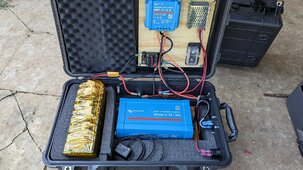
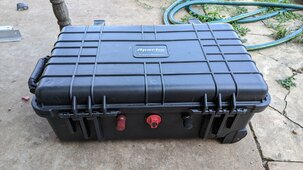
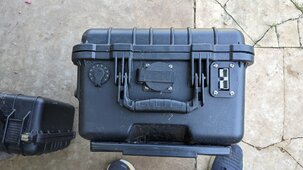
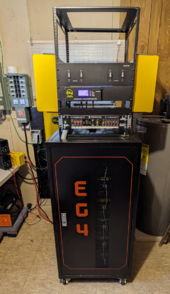
I know there's a lot of these builds like this out there, but I'm surprised at how well this turned out. It was a good excuse to try working with new materials, tools, and components.
Primary goal for this was to build something compact that I could take with me camping so I'd have power to run a fridge, camp lights, and charge devices. During the planning stage, I started spiraling into the idea of adding solar charging capability and stumbled upon this forum.
My design considerations include:
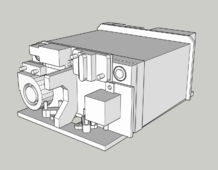
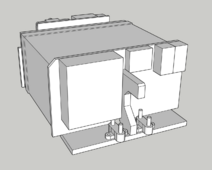
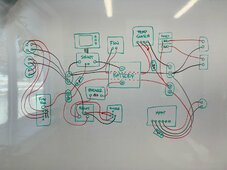
I also sketched out a wiring diagram of everything so I knew going in what needed to be connected to what.
The Build
Here are several photos of the progress of the build from start to finish. I started with assembling the frame out of HDPE boards I had leftover from another project. This stuff is awesome. It's got a lot of the same properties as wood, but the density is more consistent, making tapped & screwed connections much more secure. Plus, they come in black, so I don't have to do any sort of painting to make it all look nice.


Cutting holes in the case and mounting all the components...


As mentioned earlier, I wanted to design the frame to be completely removable so I could easily connect all the wiring and service components down the road if needed without having to take everything apart. Since the frame was custom fit to the box and braced in all directions, it's not actually secured to the case itself. A strap was installed to secure the battery to the platform. It wasn't moving around before adding the strap, but I found that with the battery's weight, it was nearly impossible to lift the whole assembly out of the case without something easy to grab onto.

Wire thickness was probably a bit overkill for this setup, but it's better to be safe than sorry. Everything connected to the battery on its own circuit is appropriately fused to prevent it all from melting down (hopefully).


Final assembly was a bit of a pain, just because I didn't leave much room for my fat fingers to connect all the plugs. After some minor adjustments, everything fit nicely together. The left side of the power station will be used for charging devices (phones, laptops, flashlight batteries, etc.) as well as running a fridge or camp lights. The battery monitor display is also on this side for easy access.

The right side is for connecting utilities, like an AC charger, a DC-DC charger, or outputting to a small inverter run things on AC. There's also the solar input for charging the battery on its own. The hole cutout serves as the intake for air to get pulled in across the length of the case by the exhaust fan on the other side. The fan is controlled by the programmable temperature relay switch with the thermometer mounted next to the solar charger (because that is likely to get the hottest during operation).

The single power button on the front acts as the cutoff switch for the entire battery via the large relay. I placed it there to protect it from getting accidentally pushed when moving it around or packing it in next to other things. With the power off, all internal circuits are disabled and no electricity will be able to run in or out of the box. This will be useful to easily power it all down when not in use.

Believe it or not, it all fits in there with the lid closed.

Here are the high-level specs at a glance:
Primary goal for this was to build something compact that I could take with me camping so I'd have power to run a fridge, camp lights, and charge devices. During the planning stage, I started spiraling into the idea of adding solar charging capability and stumbled upon this forum.
My design considerations include:
- Rigid frame to secure battery and all components that could easily be removed if something needed servicing
- The ability to store the box flat or horizontally, while still allowing access to all the ports and air flow for the cooling system
- Single power button to cut off everything connected to the battery
- Expansion ports to connect other devices (inverter) or for charging (AC charger or DC-DC charger)
- Programmable temperature-controlled fan to pull air through the box only when needed
- Keeping everything as tidy as possible


I also sketched out a wiring diagram of everything so I knew going in what needed to be connected to what.

The Build
Here are several photos of the progress of the build from start to finish. I started with assembling the frame out of HDPE boards I had leftover from another project. This stuff is awesome. It's got a lot of the same properties as wood, but the density is more consistent, making tapped & screwed connections much more secure. Plus, they come in black, so I don't have to do any sort of painting to make it all look nice.
Cutting holes in the case and mounting all the components...
As mentioned earlier, I wanted to design the frame to be completely removable so I could easily connect all the wiring and service components down the road if needed without having to take everything apart. Since the frame was custom fit to the box and braced in all directions, it's not actually secured to the case itself. A strap was installed to secure the battery to the platform. It wasn't moving around before adding the strap, but I found that with the battery's weight, it was nearly impossible to lift the whole assembly out of the case without something easy to grab onto.
Wire thickness was probably a bit overkill for this setup, but it's better to be safe than sorry. Everything connected to the battery on its own circuit is appropriately fused to prevent it all from melting down (hopefully).
Final assembly was a bit of a pain, just because I didn't leave much room for my fat fingers to connect all the plugs. After some minor adjustments, everything fit nicely together. The left side of the power station will be used for charging devices (phones, laptops, flashlight batteries, etc.) as well as running a fridge or camp lights. The battery monitor display is also on this side for easy access.
The right side is for connecting utilities, like an AC charger, a DC-DC charger, or outputting to a small inverter run things on AC. There's also the solar input for charging the battery on its own. The hole cutout serves as the intake for air to get pulled in across the length of the case by the exhaust fan on the other side. The fan is controlled by the programmable temperature relay switch with the thermometer mounted next to the solar charger (because that is likely to get the hottest during operation).
The single power button on the front acts as the cutoff switch for the entire battery via the large relay. I placed it there to protect it from getting accidentally pushed when moving it around or packing it in next to other things. With the power off, all internal circuits are disabled and no electricity will be able to run in or out of the box. This will be useful to easily power it all down when not in use.
Believe it or not, it all fits in there with the lid closed.
Here are the high-level specs at a glance:
- 12V 100Ah LiFePO4 battery
- 15A solar MPPT charger
- Battery monitor with color LCD screen
- Temperature-controlled cooling fan
- Single power button battery disconnect
- 2x 20W USB-C ports
- 1x 18W USB-A port
- 1x 300W 12V cigarette lighter port
- 2x 30A Anderson Powerpole ports (input/output)
- 2x 50A Anderson plug ports (input/output)
- 1x 30A Anderson Powerpole solar input


