diy solar

diy solar

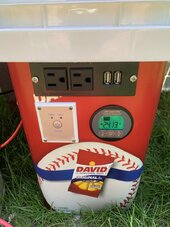
The Bucket

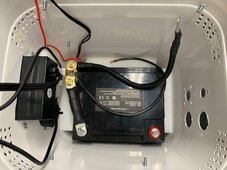
Looks like the battery finished charging while I was working.
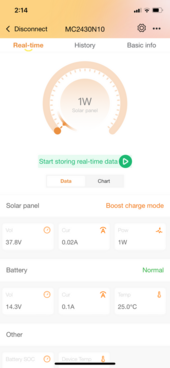
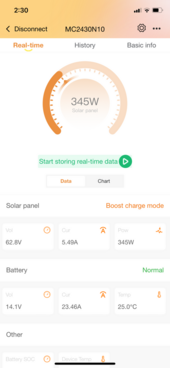
First SCC functional test was successful.
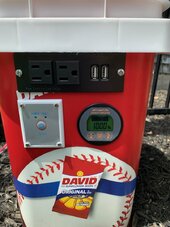
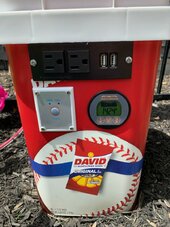
IMG_8276.jpgIMG_8278.jpgIMG_8277.PNG

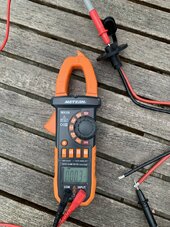
I noticed the app consistently reported a battery voltage reading that was somewhere around 0.07-0.10V higher than what the Aili and my voltmeter read. The app does appear to provide a calibration function for the battery voltage. I'll play around with that some other time.

I'll also run some additional tests down the road, including whether it can actually deliver on the promised 30A.
 
I've found all my previous inverters always shown slightly different voltages than my SCC.. even two identical SCCs on the same battery shown a minimal difference lol. Speaking of inverters, it's been nearly 18 hours with that Giandel 600w and I'm really loving it!

It would be interesting to see if that SCC could hold 30A... even 25A would be good to see. Mine (despite being a 30A PWM) doesn't like sitting at 22A for very long, which is understandable.

It is like driving around with 2 different GPS in your car - hardly ever agree on the path.

The only way to get really accurate / precise voltage measurements consistently is if your meters are traceable to the national bureau of standards.

A real pro will do that but hardly anyone else.
 
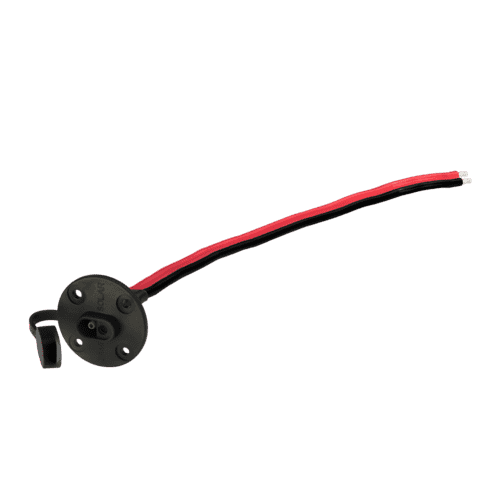
An SAE bulkhead port can be useful for low voltage solar input.

Zamp sells them with 10 awg wire, or you can buy them at the usual places, ebay, amazon, etc.

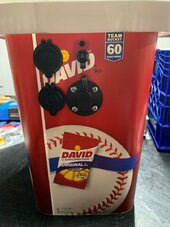
The Zamp SAE solar input port was just delivered along with an SAE to MC4 adapter cable. Looks like it's going to work very well. Thanks @HarryN
 
The Zamp SAE solar input port was just delivered along with an SAE to MC4 adapter cable. Looks like it's going to work very well. Thanks @HarryN

It is easy to make polarity errors when setting up. The method that I use is to start at the solar panel and put a piece of yellow tape on the solar panel ( + ) wire and sort of follow that convention all they way through. It isn't official, the yellow just reminds me of the sun.

If you put a matching port on your car and attach it to your starter battery ( fused ), then in an emergency, you can just attach that panel to your car battery and it can slowly trickle charge it up enough to start the vehicle. While it is better to have a solar charge controller there, you don't actually need one if you just keep an eye on it while it brings the voltage back up to ~ 13 - 14 volts or so.

Possibly avoid the "Breaking Bad" episode where the RV was stuck in the middle of the desert with no power.
 
Last edited:
If you get a chance to take any measurements on the resistance or voltage drop through that zamp connector setup, I am very curious about the numbers.

I have used SAE connectors for solar for a while and suggested them to a friend. Not sure what brand he purchased, but the voltage drop through his with a 100 watt panel was surprisingly high, so now I am second guessing myself / wondering if he just has some poor quality ones.

Thanks
 
If you get a chance to take any measurements on the resistance or voltage drop through that zamp connector setup, I am very curious about the numbers.
I have no concerns. Your friend must have a crappy one with bad connections. I bought a Zamp branded one.

IMG_8329.jpegIMG_8328.jpeg
 
I don't know why, but I like this so much better than many of the cart builds, etc

I have to ask, was that bucket full of sun flower seeds that you could ate? That would take me a lifetime.
 
I have to ask, was that bucket full of sun flower seeds that you could ate? That would take me a lifetime.
Nope. I intercepted it as someone was sending it to the trash bin.
(I assume some baseball team ate all the seeds..)
 
Last edited:
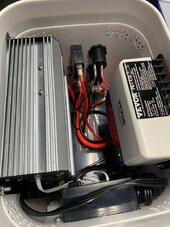
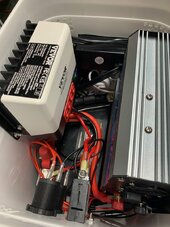
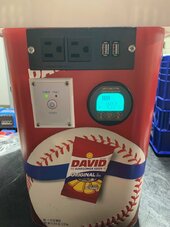
Final assembly is complete.

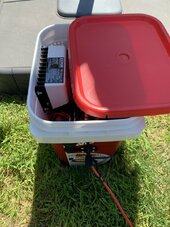
I decided to drill out the remaining two corners as ventilation and see how that goes for a while. I also added some (highly flammable?) foam around the battery to keep it from drifting around.
IMG_8331.jpg

It's a tight fit with everything fully assembled, but it works.
IMG_8336.jpgIMG_8337.jpg

The SAE connector *almost* fit perfectly below the breaker. A look at the final operational side panels.
IMG_8333.jpgIMG_8334.jpg

And... of course it's raining so I can't do any additional charge tests today.
 
Solar charging test through the SAE input port using a slap-dash 4S 400W HQST panel array.

Looking good:
IMG_8366.pngIMG_8361.jpegIMG_8364.jpeg

I’ll cobble together a 600W array some other time and try to peg the SCC at 30A.
 
Raise your hand if you thought the bucket needed more ventilation. Oh... Everyone did? Yeah, so it needs more ventilation.

During the charging test the SCC heat sink got so hot I kept wondering if it would melt the side of the bucket. I ended up retracting the stadium roof to vent it. I don't like that as a permanent solution since I don't want anything accidentally falling into the works (or anyone's hand reaching in because they don't understand what's going on in there).
IMG_8367.jpg

I’ve been contemplating how I want to add vents and will post updates soon. I'm going to try and avoid adding a fan mainly because I'm not sure I can squeeze one in there.

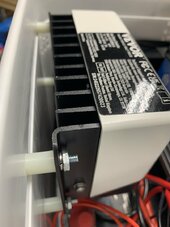
To facilitate better airflow once I add the vents, I used 1/2 inch nylon spacers to stand the SCC off from the side of the bucket.
IMG_8469.jpg
 

diy solar

diy solar
Back
Top