diy solar

diy solar

JK-BMS-CAN with new Cut-Off Charging Logic (open-source)

I have a setup worse than yours where my inverter does NOT talk to ANY battery 🤣.

Just working in Float/Absorbtion/Equalization on Inverter level and set maximum charge/discharge current there.

Also, when you do NOT have a load (check each battery 1 by 1), check the no-load voltage of each battery.

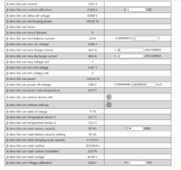
As you can see in my plots, I have approx 0.7V voltage measument "offset" / error on the second battery that's currently hitting OVP. At first it was a diode in the loop, but probably just some voltage that needs calibration in the JK BMS App.

That could be something else to check if you can read very similar voltages, yet the load voltages / capacities seem quite different (you might have the OPPOSITE problem as I have basically).
Offset - that is one topic i dont yet understand
Here are m=y current settings again

# Operating Voltage
46v (3.28) to 57v (4.07)

# JK-Can
Absorbtion Voltage
Absorbtion Offset - 0.05
Absorbtion Time - 42 mins
Bulk Voltage - 55.7
Rebulk Offset - 0.8
Float Voltage - 54.1 change to 55.9
Discharge Current - 40 A
Charge Current - 40 A
Total Battery Capacity - was 80Ah - New 95 Ah
SOC 100% 4.1
SOC 0% 3.25 NEW 3.34
UVP 3.33

# JK-Can-2
Absorbtion Voltage
Absorbtion Offset - 0.15
Absorbtion Time - 42 mins
Bulk Voltage - 56.4
ReBulk Voltage - 53.6
Rebulk Offset - 0.8
Float Voltage - 56.4
Discharge Current - 28 A
Charge Current - 40 A
Total Battery Capacity - 95 Ah
SOC 100% 4.0
SOC 0% 3.25 NEW 3.34
UVP 3.33
 
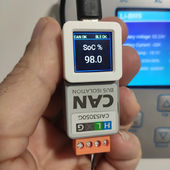
Right ....will restart some troubleshooting session to understand why Atom S3 doesn't work with wired RS485 version (compilation is OK) :unsure: :unsure:

🎺 I close this action point and confirm that the ATOM S3 lite ESP32 HW works fine with both wired RS485 and BLE version 🍾

some indication for yaml file compilation

use esp-idf (both wired and ble)

C++:
esp32:
  board: esp32-s3-devkitc-1
  framework:
    type: esp-idf
  variant: esp32s3

in the wired version redirect the debug uart port to avoid conlfict

C++:
logger:
  hardware_uart: USB_SERIAL_JTAG
  level: INFO

so bottom line Atom S3 lite + atomic CAN base seems the simplest, easy and plug and play HW solution to run the JK-BMS-CAN sw with BLE interface or maybe with more "stable" wired RS485 interface (off course in the simple case 1 BMS and 1 inverter)

to do...
  • manage the smart RGB led to convey usesful information (connection status, etc..)
  • use the button to activate some useful function
  • use the Atom S3 with 0.85" display to visulize relavant info and build also a "real time BMS / battery monitor"
work in progress :)

1709917543800.png
 
Offset - that is one topic i dont yet understand
Here are m=y current settings again

# Operating Voltage
46v (3.28) to 57v (4.07)

# JK-Can
Absorbtion Voltage
Absorbtion Offset - 0.05
Absorbtion Time - 42 mins
Bulk Voltage - 55.7
Rebulk Offset - 0.8
Float Voltage - 54.1 change to 55.9
Discharge Current - 40 A
Charge Current - 40 A
Total Battery Capacity - 95 Ah
SOC 100% 4.1
SOC 0% 3.25 NEW 3.34
UVP 3.33

# JK-Can-2
Absorbtion Voltage
Absorbtion Offset - 0.15
Absorbtion Time - 42 mins
Bulk Voltage - 56.4
ReBulk Voltage - 53.6
Rebulk Offset - 0.8
Float Voltage - 56.4
Discharge Current - 28 A
Charge Current - 40 A
Total Battery Capacity - was 80Ah - New 95 Ah
SOC 100% 4.0
SOC 0% 3.25 NEW 3.34
UVP 3.33
An "offset" is simply a constant value that is added/subtracted to your (real) voltage.

Think of it like:

U(t) = Ureal(t) + 0.7V

In this case 0.7V is the offset.

Or more generally for a linear function y = a*x + b, "a" is the gain while "b" is the offset

You seem to have very different values for voltages, currents, etc between the two batteries. Are you sure it's correct ?
 
You monitor the lowest VOLTAGE you mean ?

That can also be a bit skewed (on the conservative side): assuming you do NOT have any load steps, it could be OK. But if you suddenly apply a load to your battery, then the (load) voltage might drop below that value ...

As I explained, the "real" SOC and the "reported" SOC will likely differ a lot due to the reasons I outlined. That was the case for me at least
Very correct - i noticed this...
 
An "offset" is simply a constant value that is added/subtracted to your (real) voltage.

Think of it like:

U(t) = Ureal(t) + 0.7V

In this case 0.7V is the offset.

Or more generally for a linear function y = a*x + b, "a" is the gain while "b" is the offset

You seem to have very different values for voltages, currents, etc between the two batteries. Are you sure it's correct ?
yes i wanted less discharge from the second battery when i found it was always discharging more from it
 
yes i wanted less discharge from the second battery when i found it was always discharging more from it
That doesn't make much sense.

Aren't the batteries PHYSICALLY in parallel (after fuse/breaker etc of course).

You do not have 2 inverter with 2 separate and decoupled batteries, do you ?
 
in our discussion i just found/discovered one problem

the 1st battry Ah was set at 80

i have just corrected it to 95
i can swear i did not set that...maybe it didnt save in the BMS software when i set it...i have reset it via the web interface now
1709917678666.png
 
🎺 I close this action point and confirm that the ATOM S3 lite ESP32 HW works fine with both wired RS485 and BLE version 🍾

some indication for yaml file compilation

use esp-idf (both wired and ble)

C++:
esp32:
  board: esp32-s3-devkitc-1
  framework:
    type: esp-idf
  variant: esp32s3

in the wired version redirect the debug uart port to avoid conlfict

C++:
logger:
  hardware_uart: USB_SERIAL_JTAG
  level: INFO

so bottom line Atom S3 lite + atomic CAN base seems the simplest, easy and plug and play HW solution to run the JK-BMS-CAN sw with BLE interface or maybe with more "stable" wired RS485 interface (off course in the simple case 1 BMS and 1 inverter)

to do...
  • manage the smart RGB led to convey usesful information (connection status, etc..)
  • use the button to activate some useful function
  • use the Atom S3 with 0.85" display to visulize relavant info and build also a "real time BMS / battery monitor"
work in progress :)

View attachment 200844
pls support me as i have paused on this project
not been successful in flashing the module

Send me a copy of the Yaml code you used to flash it - private Message me

you didn't share the link for the mini monitor so i didn't purchase that.
 
Bfor fuse breaker
Yeah, but I mean (just like in my case) they MUST have the same voltage. Otherwise you'd have a VERY BAD CONNECTION somewhere in your system. So a voltage measurement offset/error may be the case there.

But you cannot CONTROL how you discharge your batteries. That's physics and Ohm's law. Depending on voltage and internal resistance / cabling resistance / etc, the share of current between these 2 batteries will be determined.

You can only control when you DISCONNECT due to OVP/UVP/OCC/etc.

But changing that parameter will not affect the real voltage of the system in any way. Neither will it change the current sharing.

If you want to influence the current sharing, you can add e.g. 1 meter cable, an extra fuse, small e.g. 10mOhm resistor, etc. IF REALLY NEEDED.

Current sharing isn't perfect in most of the cases and you need to design accordingly. Like with 2 batteries (depending on many factors) you might aim to 120-150% of the power of each battery. Or in another way you might need to design your cabling in each system to handle 120-150% of each battery ideal current.
 
Should i attempt to adjust the second battery Ah to meet up with the 1st or wait till 100 % then adjust ?
I do not think it matters. But I don't trust either number at all at such low SOC. Charge to equalization voltage, hold 12-24h, balance, SOC at 100%, and see how it evolves from there.
 
@silverstone

Help me out here
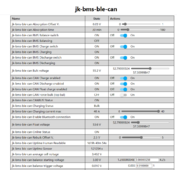
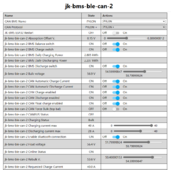
i have 2 ununiformed absorption offset (notice in the screenshot)
Absorption time is not available on the Slave ESP setting even though they are the same BMS model)

what should i set the absortion to - i just guessed
1709918637595.png

1709918673586.png

and yes the Bulk v are not the same...deliberately, bcos batt 2 was not charging and discharging at the same rate so i used that to correct the behavior and it worked
 
@silverstone

Help me out here
i have 2 ununiformed absorption offset (notice in the screenshot)
Absorption time is not available on the Slave ESP setting even though they are the same BMS model)

what should i set the absortion to - i just guessed
View attachment 200855

View attachment 200856

and yes the Bulk v are not the same...deliberately, bcos batt 2 was not charging and discharging at the same rate so i used that to correct the behavior and it worked
I'm not sure as I have LiFePo4 cells.

But having a different voltage "reference" on two batteries ... Not sure what that does. Maybe the controller from @Der_Hannes just averages those ? Or takes the minimum ? Not sure.

The voltages seem high, but as I said I have LiFePo4 cells, so I cannot help you much there.

But they should be the same value. Whether you need to downsize that common value is another matter, but having this "hack" (which "works" but don't know why/how) I'm not sure it's a (safe) solution.

LiFePo4 I usually absorb/equalize a 56.2V for a 16s (3.51 V /cell). Be sure that you stay below OVP ... Although I guess in your case the balancer (2A active balancer ???) will probably be much faster than in my case (currently 280Ah cells).
 
pls support me as i have paused on this project
not been successful in flashing the module

Send me a copy of the Yaml code you used to flash it - private Message me

you didn't share the link for the mini monitor so i didn't purchase that.
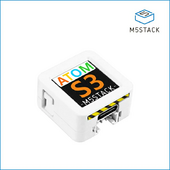
The Atom S3 lite with display is available on M5stack store as all other devices

1709919757325.png
 
@silverstone

Help me out here
i have 2 ununiformed absorption offset (notice in the screenshot)
Absorption time is not available on the Slave ESP setting even though they are the same BMS model)

what should i set the absortion to - i just guessed
View attachment 200855

View attachment 200856

and yes the Bulk v are not the same...deliberately, bcos batt 2 was not charging and discharging at the same rate so i used that to correct the behavior and it worked
You are not using the same version of the code on both of your ESP32 devices.
Please, slow down and properly think everything through.

The YAML you are using on your second ESP32 is more up to date than the other. I would suggest standardising on that.

I am concerned that you're changing settings far too often to truly understand the impact and results. This won't work in the long run.

Go back to basics, correctly balance and fully charge each battery pack.
 
I'm not sure as I have LiFePo4 cells.

But having a different voltage "reference" on two batteries ... Not sure what that does. Maybe the controller from @Der_Hannes just averages those ? Or takes the minimum ? Not sure.

The voltages seem high, but as I said I have LiFePo4 cells, so I cannot help you much there.

But they should be the same value. Whether you need to downsize that common value is another matter, but having this "hack" (which "works" but don't know why/how) I'm not sure it's a (safe) solution.

LiFePo4 I usually absorb/equalize a 56.2V for a 16s (3.51 V /cell). Be sure that you stay below OVP ... Although I guess in your case the balancer (2A active balancer ???) will probably be much faster than in my case (currently 280Ah cells).
it is below OVP - thanks
 
You are not using the same version of the code on both of your ESP32 devices.
Please, slow down and properly think everything through.

The YAML you are using on your second ESP32 is more up to date than the other. I would suggest standardising on that.

I am concerned that you're changing settings far too often to truly understand the impact and results. This won't work in the long run.

Go back to basics, correctly balance and fully charge each battery pack.
And changing 3 things at the same time makes it also difficult to figure out what's working, why, and why not. I'm also guilty of this sometimes ...

Change 1 thing at the time. Fully charge. Let it rest up there. See how it works in 1-2 days time. Then we see what to change and how.
 
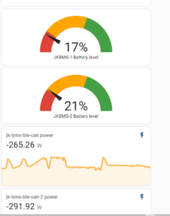
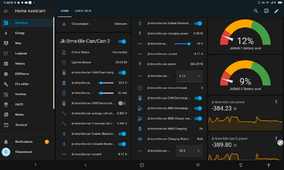
Current state - lets see if it stops at 10% , if it does i leave it like that, i like that the second battery discharges to lower depth that the master
1709920170709.png
 
Back
Top