TheHappyNomads
New Member
Decided to take a peek on eBay to see if I could find a deal on this final part to my PV setup -- and found a great one!
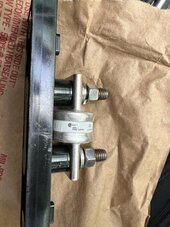
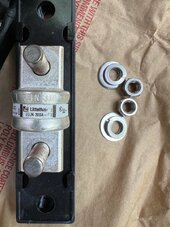
Class T 300a Fuse + Block
Class T 300a Fuse + Block
That's weird.looks like the seller has been around for 20 years:
View attachment 209871
If it is getting that hot you've got issues already anyway!Pure assumption here, looks like new old stock, possibly from car audio install shop that went bust. I get that from the description and datasheet. And the fact theat the wires connect directly to the fuse studs.
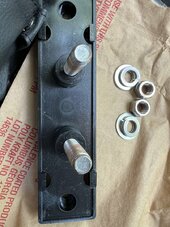
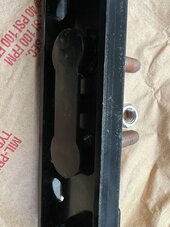
The base and case both appear to be abs plastic. Not fantastic because it can burn but not until 230c typically.
They are set to arrive today. I will keep everyone posted on conditionHave you received it yet?
That seller is new, with no reviews yet. (Not necessarily a bad thing)
Your experience with them is valuable.
Maybe, but still don't like it. We've seen post on here where plastic blocks have melted. I still like metal on metal, especially for a shared connector.If it is getting that hot you've got issues already anyway!
Wait maybe I'm missing something but how do you have metal on metal without a short circuit? It has to use plastic orbsome kind of insulator to mount to.Maybe, but still don't like it. We've seen post on here where plastic blocks have melted. I still like metal on metal, especially for a shared connector.
Normal block, like blue sea, has 2 studs on each end, one for the fuse, one for the connector, both on the same bar. So, even if the plastic melts, both connectors are still solid.Wait maybe I'm missing something but how do you have metal on metal without a short circuit? It has to use plastic orbsome kind of insulator to mount to.
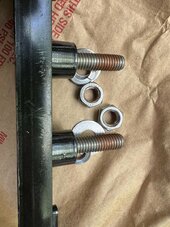
From what I could tell, the studs are threaded into the busbar on the double studded ones I have. That means, you could actually remove the plastic and it would still work. If this single studded one is fuse on plastic, if you remove the plastic, you no longer have a tight connection.There's really not much difference between a single stud or two.
If the base melts, the conductive parts are free to move.
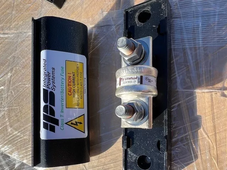
Maybe we will find out, when the OP receives theirs.From what I could tell, the studs are threaded into the busbar on the double studded ones I have. That means, you could actually remove the plastic and it would still work. If this single studded one is fuse on plastic, if you remove the plastic, you no longer have a tight connection.
