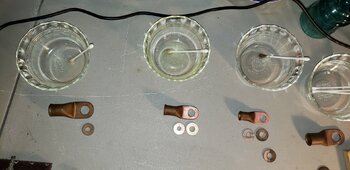
I know this is not very scientific but I conducted a little experiment with a couple of household cleaning products VS an aluminum acid.
View attachment 228332
View attachment 228329View attachment 228328View attachment 228327View attachment 228330 I figured the aluminum acid would win this competition but I expected better results out of the wheel cleaner.
I started by applying with the q-tip and then this decided to throw the washers in the solution dwell time was 3 to 5 minutes like I said not very scientific. The last one I used as the control i only use the wire brush all parts were cleaned with 91% Iso. alcohol to remove solutions.
Parts of copper and brass with approx 40 years of garage storage oxidation.
I was impressed with the CLR did not work nearly as fast as the aluminum acid but nonetheless.
View attachment 228382Left to Right: wheel cleaner, CLR, Aluminum Acid, Wire Brush Control.
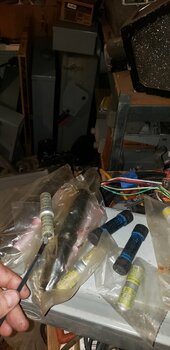
View attachment 228336 These are some basic tools I like using for preparing electrical connections
View attachment 228333 These are some corrosion inhibitors that I never leave home without
View attachment 228334 I don't expect anyone to do as I do. But if they were to follow the simple instructions on the backs of either one of these inhibitors plus proper torque I don't believe they would have a problem.
I like acid oxidation removal for aluminum battery terminals and the inside of ?able lugs were it is difficult to mechanically clean these areas or if you're just lazy in general.
If using wire brushes or steel wool only use stainless steel as to not further contaminate your connections.
Anyways that's my $0.02
I hope no one takes any of this throw away I value all of your shared knowledge