diy solar

diy solar

solar water heater/waste oil boiler

Daddy Tanuki

Solar Wizard
Joined
May 11, 2021
Messages
3,062
Location
Flanks of Mount Fuji
Been talking about this for over a year now, its time to get started,

So originally this idea was formulated as a way to use up excess production as my panels and batteries are all specc'd for winter time with low solar output, and then it morphed into why not heat the house, or at least the underside of the house to prevent pipe freezing. This then mixed in my brain with my desires to build a waste oil burner for heating the large portions of the shop and in the end the decision was to make a waste oil boiler.

so through the entire year, I make enough excess to heat water for general use... bathing etc. and i think after crunching numbers until my brain was jello, that in the months of April/May (early spring) and maybe late September early October (late fall) the excess solar production makes enough that I can even keep the house warm at night.

the months between October-April are another story entirely... and that's where the waste oil boiler will come into play. currently working with a person in the states who specializes in waster oil burners and between the two of us we are working on using a honeywell aquastat to turn the waste oil burner on and off, along with some other circuits to make it pretty much hands free other than filling the waste oil tank (and all the prep needed for that, centerfuge, filter pre heat etc.).

this will cover the tank, heat exchanger, electrical heating elements and everything except the controls for the waste oil boiler.

when I can i iwll list the prices paid converted to USD at the time of purchase along with the exchange rate.

warning, picture heavy:

2023 fall

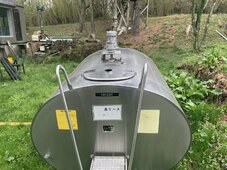
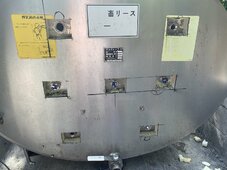
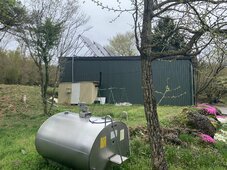
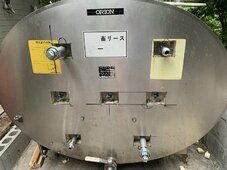
1700 liter insulated milk tank side view ¥80,000/130 = $615.00 Local purchase.
IMG_2131.JPG


1700 liter tank front viewIMG_2132.JPG

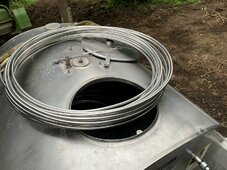
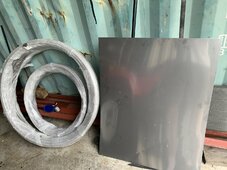
2024 mid May Stainless 1/2" pipe in coils for heat ex-changer ¥120,000/160 = $800.00 China/alibaba.
IMG_2253.JPG

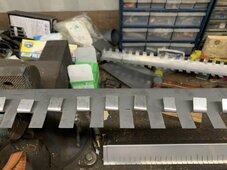
Mid May Stainless steel sheet cut to strip and making heat exchanger coil supports
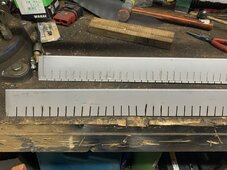
IMG_2256.JPG IMG_2257.JPG

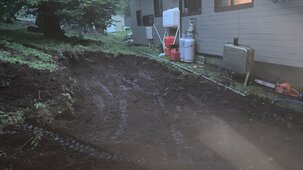
late June 2024 start excavating

IMG_2265.JPG


July 4th-8th 2 cubic meters of gravel to prevent frost heave in winter gravel ¥12,000 $78 USD at 155/$
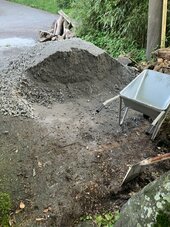
IMG_2297.JPG

Concrete pad will be 2 meters x 4 meters and 8" +- 1" thick. single 10mm rebar with 5mm rebar mesh. final area to be enclosed, 2/4 stick build with single slant roof, insulated and extra space will hold future washer and dryer hence the drain pipe at the end of the pad for the washer.
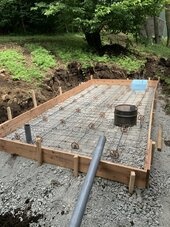

IMG_2308.JPG


wore the F out... 27-28 °c but humidity is off the charts.


conrete poured next week after the forms are removed I will lay the blocks for the building. concrete with pump truck is ¥110,000 or $709.00 @155/$ and then an extra ¥10,000 to a neighbor who is good at floating concrete, (or at least better than I am) .

IMG_2333[1].JPG

to be continued:
 
Last edited:
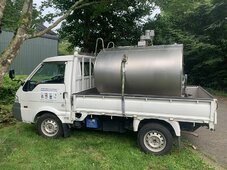
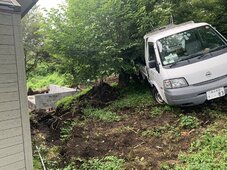
tank movement and prep, got the truck stuck 4 times in the mud and slick rocks behind the hose. used the F150's winch via some pulleys to pull the small truck out

IMG_2348.JPG

truck slid sideways on the wet soft dirt, and the huge rocks that are located right under the dirt. slid right into the tree as I was trying to back past the tree, so I had to block and tackle the truck up the hill with my other trucks winch and then try again. it took a couple of trys to get the truck back next to the concrete pad.
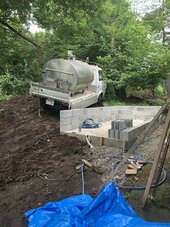
IMG_2352.JPG


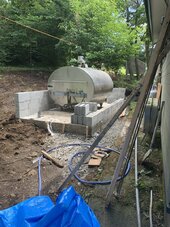
used a ratchet strap to slowly roll the tank over onto the pad. would be great if i could get @kolek to get his happy ass up here and give a hand! Hint good BBQ and free beer!
IMG_2353.JPGIMG_2354.JPG
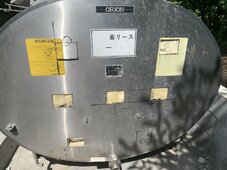
7 holes need to be opened through the outer wall and the inner wall to accommodate the three water heater elements, the potable cold water inlet, the potable hot water outlet and the hot water outlet to the radiators, and its return line.
IMG_2355.JPGIMG_2358.JPG
stainless fittings placed into location but not tightened down yet. The three water heater elements will actually only be running two the third is a spare that I can use without draining the tank if one burns out.


IMG_2367.JPG

tubing for the heat exchanger going in.

IMG_2388.JPG

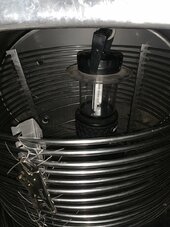
about half of the tubing hung on its support rack, will finish up tomorrow. I was doing this portion at night as its too hot in the day. its about 25c at night, but the tnak is so well insulated that inside it got up to 35c over a 4 hour span of time while I was inside of it. could not handle anymore so got out took this photo and called it an evening.

IMG_2392.JPG

thats stainless steel safety wire .63mm so its pretty strong and it the tank, tubing and all fittings are stainless to help cut down on corrosion between dissimilar metals. I will be putting in two sacrificial anodes but every little bit helps.
 
Last edited:
Looks like heck of a project how are you intending on burning the waste oil? Vapor chamber or pressure jet? Be sure to mechanically join any fittings on the oil line, brazing/soldering will fail. how long will the run be from the tank to the boiler? Don't forget to buy a decent wax capillary fire valve fitted as far as you can from the boiler room but still serviceable.
 
Looks like heck of a project how are you intending on burning the waste oil? Vapor chamber or pressure jet? Be sure to mechanically join any fittings on the oil line, brazing/soldering will fail. how long will the run be from the tank to the boiler? Don't forget to buy a decent wax capillary fire valve fitted as far as you can from the boiler room but still serviceable.
one of two options on the burner portion, high pressure pump, or compressed air for atomization.

I hear ya on the oil stop valve. the oil sub tank unfortunately will be in the same space as the boiler itself, the main tank will be outside the building. This outbuilding will have insulation in the walls This is because the cold temperatures will cause the oil not to flow from the tank to the burner, so a gravity feed tank with a 1/2" pipe to a small steel sub tank that is heated via hot water heat ex changer from the boiler itself. keeping the oil warm enough to flow is one of the challenges due to location of the cabin. Initially I thought of using an engine block heater from a diesel engine but the power draw is to high to support.

Copied from another post to keep it all in this location:

I wanted to use a high pressure fuel pump to atomize the waste oil through a nozzel. dual spark ignitors with a photo sensitive eye to send a signal to a timed relay. no signal within 3 seconds of ignition start signal and the relay will open shutting the pump off and resetting the timer. a squirrel cage would provide the needed air flow. A honey well aquastat would provide the temperature control signals and as they are a pre-existing module that has a proven track record that part is already in the bag.

the guy in the states I am working with uses high pressure air to do the same without the fuel pump (gravity + syphon feed) but his are all manual light off for use in DIY foundries.

he has videos of his units hitting some serious BTU's melting steel in a home foundry along with other feats of mayhem.

hoping to combine both of our experiences to make this work.
 
Thats great actually, the more critique and input the better the chances of sucess.
Thought I'd reply here since it's more on topic
Waste oil burners have always interested me for shop heating, but a boiler is different, and I have no actual experience with something like this.
I've built a few vapor chamber waste oil burners for my neighbour here in Thailand but they were very ghetto I wouldn't want to use the same principals for myself or anyone who actually cares about safety.

I wanted to use a high pressure fuel pump to atomize the waste oil through a nozzel. dual spark ignitors with a photo sensitive eye to send a signal to a timed relay. no signal within 3 seconds of ignition start signal and the relay will open shutting the pump off and resetting the timer. a squirrel cage would provide the needed air flow.
Why not use a riello multi fuel burner apart from the odd pressure nozzle and rarely a pump their pretty bullet proof and would have everything in one unit(burner,pump,air-fan and settings as far as controlling airflow puel pressure)
A honey well aquastat would provide the temperature control signals and as they are a pre-existing module that has a proven track record that part is already in the bag.
That's fine
the guy in the states I am working with uses high pressure air to do the same without the fuel pump (gravity + syphon feed) but his are all manual light off for use in DIY foundries.
Cool I've seen some poorly configured burners melt through 1/4 steel [late baffles in the past.
he has videos of his units hitting some serious BTU's melting steel in a home foundry along with other feats of mayhem.
Any links?
hoping to combine both of our experiences to make this work
Well I say I'm an engineer but really I was a service technician that delt with kerosene stoves and boilers but I did it for 15 or so years so if you have any questions on the domestic side I'll do what I can to help.
 
Marking this I like projects. I live vicariously through others who have more time/ability than I do :LOL:
Thanks Ihave ten years to finish this retirement house/cabin. by then my girls will be done with college and I will be in my mid late 60's gotta get heat for the iwnter without the requirement of cutting firewood. a little woodburner for ambience and quick heat is fine, but for main heat the splitting, stacking and drying would wear me out .
 
Why not use a riello multi fuel burner apart from the odd pressure nozzle and rarely a pump their pretty bullet proof and would have everything in one unit(burner,pump,air-fan and settings as far as controlling airflow puel pressure)

will have to look this up.
Cool I've seen some poorly configured burners melt through 1/4 steel [late baffles in the past.

Any links?

Well I say I'm an engineer but really I was a service technician that delt with kerosene stoves and boilers but I did it for 15 or so years so if you have any questions on the domestic side I'll do what I can to help.

this guy is all over the map on projects, but most of his are all manually controlled. I want to automate it as much as possible.
 
one of two options on the burner portion, high pressure pump, or compressed air for atomization.
Personally I'd go high pressure through an atomising jet then add airflow via a simple fan you have more control on how well it burns this way
I hear ya on the oil stop valve. the oil sub tank unfortunately will be in the same space as the boiler itself, the main tank will be outside the building. This outbuilding will have insulation in the walls This is because the cold temperatures will cause the oil not to flow from the tank to the burner, so a gravity feed tank with a 1/2" pipe to a small steel sub tank that is heated via hot water heat ex changer from the boiler itself. keeping the oil warm enough to flow is one of the challenges due to location of the cabin. Initially I thought of using an engine block heater from a diesel engine but the power draw is to high to support.
I guess kerosene is more viscous I've only ever had issues with cold weather when the tank has condensation which has turned to ice in the tanks filter never seen kerosene get to the stage it won't flow.

Though towards the end of my time working we did fit plastic sheathed copper but I would have thought that was more for corrosion than insulation
 
Personally I'd go high pressure through an atomising jet then add airflow via a simple fan you have more control on how well it burns this way

I guess kerosene is more viscous I've only ever had issues with cold weather when the tank has condensation which has turned to ice in the tanks filter never seen kerosene get to the stage it won't flow.

Though towards the end of my time working we did fit plastic sheathed copper but I would have thought that was more for corrosion than insulation
Yes I have a small squirrel cage fan that I pulled from a japanese kerosene burner. thats where I get the ideas and parts for the photo electric eye that signals the circuit board to let it know the burner is lit or not. I want to try and adapt the japanese circuit controls directly to the oil burner but it might or might not work.

I need to add relays to either control the solenoid valves for the oil feed if I use a high pressure pump, or a soilenoid to shut of the compressed air, if I go that route.
Kerosene burners abound here in Japan, I am looking specifically at waste engine oil as its free for the taking. I have too many contacts that will quickly give me used motor oil in 200 liter drums all day long.
Sad thing is I could have shipped you anything 12 months ago even complete burners if I'm remembering correctly the riello`s used danfoss oil pumps that had a solenoid fitted and would be powered by the squirrel cage fan.
 
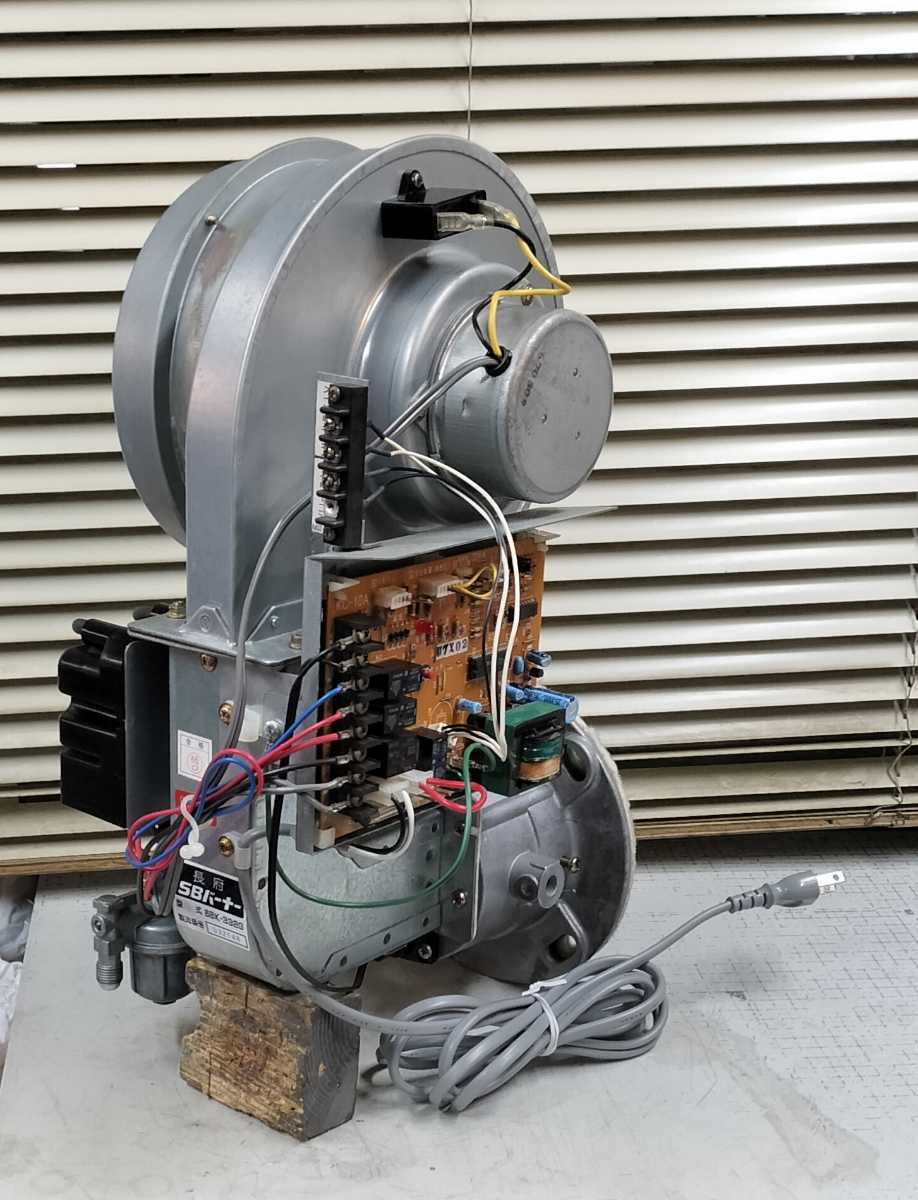
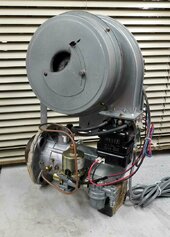
this is a kerosene burner I just bought for parts...


1720969214536.jpeg
 
I will look into this, if they already offer a small version that is pre-made I would gladly just buy one simply for safety's sake.
Yep I think the only thing you would also need to purchase is the correct jet for the burner( best order a few they were typically changed annually with a service) Its late now but I can see if I can find you some more details when I get chance tomorrow.
 
this is a kerosene burner I just bought for parts...


View attachment 228630
Essentially the same thing but Japanese, confused is the pump on an independent motor? What's wrong with that one?
 
it is designed to burn kerosene but I think with a higher pressure pump, it could probably do waste oil as well.
Send me some details on the pump that's fitted and remove the burner jet and give me the jet diameter and angle(should be stamped in the brass) and I'll take a look
 
Just found this
Seems like you can buy specially customized jets that use compressed air rather than firing a higher pressure pump so maybe the burner you have can be used with some customizing
 
Essentially the same thing but Japanese, confused is the pump on an independent motor? What's wrong with that one?
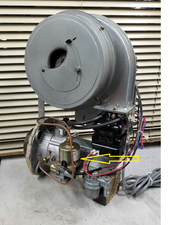
the pump is that small unit on the side. it and its pressure is designed for kerosene so it does not have enough ass for used motor oil. I will see if I can see what size the orfice is and get back with you. my plan was to replace the pump it had with a high pressure fuel pump for cars, and put a pressure regulator on it to fine tune the amount of pressure needed to atomize the oil.
 
Essentially the same thing but Japanese, confused is the pump on an independent motor? What's wrong with that one?
the yellow arrow is the pump thats on it. I was going to replace it with a larger, higher pressure fuel pump form a car with a pressure regulator to make it adjustable. supposedly nothing was wrong with it, but i have not had time to play with it yet. it was cheap enough i bought it on the assumption that it might be toast.

oil burner.png
 

diy solar

diy solar
Back
Top