diy solar

diy solar

How to Flash Atom S3 with EspHome - HA

chaosnature

New Member
Joined
Sep 15, 2022
Messages
460

How to Flash Atom S3 with EspHome - HA​


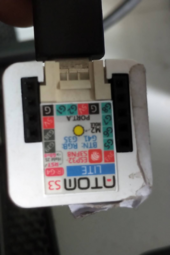
I struggled with flashing Esp32 S3 Atom lite with the (Sleeper85) project I was actively involved for the Rs485/CAN battery Comm conversion
- unlike flashing the Esp32 dev kit chip, it's not as straightforward.
but I finally found a way around it.

Project Link:

1714935744563.png
1. Make sure the GPIO is correct or else you will end up with a loop which you can only get out of by pressing and holding down the reset button and reflashing.

1715436543891.png


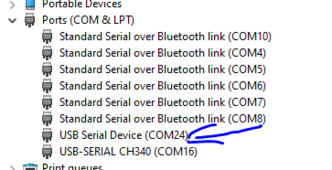
2. Do the usual unplugging and replugging to detect the Atom S3 chip Comm port
1714935864045.png


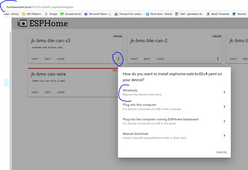
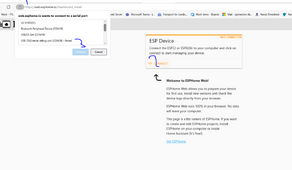
3. Connect to the port via the url on the below screenshot ( https://web.esphome.io/?dashboard_install )
1714935966652.png

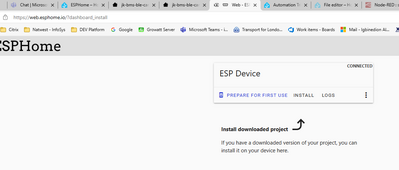
4. Prepare For First Use to obtain the IP address issued by your DHCP.
1714936043096.png
Join it to your preferred Wifi network

1714936178437.png
Now you have your Ip - you should be able to browse and get the above EspHome Web page.
On this page as a test if you have already downloaded the .bin file you can upload it and flash it - it should flash successfully and you will see the below log information after successful flash.
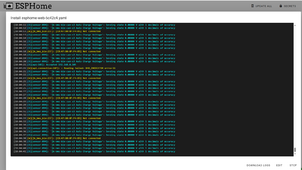
1714936441073.png

a.
Do Adoption (and Copy New yaml into the new file) -
If not already adopted (and change the name to desried name) Rememeber to delete any old yaml after copying the codes into the newlly adopted yaml
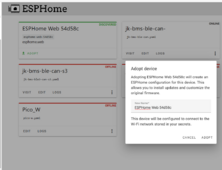
1715435705423.png

b.
5. Edit your yaml code and set the wireless section as below screenshot
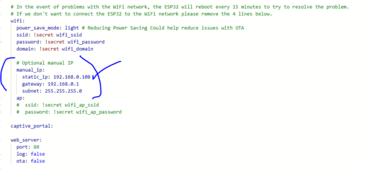
1714936549414.png
Optional
- Enable Web
- Set Friendly name
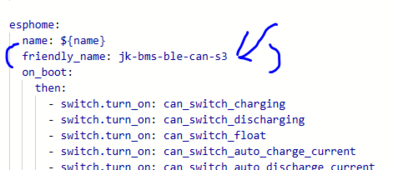
1714936793062.png

6. Now flash over wireless.
1714936600741.png
Again - Your confirmation is the below log screen
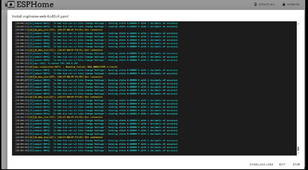
1714937638383.png

7. Do not unplug your Atom chip throughout this process - Now do the normal Integration
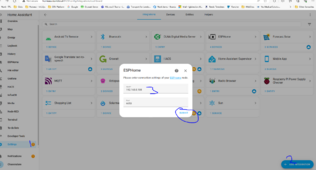
1714936946807.png

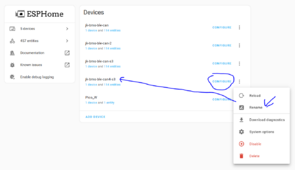
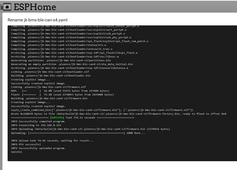
8. Now Browse over to Config/EspHome/xxx.yaml file and rename (to name chosen) the yalm from esphome-web-6c42c4.yaml to jk-bms-ble-can-s3.yaml
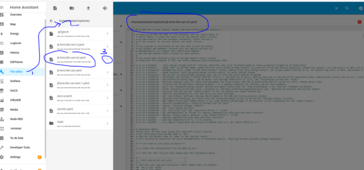
1714937255171.png

Now you can safely unplug the Atom chip and reflug without losing the flashed data.

Hope you find this useful - took me weeks to finally figure this out.

You can also download the .bin file - sure you already know this
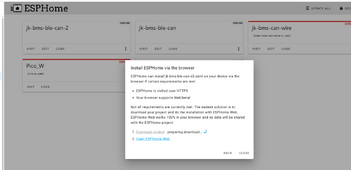
1714937659612.png
 
Last edited:

How to Flash Atom S3 with EspHome - HA​


I struggled with flashing Esp32 S3 Atom lite with the (Sleeper85) project I was actively involved for the Rs485/CAN battery Comm conversion
- unlike flashing the Esp32 dev kit chip, it's not as straightforward.
but I finally found a way around it.

Project Link:

View attachment 213541
1. Make sure the GPIO is correct or else you will end up with a loop which you can only get out of by pressing and holding down the reset button and reflashing.

View attachment 213540


2. Do the usual unplugging and replugging to detect the Atom S3 chip Comm port
View attachment 213542


3. Connect to the port via the url on the below screenshot ( https://web.esphome.io/?dashboard_install )
View attachment 213543

4. Prepare For First Use to obtain the IP address issued by your DHCP.
View attachment 213544
Join it to your preferred Wifi network

View attachment 213546
Now you have your Ip - you should be able to browse and get the above EspHome Web page.
On this page as a test if you have already downloaded the .bin file you can upload it and flash it - it should flash successfully and you will see the below log information after successful flash.
View attachment 213547


5. Go back into your yaml code and set the wireless section as below screenshot
View attachment 213548
Optional
- Enable Web
- Set Friendly name
View attachment 213551

6. Now flash over wireless.
View attachment 213549
Again - Your confirmation is the below log screen
View attachment 213557

7. Do not unplug your Atom chip throughout this process - Now do the normal Integration

View attachment 213552

8. Now Browse over to Config/EspHome/xxx.yaml file and rename (to name chosen) the yalm from esphome-web-6c42c4.yaml to jk-bms-ble-can-s3.yaml

View attachment 213555

Now you can safely unplug the Atom chip and reflug without losing the flashed data.

Hope you find this useful - took me weeks to finally figure this out.

You can also download the .bin file - sure you already know this
View attachment 213558
have the same problems with loosing compiled data after unplug Atom and plug again... but after its success i was thinking it was problem with esphome, after update to newest version (Current version: 2024.4.2) on HA compiled and its working. maybe I did something accidentally from the procedure and that's why it remembered.

Is this problem with flash new compiled data will be always if we changed some data in YAML and recompile or update esphome?

For now my Atom S3 Lite is working as You described with GPIO2 and 1 :) Led GPIO i've moved to GPIO8 as 35 give me some warning on LOG.

I'm using dhcp settings in YAML not manual IP as You
So this is problem with changing IP via dhcp or some bug with esphome with earlier version than 2024.4.2?


best regards
M.
 
Last edited:
have the same problems with loosing compiled data after unplug Atom and plug again... but after its success i was thinking it was problem with esphome, after update to newest version (Current version: 2024.4.2) on HA compiled and its working. maybe I did something accidentally from the procedure and that's why it remembered.

Is this problem with flash new compiled data will be always if we changed some data in YAML and recompile or update esphome?

For now my Atom S3 Lite is working as You described with GPIO2 and 1 :) Led GPIO i've moved to GPIO8 as 35 give me some warning on LOG.

I'm using dhcp settings in YAML not manual IP as You
So this is problem with changing IP via dhcp or some bug with esphome with earlier version than 2024.4.2?


best regards
M.
Is this problem with flash new compiled data will be always if we changed some data in YAML and recompile or update esphome?

this is with Flash New - after the procedure, you can update as many times as usual....
 
  • Like
Reactions: knd
this is with Flash New - after the procedure, you can update as many times as usual....

thanks for info, with new flash have the same problems as You but with newest esphome problem gone or i have luck... dont know. Will remember Your procedure if problems back with flash new Atom S3 lite.
 
thanks for info, with new flash have the same problems as You but with newest esphome problem gone or i have luck... dont know. Will remember Your procedure if problems back with flash new Atom S3 lite.
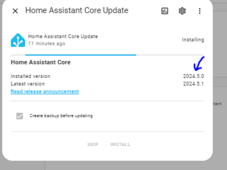
I was actually having the issue with 2024.5.0 as you can see I am only just upgrading now....

1714948010424.png
 
i h
i have this problem on my version

View attachment 213577

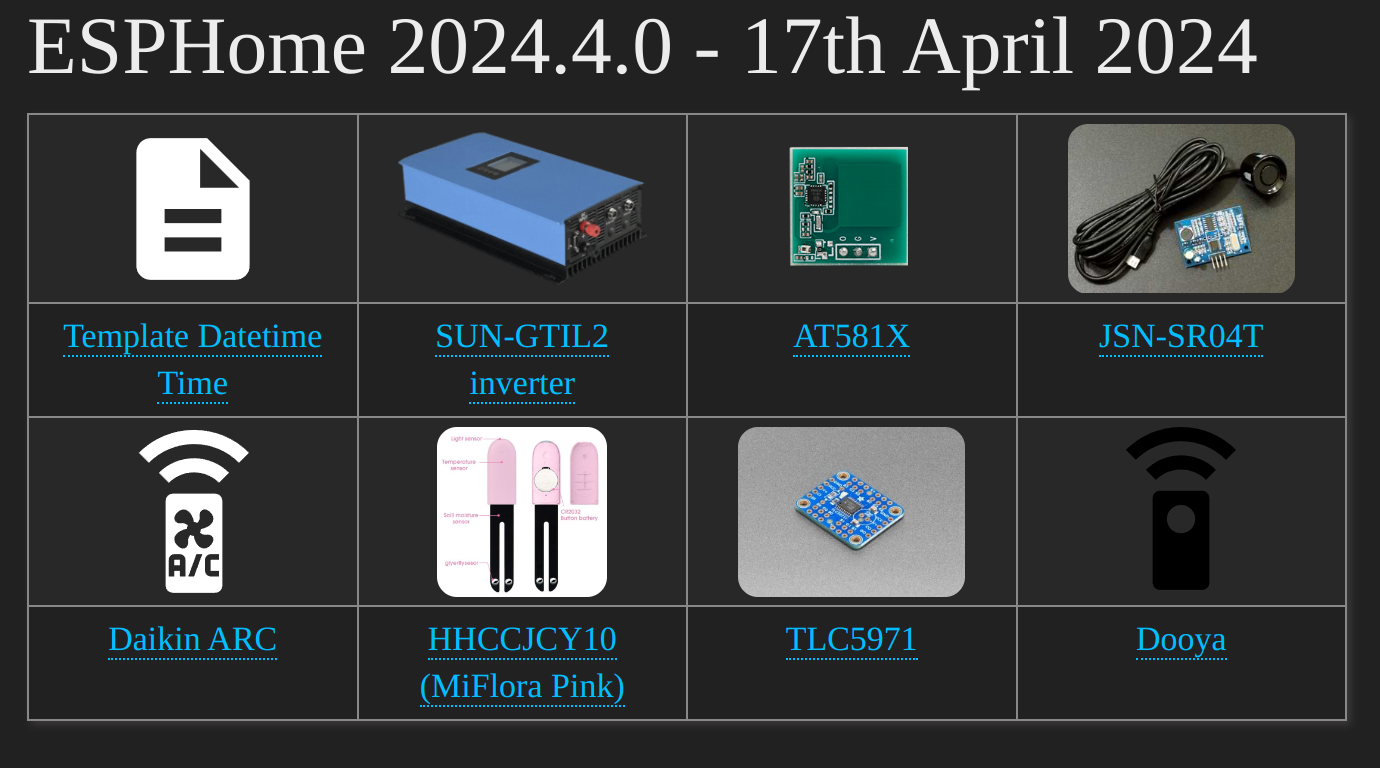
so i think this issue is related to Esphome addon version -

Esphome 2024.4.1​

now i have

Esphome 2024.4.2​

[QUOTE="knd, post: 1084447, member...release-2024-4-2-april-30[/HEADING] [/QUOTE]
i have also upgraded

and by the way for anyone upgrading the core - hold off

there is a bug....mine has just crashed after upgrading to x.5.1

1714957182139.png
 
Last edited:
  • Like
Reactions: knd

How to Flash Atom S3 with EspHome - HA​


I struggled with flashing Esp32 S3 Atom lite with the (Sleeper85) project I was actively involved for the Rs485/CAN battery Comm conversion
- unlike flashing the Esp32 dev kit chip, it's not as straightforward.
but I finally found a way around it.

Project Link:

View attachment 213541
1. Make sure the GPIO is correct or else you will end up with a loop which you can only get out of by pressing and holding down the reset button and reflashing.

View attachment 213540


2. Do the usual unplugging and replugging to detect the Atom S3 chip Comm port
View attachment 213542


3. Connect to the port via the url on the below screenshot ( https://web.esphome.io/?dashboard_install )
View attachment 213543

4. Prepare For First Use to obtain the IP address issued by your DHCP.
View attachment 213544
Join it to your preferred Wifi network

View attachment 213546
Now you have your Ip - you should be able to browse and get the above EspHome Web page.
On this page as a test if you have already downloaded the .bin file you can upload it and flash it - it should flash successfully and you will see the below log information after successful flash.
View attachment 213547


5. Go back into your yaml code and set the wireless section as below screenshot
View attachment 213548
Optional
- Enable Web
- Set Friendly name
View attachment 213551

6. Now flash over wireless.
View attachment 213549
Again - Your confirmation is the below log screen
View attachment 213557

7. Do not unplug your Atom chip throughout this process - Now do the normal Integration

View attachment 213552

8. Now Browse over to Config/EspHome/xxx.yaml file and rename (to name chosen) the yalm from esphome-web-6c42c4.yaml to jk-bms-ble-can-s3.yaml

View attachment 213555

Now you can safely unplug the Atom chip and reflug without losing the flashed data.

Hope you find this useful - took me weeks to finally figure this out.

You can also download the .bin file - sure you already know this
View attachment 213558
Thank you for taking the time to meticulously document everything for others.

but after its success i was thinking it was problem with esphome, after update to newest version (Current version: 2024.4.2) on HA compiled and its working.
Looks like we need to explicitly state everyone to keep everything updated beforehand.
 
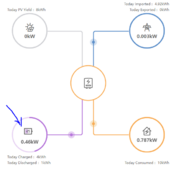
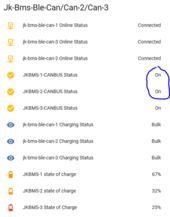
I have just tried out something i have been meaning to try for a long time which is to have 2 JKBMS CAN talk through one Inverter CAN bus channel and it worked !!
The inverter adds the State of Charge up and averages it.

if what I expect in terms of SOC control actually happens this would be a Major breakthrough for my dual battery configuration.

1715198140819.png

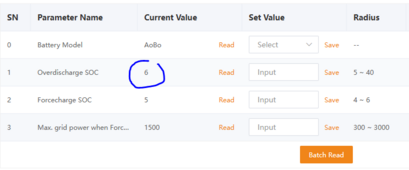
However, my own average calculation says it should be 51 % so I wonder where the 6% went

unless it takes it out from the Overdischarge SOC which is currently set at 6 %
1715198307454.png

# Edit
Was really surprised to see the ESP32 Dev kit light start to blink and the status change from off to on....
1715198544196.png
 
Last edited:
Thanks, that’s interesting.

@arzaman and @Der_Hannes can you share your procedure?

I could then do a how to in github.

Very interesting to read all these problems...
I dont have any problems with flashing any ESP using ESPHome docker to compile and manage them.

1. Compile and download the firmware file in modern format
2. Switch to esphme web (cause i dont have https) and falsh it to the ESP.
3. The ESP then shows up in the dashboard and from now on i can flash OTA via console or dashboard without any problems.

btw: I always use fixed IP settings from the beginning

maybe it helps someone
Thanks for your contribution....however this is still incomplete assuming it will work on Normal ESPHome

I have just tried you procedure as a test and it ends up in a loop where i had to hold down reset for 5 seconds to stop the loop

Also - for new devices as MAC address is different for diferent devices - for your steps to work you must have already reserve an IP in your DHCP or if static not set add as "Prepare for First Use" to determine what IP your router is dishing out for the device....then one might be able to do those 3 steps.

Revisng your steps whould look like this - if it will work:

# New device
1a. Reserve IP in DHCP for Static configuration - OR flash as First Use in EspHome first.
1b. Compile and download the firmware file in modern format
2. Switch to esphme web (cause i dont have https) and falsh it to the ESP.
3. The ESP then shows up in the dashboard and from now on i can flash OTA via console or dashboard without any problems.

# Existing device
1. Compile and download the firmware file in modern format
2. Switch to esphme web (cause i dont have https) and falsh it to the ESP.
3. The ESP then shows up in the dashboard and from now on i can flash OTA via console or dashboard without any problems.


# Edit
EspHome I tested with was x.4.2 (on Pi) i also tested obviouly on legacy versions before i did the write-up.

Regards
...
Very strange...
I use 2024.4.1 and 2024.4.2 and as discribed it works just fine

You dont have to reserve the IP on the router before assigning the fixed IP to the ESP config - you just have to assure that the ip is not already used/assigned to another device. Best would be to use an IP outside of the DHCP Server address range.
Of course you can also reserve with the MAC before - that should´t matter.
 
For my part, I flash the ESP32 or ESP32-S3 from the command line from Linux without any problems and I don't need a web interface.
I find it very simple.

When the firmware is compiled, the choice is offered to upload it via UART or IP.

Bash:
esphome run jk-bms-can.yaml

To flash an ESP32 already in service and connected to the network, I specify its IP address (192.168.1.2 is an example) when flashing.

Bash:
esphome run jk-bms-can.yaml --device 192.168.1.2
 
Very strange...
I use 2024.4.1 and 2024.4.2 and as discribed it works just fine

You dont have to reserve the IP on the router before assigning the fixed IP to the ESP config - you just have to assure that the ip is not already used/assigned to another device. Best would be to use an IP outside of the DHCP Server address range.
Of course you can also reserve with the MAC before - that should´t matter.
I can confirm that this does not work for sure.....
At least not on my network.

Process taken:
- Remove from loop by pressing and holding donw reset button for 5 seconds (device appeard in device manage and stopped looping)
- Copy a working yaml config
- Change IP (assign unused IP)
- Change name and friendly name
- Change Mac to new BMS
- Validate Yaml - No errors
- Install (get .bin File)
- Flash New ESp Atom S3 chip.
- Visit YAML config

Result = Fail

1715423100986.png

So i will use my method to flash.

Aslo for those who might have a complex network as well can use my method.

regards
 
I can confirm that this does not work for sure.....
At least not on my network.

Process taken:
- Remove from loop by pressing and holding donw reset button for 5 seconds (device appeard in device manage and stopped looping)
- Copy a working yaml config
- Change IP (assign unused IP)
- Change name and friendly name
- Change Mac to new BMS
- Validate Yaml - No errors
- Install (get .bin File)
- Flash New ESp Atom S3 chip.
- Visit YAML config

Result = Fail

View attachment 214638

So i will use my method to flash.

Aslo for those who might have a complex network as well can use my method.

regards
What Worked :

Tried:
- Unplug - Replug
- Flash First use
- Get new IP
- Edit yaml file with new IP
- Re-Download
- Unplug - Replug
- Flash new Download
Result = Fail


Then:

- Unplug - Replug
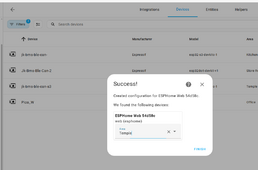
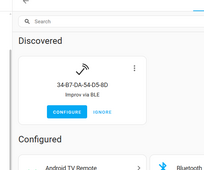
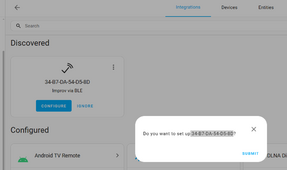
- Add integration of the new IP
1715427862940.png
Then
1715427724907.png1715427740563.png
- look for the "ESPHome Web 54d58c" file in the EspHome directory and rename if exist (in my case it didnt)
- Went to Integration - Click EspHome - Rename to what you like to call your project
1715428025476.png
- Then Configure


Result = Pass
1715428077354.png1715428104935.png


Unplug - Replug Data retained
1715428384508.png

Trust me i am not making this up.... :)
 
Very strange...
I use 2024.4.1 and 2024.4.2 and as discribed it works just fine

You dont have to reserve the IP on the router before assigning the fixed IP to the ESP config - you just have to assure that the ip is not already used/assigned to another device. Best would be to use an IP outside of the DHCP Server address range.
Of course you can also reserve with the MAC before - that should´t matter.
# Update

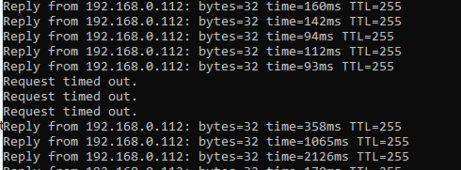
On 2024.4.2 I have been able to flash using your process - The key thing also is to make sure you unplug and replug the device after flash - to be able to enable the device to get back on the network.

not sure why I have had this problem - but hay!

If anyone else experiences what I was experiencing they can use the method described above.
Also - as the device must be pingable to receive flash I recommend starting from the "First use Option"

As I am testing all processes - I also gave the command line a try with the below :

1st
# Install Python
  1. Download the python.exe file on your computer from the official site.
  2. Open CMD and change Your directory to the path where you have python.exe
  3. Past this code in your Command prompt make sure to change the name with your file version In the below code(e.g python-3.8.5.exe)
python-3.6.0.exe /quiet InstallAllUsers=1 PrependPath=1 Include_test=0

Check - type in cmd
> python --version
Python 3.10.x

# Install EspHome
pip3 install wheel
pip3 install esphome

Check - type in cmd
> esphome version
Version: 2021.12.3

Then:

# Flash Flash Over The Air (OTA)
esphome run "C:\EspHome\jk-bms-ble-can4-s3.yaml" --device 192.168.0.xxx

# Edit.....
Result: Success
1715687225914.png


# Other Commands


# Wizard command
esphome wizard test.yaml


#Erase command
python -m esptool --port COM1x erase_flash

# Flash Command
python -m esptool --port COM1x write_flash -z 0x0 "K:\BACKUPs\HomeAssistant\EspHome Bin Files\jk-bms-ble-can-4-s3-factory_V4_(Shed).bin"

# Flash Command Specifying the Board (For .bin)
python -m esptool --chip esp32-s3 --port COM1x write_flash -z 0x0 "C:\EspHome\jk-bms-ble-can4-s3.bin"

# Flash YAML File
esphome "C:\EspHome\jk-bms-ble-can4-s3.yaml" run --upload-port jk-bms-ble-can4-s3.local # OR "IP"

OR

esphome run "C:\EspHome\jk-bms-ble-can4-s3.yaml"

Troubleshooting and Issues I had:

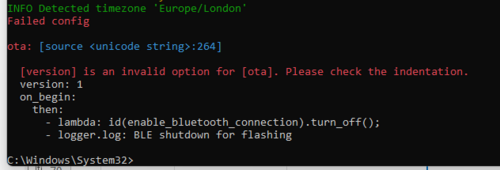
Error invalid ota version - But I could flash the same yaml content in EspHome HA

then I changed the version - but then I got

1715680939365.png

Change the version back reflash to "prepare for First Use"
That's how I got the success result above.

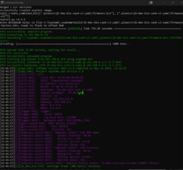
Also can see logs after the flashing..:

esphome logs "C:\EspHome\jk-bms-ble-can4-s3-yaml.yaml"

1715683370156.png


Hope it helps Others....
 
Last edited:
Thanks, that’s interesting.

@arzaman and @Der_Hannes can you share your procedure?

I could then do a how to in github.

I don't use EspHome to compile and load the firmware on my M5Stack Atom S3 since the compilation process runs on my old Raspberry Pi and lacks sufficient resources.

It's much simpler and more straightforward to use the command line so I can run the process on my powerful Windows desktop PC.

Just a single command line:

Code:
esphome run jk-bms-can.yaml --device ip_address

Then, the upgrade can be done either via the serial interface (first time) or OTA.

I have fixed the IP address of my little Atom S3 on the home router just to make troubleshooting and maintenance easier.
 
Back
Top