atatistcheff
Solar Enthusiast
- Joined
- Sep 20, 2019
- Messages
- 176
While I was sitting staring at a volt meter today I was thinking of ways to make bottom balancing easier. Since this seems to be a critical step when dealing with DIY LiFePO4 packs it would be really nice to make it easier. I'm sure there are some tricks out there and my purpose here is to brainstorm a little and see what others may want to contribute. This discussion assumes we are using LiFePO4 packs with a small number of cells. What I mean is we're not building using 18650 cells where you would have dozens in a pack but probably using something like 8Ah Headway to 200Ah Sinopoly cells.
One technique seems to follow steps similar to this:
1. Verify your cell voltages are close. Yes "close" is vague but follow best practices you can find in Will's videos.
2. Assemble your pack, let's say 4s for example.
3. Connect the pack to a load and drain until the lowest cell is at 2.5V
4. Connect resistors to the other cells one at a time to bring each cell to 2.5V
5. Charge the pack and proceed with load testing.
These are high level steps and your idea of the bottom voltage may vary somewhat but I believe these are fairly close to reality.
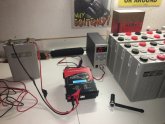
Now the monotony comes in step 4. You have to be careful when draining your cells that you don't go below 2.5V. Somewhere around 2.0V you will begin to permanently damage your LiFePO4 cells. I generally hook up resistors, set a timer, check back, rinse and repeat until I'm at 2.5V. This is a time consuming process and requires babysitting the cells to make sure you don't hurt them.
What would be nice is some way to automatically discharge the cell down to 2.5V and then disconnect the load.
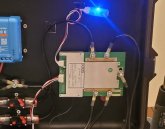
One thing that occured to me is that my BMS automatically cuts off anytime a cell goes below 2.5V. A simple solution would be to use a 12V N.O. relay to disconnect my resistor load when my cell hits 2.5V. That's great if you have a BMS that cuts out at 2.5V. Are there other solutions? Here's where I'd like to solicit some input and see what others might be doing to automate this process a bit.


