


You are using an out of date browser. It may not display this or other websites correctly.
You should upgrade or use an alternative browser.
You should upgrade or use an alternative browser.
Ryobi Zero-Turn Mower SLA to LiFePo4 Conversion - (Updated - Build Complete With Pics!)
- Thread starter AMDPower
- Start date
Nobodybusiness
Collecting the leftovers of the Great Sky Reactor.
I hooked mine back up but I think ones of those is the interlock.I have a Ryobi ZT540e.
I swapped the OEM batteries for the CHINS battery last night and charged it up overnight.
Do I ahve to install both of these for the ZT540e to work?
Can I bypass them?
Can’t remember.
Try it and see if it will come on.
I have the same mower and installed a CHINS battery. I hooked those parts back up, don't know if it was necessary or not, but I pretty much left everything like it was. The new charger has its own port connected to the battery. Works fine.I have a Ryobi ZT540e.
I swapped the OEM batteries for the CHINS battery last night and charged it up overnight.
Do I ahve to install both of these for the ZT540e to work?
Can I bypass them?
Nobodybusiness
Collecting the leftovers of the Great Sky Reactor.
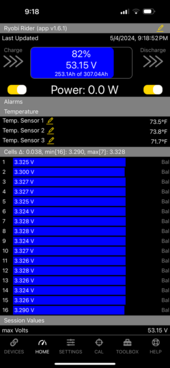
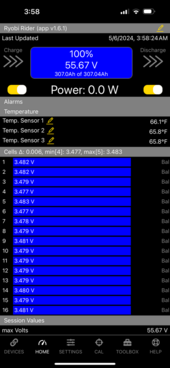
Must have been some thick grass or something.Is anyone interested in my conversion from SLA to 304Ah Expert Power cells from Amazon? I have Pictures. First mow of 1.66 acres and only used 18% or 53.31 Ah.
I use 140ah to cut 6 acres usually.
Would always like to see someone else work!!
Post away…
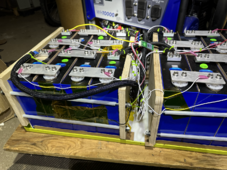
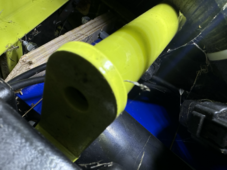
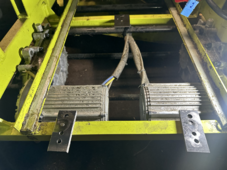
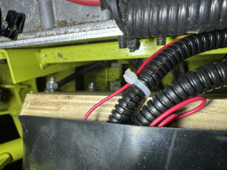
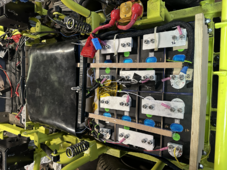
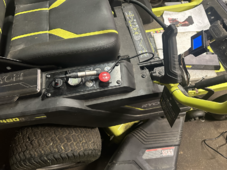
OK then here we go. I got these (https://www.amazon.com/gp/product/B0C4VQW2VW/ref=ppx_yo_dt_b_search_asin_title?ie=UTF8&th=1) from Amazon. Kinda sucks they are so cheap now. Mine were $1400 for 8 in February. I measured and measured. Then measured again. I had to be sure they would fit. So I ordered and they got here in about 1-1/2 weeks. I top balanced them which took 6 days to do with a 10 amp power supply. I let them sit for the rest of that week and put them in the series config and did the initial charge with a Cycle Satiator. I then took everything apart and put the battery tray on a roller dolley to put it in its final resting place. As you see I separated all batteries by chipboard pieces. In the bottom of the tray I put a 1/16th inch piece of metal sheet cut to fit. Then my job makes very large plastic pieces which are also 1/16th inch thick. I also put chipboard pieces along the bottom edge of all batteries. The Overkill BMS 16S 100Amp fits in between the two stacks.
Attachments
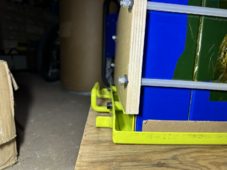
Also I found that my clamp plates were a little too big on the top so had to saw some off. Oh AND the tray wouldn't go all the way in. So I extended the mounts outward 1-14 inch. Also you can see in the pics above I used a wood spacer to keep them at each edge of the battery tray.
Attachments

Nobodybusiness
Collecting the leftovers of the Great Sky Reactor.
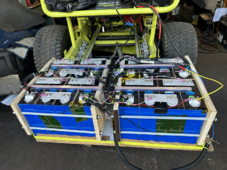
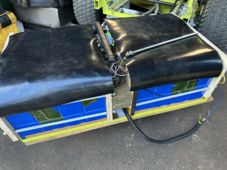
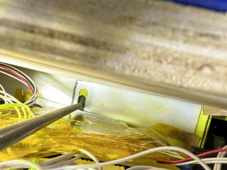
Looks nice..Also had to make a new battery tray hold-down. Had to get some metric threaded bar too. I put 1/16th inch thick rubber sheets on top for my bumpy yard. So the batteries wouldn't contact the frame in any way. And it all JUST fits.
How do you like it so far?
Are you using a pre charge resistor?
After all the work was done I topped off the batteries and let set overnight. I mowed the next day. My home is very hilly and uneven and 1.66 acres. But I still only used 18% of my battery. My EV bike batteries were powering the mower for 1 season when the SLAs went dead. they were only 100 Ah (2 - 50 Ah batteries in parallel.) And they got me about a time and a half of mowing on 1 charge. when I was done I charged my new pack bak up. And it took 53.3 Ah to do overnight. Next time I mow I want to do it again and again until I can't anymore - to see how many times I can on one charge. I just noticed my picture of the BMS screenshot says 307.04. it is supposed to be 304Ah. I have since corrected this.
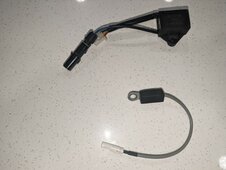
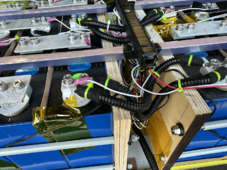
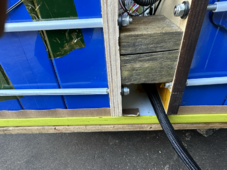
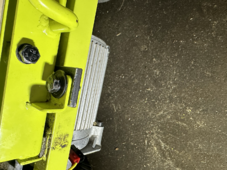
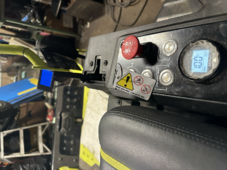
Also I took out theUSB charge port and bout an Anderson 45amp charge port.
Also I took out theUSB charge port and bout an Anderson 45amp charge port.
Attachments
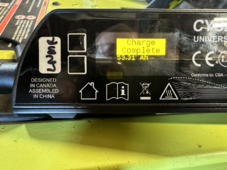
No just the pack and a Cycle Satiator charger from Ebikes.ca oh and an Overkill BMS. It all seems to work good. There is no more bogging down on some of my hills that used to bog me down when climbing them to Now.Looks nice..
How do you like it so far?
Are you using a pre charge resistor?
Nobodybusiness
Collecting the leftovers of the Great Sky Reactor.
Yea I have noticed the same things.No just the pack and a Cycle Satiator charger from Ebikes.ca oh and an Overkill BMS. It all seems to work good. There is no more bogging down on some of my hills that used to bog me down when climbing them to Now.
No more bogging in high grass or hills.
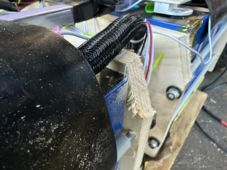
Some talk in this thread about the inrush of current when the contactor closes Damaging capacitors.
I never had any issue with it but recently installed a pre charge resistor with momentary push button across the contactor just to make sure.
ImAnIdiotPleaseBePatient
Solar Enthusiast
- Joined
- Dec 10, 2022
- Messages
- 432
Just ordered a new surplus stock zt540e to play around with. Hopefully the batteries last for a while before I dive into converting it. Looking forward to a fun project though. Def would not have done it without reading through this entire thread! Thanks people
Zbelly
New Member
You can get to the power button on the vatrer from underneath - you can see the openings on the battery tray now that the vatrer is shorter than 4 AGMs. It says to turn it off if not using for more than 5 days. I’d assume it’s good practice to follow.Thanks just assembled it up exactly as it was (minus the original thermistor cable off positive) and it functionally seems to work as expected! Hoping this week I can give it a good run once I figure out mounting.
I too am wondering about this on off button. I’m assuming/hoping it can just stay on…
ImAnIdiotPleaseBePatient
Solar Enthusiast
- Joined
- Dec 10, 2022
- Messages
- 432
So I got my 16 230a cells from 18650batterystore the other day, along with a crimping tool, some ring terminals and a 48v lifepo4 charger. Mower should be showing up this wednesday or thurs, and I'm going to start the conversion. Going to have to build some kind of box, but I also ordered some EPDM foam and kept the styrofoam from the battery order to fill in gap areas. 200A JK BMS shows up in a few weeks. Will update here as it goes. If anyone needs four new 115ah lead acid batteries in the NoVA area, I am going to pull them off and sell them.
Similar threads
- Replies
- 7
- Views
- 606
- Replies
- 3
- Views
- 1K
- Replies
- 1
- Views
- 406
- Replies
- 4
- Views
- 196
- Replies
- 26
- Views
- 7K