You are using an out of date browser. It may not display this or other websites correctly.
You should upgrade or use an alternative browser.
You should upgrade or use an alternative browser.
Ryobi Zero-Turn Mower SLA to LiFePo4 Conversion - (Updated - Build Complete With Pics!)
- Thread starter AMDPower
- Start date
rio
New Member
rio
New Member
Thanks for sharing - that was useful. I looked through my batteries' datasheet and it says nothing about compression or fixturing. So I'm not going to stress over it.
Exactly!Great info. I taped half of mine with Kapton so I guess I'm half good. Since we likely will not deplete to anywhere near zero and don't need to charge to 100, we'll probably be just fine either way right?
Looks like Amazon screwed up and my charger didn't arrive on today's UPS truck. Hoping it's not lost and will show tomorrow.
AMDPower
New Member
- Joined
- May 18, 2021
- Messages
- 123
It's probably with my heli-coils! I got my meter but none of my other goodies. Damn...Exactly!
Looks like Amazon screwed up and my charger didn't arrive on today's UPS truck. Hoping it's not lost and will show tomorrow.
Got the charger in and adjusted down the VR2 pot to 56v, 58.4v is indeed a little too hot.
Man, this charger design and build quality totally sucks. I trust it about as far as I could throw it. As you mentioned, the power switch, which should be connected to the mains is connected to the board that almost shuts off the DC voltage, except it doesn't, it still outputs ~5v with the switch off! I'll be attaching a proper switch to this guy's mains and it'll be completely disconnected between charges until I can find a better/safer charger on the market. This charger in my opinion is dangerous to be plugged in 24/7.
Do you also here a clicking noise if you listen closely to it when it's "powered off"?
AMDPower
New Member
- Joined
- May 18, 2021
- Messages
- 123
Right?!!! It's a POS! I attached a smart plug to mine so I can cut power remotely. I don't know that it's dangerous outside of the horrible build quality but it's crap. It does have a float voltage which I don't like. I disconnect mine when done. I'll probably upgrade too. If you find a good one for a decent price, let me know!
AMDPower
New Member
- Joined
- May 18, 2021
- Messages
- 123
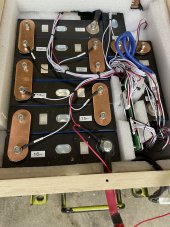
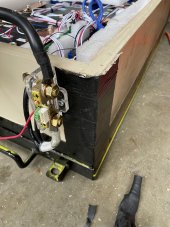
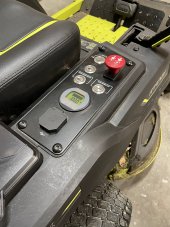
Got my gauge installed and fixed my cell last night! Gotta say those Heli-Coil things are AWESOME! Work great. Also got a smaller torque wrench that I could use for future so I don't do it again! Grinding out that hole for the gauge absolutely sucked by the way. I used my Ryobi zip tool with a grinding stone attachment. Took FOREVER. I'm sure there is a better way.


Hedges
I See Electromagnetic Fields!
- Joined
- Mar 28, 2020
- Messages
- 21,840
Grinding out that hole for the gauge absolutely sucked by the way. I used my Ryobi zip tool with a grinding stone attachment. Took FOREVER. I'm sure there is a better way.
Round hole?
I just used these step bits to make openings for connectors in a cast aluminum box. Slowest speed on drill press (even for small holes), and a vice holding the box worked best. I used some IPA because I didn't have Tap Magic handy.

Cobalt Steel Step Drill Bit Set, 2 Piece
Amazing deals on this 2Pc Cobalt Hss Step Bit at Harbor Freight. Quality tools & low prices.
For some materials and diameters, a knockout punch is faster. I have a Greenlee Slugbuster, but here's the cheap brand:
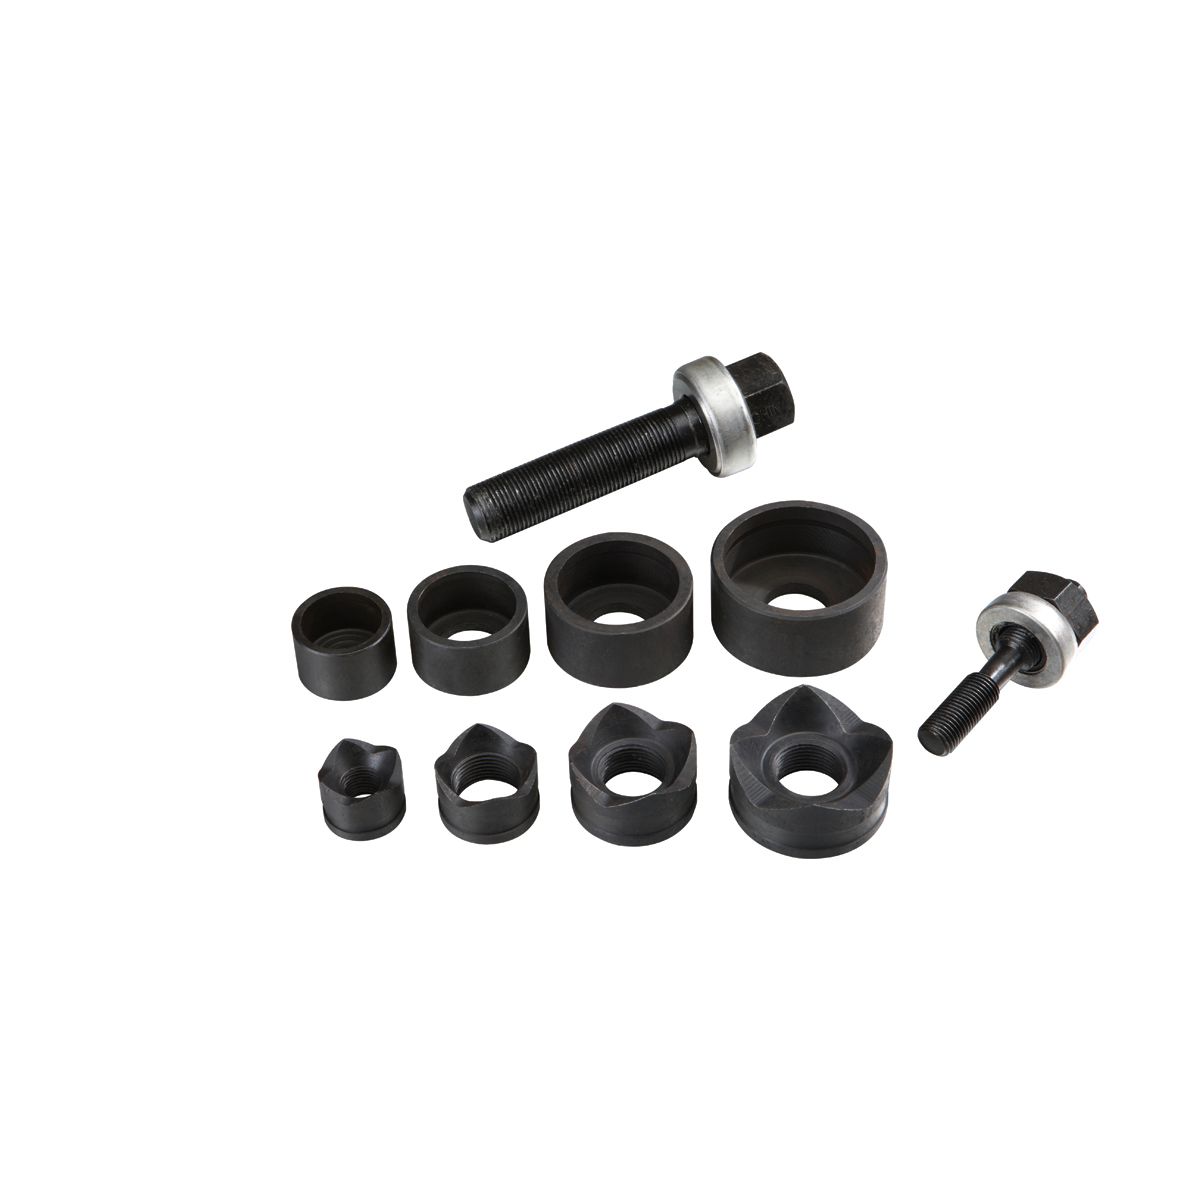
Knockout Punch Kit, 10 Piece
Amazing deals on this 10Pc Knockout Punch Kit at Harbor Freight. Quality tools & low prices.

14 Piece Hydraulic Punch Driver Kit
Amazing deals on this 14Pc Hydraulic Punch Driver Kit at Harbor Freight. Quality tools & low prices.
AMDPower
New Member
- Joined
- May 18, 2021
- Messages
- 123
I have a step bit but not one that is 2". I used what I had on hand. I like that punch kit though. Might need to grab one of those for future projects. The steel for the mower panel looks like 1/8". Also, I just did a full cut with the new meter. Less than 1% difference in capacity between the meter and the BMS. Not bad at all.
Hedges
I See Electromagnetic Fields!
- Joined
- Mar 28, 2020
- Messages
- 21,840
And of course hole saws too. Like the punches, mostly sizes for pipe/conduit. Benefit over punch is they can cut wood as well as metal.
I previously tried Milwaukee self-feed bits, but couldn't drill studs higher than where I could really lean into them. Flat wood bits worked. The drill worked for larger drain pipes. Generally, back-drilling after pilot bit comes through avoids blowout (but with hammer drill on stucco the blowout from drill was large.)
For the electrical connectors I was mounting, none of the hole saws were the right diameter, but some of the step bits were. Also, the curve where it stepped up to the next size took care of chamfer for where a connector's injection molded shape wouldn't have let it fit all the way in. Some other connectors I had simply drilled for (BNC), I countersunk with 1/2" bit due to thickness of box, in order to fit threaded nut and other hardware.
 www.harborfreight.com
I previously tried Milwaukee self-feed bits, but couldn't drill studs higher than where I could really lean into them. Flat wood bits worked. The drill worked for larger drain pipes. Generally, back-drilling after pilot bit comes through avoids blowout (but with hammer drill on stucco the blowout from drill was large.)
For the electrical connectors I was mounting, none of the hole saws were the right diameter, but some of the step bits were. Also, the curve where it stepped up to the next size took care of chamfer for where a connector's injection molded shape wouldn't have let it fit all the way in. Some other connectors I had simply drilled for (BNC), I countersunk with 1/2" bit due to thickness of box, in order to fit threaded nut and other hardware.
Harbor Freight Tools – Quality Tools at Discount Prices Since 1977
Harbor Freight buys their top quality tools from the same factories that supply our competitors. We cut out the middleman and pass the savings to you!
Also did a full cut and meter is accurate. The Daly BMS after a full cut was extremely hot. I sent a message to them to ask if that's normal. Likely POS BMS and will likely replace it with the overkill BMS.I have a step bit but not one that is 2". I used what I had on hand. I like that punch kit though. Might need to grab one of those for future projects. The steel for the mower panel looks like 1/8". Also, I just did a full cut with the new meter. Less than 1% difference in capacity between the meter and the BMS. Not bad at all.
I'm also adding a wifi switch to the charger so that it's off when not in use.
Hedges
I See Electromagnetic Fields!
- Joined
- Mar 28, 2020
- Messages
- 21,840
Consider heatsink and/or fan to cool BMS.
In stagnant air, things get much hotter than with a slight breeze.
I was working with a Pfeiffer turbo pump on the bench. It was uncomfortably hot to touch, dissipating about 20W. Bench fan aimed at it dropped it to room temperature.
In some applications, possibly a chimney to get more air velocity from natural convection would work.
AMDPower
New Member
- Joined
- May 18, 2021
- Messages
- 123
The overkill has no active cooling and didn't seem to get too hot. The internal sensor was a bit warmer than the two external sensors on the batteries. I have it stuffed in the plywood box and sandwiched between two pieces of foam. After a full mow it was just slightly above 30 degrees C and the two external sensors were around 26-28 C. Fine by me and I figure if there was a problem, the BMS will just shut off like it is supposed to. This was on a cool 70 degree F day.
rio
New Member
Hey guys, that's awesome that you've been already getting some mows out of your new batteries! How does the range compare to what it once was when your machine was brand new? My batteries are expected to arrive today and the BMS sometime on Tuesday, so I'm hoping to have my rig ready before first frost.
What did you guys do about the top pin in the charge plug receptacle? Are you just leaving it disconnected? It's hard to figure out what exactly it's for other than the thermistor... but with a continuity test it does not show connection to either of the thermistor pins. Maybe this pin is also responsible for blinking the charge LED? If so then I suppose there is some sort of semiconductor electronics inside that receptacle.
Then there is the blue wire leading into what @AMDPower identified as a reed switch. No idea how this works but maybe activated through some sort of EMI once there is current flowing through the charge port? So if all I do is connect + and - from charger into bottom two pins on receptacle, would this be sufficient to enable the "can't turn mower on while charging" feature?
Then there is the charger... I'm hesitant to get the same one you guys got but not a lot of great options out there. For 3 times the cost there is this one from Dakota Lithium: https://dakotalithium.com/product/4...4-battery-charger-for-lithium-iron-batteries/ but damn that's steep. So, how bad do you guys think it would be to stick with the original delta Q charger? Can't I just rely on the BMS overvoltage protection to protect the cells? I could replace the thermistor with a ~12K resistor or pot. I just wonder how detrimental to long-term battery life it would be to use an SLA charging profile versus LiFEPO4.
Decisions....
rio
New Member
Also found this one: https://www.invertersupply.com/inde...t8JiAd7M5PY_7lr-iIjcF9Zxd-xgd-ssaAnRTEALw_wcB.
AMDPower
New Member
- Joined
- May 18, 2021
- Messages
- 123
I get as good or better range than when the mower was brand new. 1.2 acres in tall wet grass and cutting the front yard twice to avoid trails left me 62% remaining. You don't need that third pin. It's the thermistor sensor and yes it does appear there are some electronics in it that blinks the LED as well in the housing. LED no longer works on the mower. I kept the blue reed switch. Weirdly though, I can turn the key and hear a relay click but the display didn't light up when I had my old meter. This meter never seems to go to sleep so hard it's hard to tell. But the switch is supposed to send voltage to the control panel I believe for shutoff of run while charging. You could set the overvoltage protection lower but when I shot an email to OverKill Solar they didn't recommend it. Plus, you'll still be charging at a higher voltage until you get to that set point. I think when it comes down to the charger, you kinda get what you pay for. I plan on running with what I have for a while anyway though.
rio
New Member
Cool thanks, that's good info.
Just curious - how long does it take you to mow your 1.2 acres? And do you use the high or low blade speed?
Just curious - how long does it take you to mow your 1.2 acres? And do you use the high or low blade speed?
Similar threads
- Replies
- 3
- Views
- 369
- Replies
- 16
- Views
- 399
- Replies
- 7
- Views
- 863
- Replies
- 2
- Views
- 289


