diy solar

diy solar

Tapping new threads in the terminals

Frank in Thailand

making mistakes so you don't have to...
Joined
Feb 17, 2020
Messages
1,676
Location
Thailand
Hi all,

During my green LiFePO4 day's I used the screws provided by the sellers, and changed the setup a few times.
Needless to say that the threads in the weak aluminium didn't like that.

Git got that far that about half of the 48x 152 terminals are out of tread, locking agent no longer helps, wd-weld or similar.. can't hold +4 Nm torque

So I have the nice task of fixing 96 holes.

I have 17/64 - 6.75mm drill and thread set.
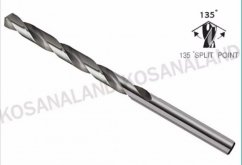
Screenshot_20210322_141149.jpg

The drill I grinded most of the tip flat, the 6mm is already there, it's just 0.75mm

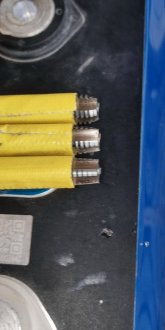
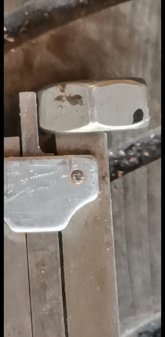
The taps is a quality set:
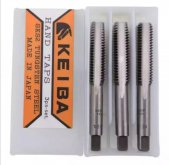
Screenshot_20210322_141219.jpg

I used my standing drill without motor (took of the belt and turned by hand)
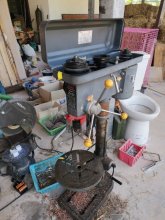
IMG_20210322_141734_copy_750x1000.jpg

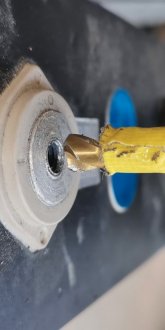
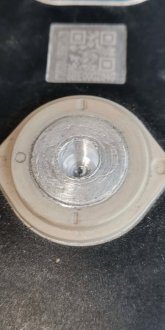
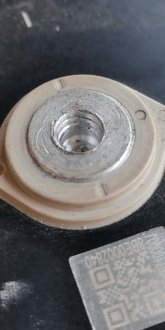
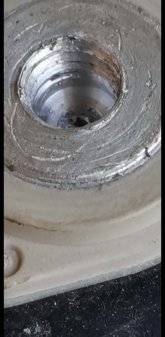
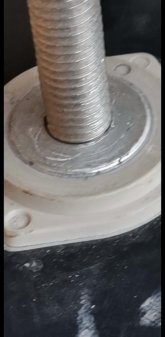
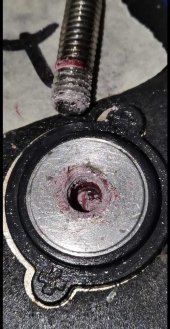
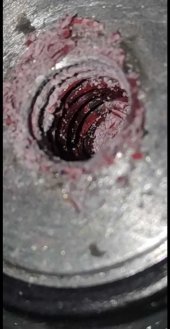
Pics say more then words, here is the progress:
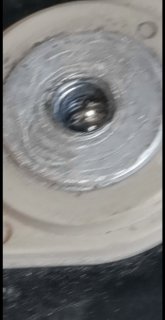
2021-3-22 13-30-56.jpg2021-3-22 13-32-19.jpg2021-3-22 13-34-57.jpg
2021-3-22 13-37-13.jpg
2021-3-22 13-39-33.jpg
 
Second set of pics:
2021-3-22 13-42-33.jpg
I did not see much progress with the tap set, this was nr2.
2021-3-22 13-50-15.jpg
2021-3-22 13-50-32.jpg2021-3-22 13-55-31.jpg

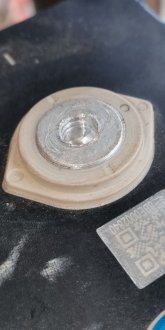
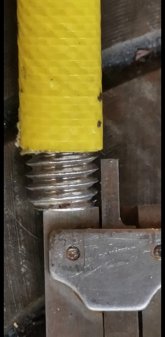
I used caliper to measure the depth of the 6mm hole.
Looks like it's all in.
Same as a regular M8 nut.
2021-3-22 13-56-15.jpg
The thread tap set I did by hand, not the drill.

The M8 stud does have a little wiggle room, in a nut it have the same wiggle room, perhaps even little bit more.

Locking agent (Loctite) will help with this.

With a drill press it's not difficult to drill straight.
Threading is exiting at start, probably will be tedious when I reach cell 90 :)
 
Looks good fhorst. I went with helicoils mostly to keep all of my cells using the same size threads.
But your method will work just as good.

Your pictures show how soft the aluminum is. Loctite is smart
 
Thanks!
I've tried helicoil, but their tap is not a bottom tap..
In short, that was a huge mess
Even wd-weld could not fix that.

I have a few other rods glued in with wd-weld (or better "4 tonnes" 2 component epoxy), Thai variant
They are to strong connected to get out (rods have Allen/hex on the top)

When there is some thread left, WD Weld is a quick and easy fix.
When blank, stripped, not much else to do then make new
M7 thread is really hard to find.
So it became M8 :)

I might even use a tiny bit wd-weld to fixate for eternity.
 
Put your tap in the drill press. It will help keep straight and also from cutting the threads larger because of wobble
I tried, the drill press really pulls up, a thing I can't turn off (yet)
This makes sensing the dept a lot more tricky.

The wobble isn't a lot, just the first one a little at start.
The other 2 almost none.

After 8 cells I needed to stop to prevent blisters on my hand...
So I'll look into the drill press again :)
 
Look into using rollform taps , get a bottom tap ,use oil for lube, uses a slightly larger drill. Rollform threads are 50% stronger than cut threads.

I have been using them for over 30 years in my machine shop . They forge the material , not cut , which makes a stronger thread . Not much

on google ,except for buying them . In my experience they produce better quality threads . If you can get twice the diameter for the depth of the treads, usually is stronger than a grade 8 bolt and snap it off even in aluminum ..
 
Could be they are better, M8 normal taps are purchased a week ago. ?

If this one is a good one, price isn't too bad.
About $32,-. Shipment also $32,- what makes it quite expensive..

It's just for these cells, not intended to use a lot.
My standard 15 bucks set (M3-10 for holes and studs wasn't used in 20 years...

4 threads of M8 should be able to do +4Nm, right?
Rolled perhaps +6Nm but it usually doesn't need this much force to clamp the Bus-bars.

I wish I knew earlier, then probably would have bought this type.
Thanks for the tip, but I stick to the cutting.
 
Last edited:
Just out of curiosity...
Why are there still cutting taps?
Purchase price is about similar.

While I understand the process, I don't see how it can do a blind hole tap in just one set.
It seems like it needs 2 rotations to make the shape.

That would still make 3 full treads, instead of 4 cut, being overall more strong, yes?
 
It is difficult to form hard metals so cutting taps still have to be used.
Even the cutting tap doesn't cut all the way to the bottom.

You will have to start the form tap in the drill press. Or use a tap guide.
 
Look into using rollform taps , get a bottom tap ,use oil for lube, uses a slightly larger drill. Rollform threads are 50% stronger than cut threads.

I have been using them for over 30 years in my machine shop . They forge the material , not cut , which makes a stronger thread . Not much

on google ,except for buying them . In my experience they produce better quality threads . If you can get twice the diameter for the depth of the treads, usually is stronger than a grade 8 bolt and snap it off even in aluminum ..
I have one terminal drilled to 6.5mm, threaded to 4.7. All the others are threaded to 6mm. I need to buy a bottom tap. I was going to get a fluted bottom tap. Should I buy a bottom forming tap instead? BTW, This battery has m6 terminals.
 
I have one terminal drilled to 6.5mm, threaded to 4.7. All the others are threaded to 6mm. I need to buy a bottom tap. I was going to get a fluted bottom tap. Should I buy a bottom forming tap instead? BTW, This battery has m6 terminals.
Look up the drill size chart for roll form, the drill hole size is larger. Don't mix the two types in same hole, you will snap the tap off.
 
You can almost be sure that the thread was cut.

Bottoming tap isn't really bottom.
Usually the set have 3 different tapers, last one just 1.5mm or so.

For me, I used the grinder on the first tap, slowest flute or tapered or what you guys call it In the States :)

Make it flat, till the full thread.
Grind a tiny bit of the sides for more easy access, and you have a real bottoming tap.

This doesn't work for strong iron!!
With our weak aluminium, you even can take a bold, cut some sleeves to accumulate the cut off aluminium and twist that one in.

Will work just as good for our purpose.

In my post of thread repair I'm showing pictures of it all :)

Thread 'Ultimate thread repair guide. (And how to prevent)' https://diysolarforum.com/threads/ultimate-thread-repair-guide-and-how-to-prevent.24614/
 
I got a 4 flute bottom tap from mcmaster and tried it out of the box...I got it from 4.7 to 5.5. I ground .7mm off and and finished up at 6mm, so I calling it a success! Thanks for the tips and replies. I was able to finish the tap with finger pressure. I tried a tap handle and only got a few degrees of a turn!
Maybe off topic but I'm testing a ss grub screw and loctite 263 in a freshly tapped hole in some 6.3mm thick scrap aluminum. The screw feels really well cured after 4 hours, no primer. I'll jam a 1/4-20 on it tomorrow and see how many inch pounds it takes to break it loose.

There are a lot of posts about backing off the grub screw 1/8 turn. Is it safe to run the grub screw to the bottom since I'm using loctite? Seems like running it down would be the best way to get a super tight fit in the threads for a good loctite bond.

Other general build details for my battery include, mcmaster-carr 1/4" neoprene foam at 11 psi for cell padding, cost $11 for 12" x 42". Also some 100mm x 15mm Galco flex busbar's rated at 120 amp's, about $3 each plus $10 for shipping, ouch. I'm doing a rv build and concerned about vibration with 6mm posts. I'm not running an inverter, just lights, sailboat fridge and a fan so I think I'm good on the flex busbars. I'll create a new thread with photos of the build sometime next week.
 
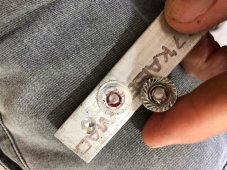
@MarkF , I really do hope your loctite bonding will look like this:

2021-7-3 12-20-27.jpg
Zoom...
2021-7-3 12-25-3.jpg

With the use of primer, this is absolutely impossible.

I placed +6Nm torque on a few with primer to unscrew...
No success.

This one (no primer) gave at about 5Nm

In steel I've had Loctite red that didn't give over 12Nm...
(On M6)
They break internally at about 15Nm
(Regular iron car bolts)
Heating to 250-300c and it's eas to unscrew.

That is how strong the bond is supposed to be :)

You should not be able to unscrew without major damage.

Be aware, according to the white paper the Terminal holding (plastic edge) is made to withstand maximal 7Nm torque.
Test on a dead cell: all good till 9Nm..
Then it started twisting in its holding.
No need to really break it.
It might be dead, not yet useless :)
Perfect for tests like this ?
So up to +6Nm should be no problems at all, and the Loctite should not care about this "little torque"....

I agree with you, the 1/8th turn loose..
What's the benefits???

Good bottoming can make almost 6.3 mm usable threads.
Already a lot more then most cells standard have.
(5mm or less)

Really curious if your results match mine without primer!!
 
I had a piece of aluminum almost the same thickness as the depth of the terminal holes, grub screw with loctite 263. The next day I double nutted it but turned the nuts at 9 NM but the screw held. I put a single nut on and went to 20FP and the screw turned a few degrees then tightened and snapped. F436211F-2727-480D-A8F8-CAD38ED49CF3.jpegD10CE0D2-F55E-4E88-B481-3FE80B78B7D7.jpeg
 
Wrong aluminum to test on. That's probably 6061. The batts are probably pure SO aluminum.
 
Wrong aluminum to test on. That's probably 6061. The batts are probably pure SO aluminum.
Yes, 6061 is what I had laying around.

I just finished my RV first battery and none of the grub screws fitted with 263 loctite stripped and tightened to 30 inch pounds, so all is good in my world!
 
Back
Top