NinjaDeathMonk
New Member
- Joined
- Sep 20, 2019
- Messages
- 54
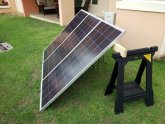
Just completed this solar panel setup inspired by Will's 600W sawhorse array. I used door hinges to secure the panels, which ended up being the perfect size.
- RICH SOLAR 160 Watt Polycrystalline Solar Panels (x3)
- Stanley 22 in. Folding Sawhorse (2-Pack)
- 8ft 2x4
- 2 in. Zinc Plated Narrow Utility Hinges (2-Pack) (x2)
- #10-24 x 1/2 in. Combo Round Head Zinc Plated Machine Screw (8-Pack)
- 1/4 in. Stainless Steel Flat Washer (6-Pack)
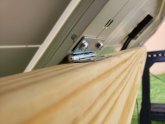
") I can try to get a side view later.
I can try to get a side view later.