diy solar

diy solar

Lishen Battery/Solar build

I have seen members use 201 and 304 stainless steel grubs screws for their cells. I believe I am going to go with a length of 25mm so I can double up the braided copper busbars and have room for bms ring terminals and bolts...

Does anyone have a infinitive answer as to what stainless steel is the best to use? Or if stainless, due to its low conductivity, is a poor choice and has a better solution?

@upnorthandpersonal
 
My cells arrived 3.24 and 3.25, so 30%soc... and it is taking forever.... the frustrating thing is I live in my van full time and only have about a 5hour window to charge with my agms... this weekend I rented a electric campsite for 72dollars for two days with the hope I could get 4 cells charged. But that seems more like a dream now.

I am considering buying another dc charger 40amps, specifically the TekPower TP1540E... if I wouldn't have bought this charger, saved the money for the campsite I would almost to its buying price and most likely with 40amps almost 4 cells charged.

I know its just time or money, or both... My 250ah agms are tired and I am really hoping to get 272ah going because I really think even that amount of power will be life changing for me.
Is anyone using a RIDEN RD6018 for top charging their cells? I bought one on Alibaba, and did not realize its a science project! I recieved the "head unit", and am now waiting for the actual power supply, and the metal enclosure "kit". All the parts cost me over $200 bucks, and now I have to out it together? That sucks.
Anyway, I am asuming it works, but was wondering if I am the only one who bought this based on Wills recommendation. Any tips?
 
@Acho_303 The conductivity doesn't matter - the amount of current carried by the grub screws is negligible compared to the one carried by the surface area of the tab. You want to make sure that the contact between that tab and the bus bar is very good.
 
@Acho_303 The conductivity doesn't matter - the amount of current carried by the grub screws is negligible compared to the one carried by the surface area of the tab. You want to make sure that the contact between that tab and the bus bar is very good.
Thank you, I ordered 304... My braided line are in LA and I am looking forward to getting those home... I am considering using copper lugs to attach them, thoughts? I suppose sandwiching them between flattened copper pipe could supply more contact area on the cell post, possibly
 
Is anyone using a RIDEN RD6018 for top charging their cells? I bought one on Alibaba, and did not realize its a science project! I recieved the "head unit", and am now waiting for the actual power supply, and the metal enclosure "kit". All the parts cost me over $200 bucks, and now I have to out it together? That sucks.
Anyway, I am asuming it works, but was wondering if I am the only one who bought this based on Wills recommendation. Any tips?
It looks solid, having 18a would be nice for top balancing..
 
Is anyone using a RIDEN RD6018 for top charging their cells? I bought one on Alibaba, and did not realize its a science project! I recieved the "head unit", and am now waiting for the actual power supply, and the metal enclosure "kit". All the parts cost me over $200 bucks, and now I have to out it together? That sucks.
Anyway, I am asuming it works, but was wondering if I am the only one who bought this based on Wills recommendation. Any tips?
I didn't know Will was recommending this? Where did you see that. I researched it myself and bought it based on the recommendation on another member of this forum. Of course shortly after I bought mine the 6018 was released.

I used the RIden RD6012 to top balance my cells using the charging feature of the unit. I have no regrets as I can use it for other things. For example, the charger I normally use to charge my Valence batteries crapped out yesterday. Riden to the rescue.

First tip is to thoroughly read the manual. The unit has a wide variety of features and you can get familiar with it before you get the rest of your things.

Second tip is to buy the battery for the internal clock and install it before installing the WiFi board. The WiFi board can be a pain to remove and the battery sits under it.

Third tip is to get decent cables and ring terminals to connect to the cells. I used 12 AWG silicone wire but you might want to consider 10 AWG. My unit came with spade connectors to connect to the Riden's output ports. You can solder those to the cables.

Finally take your time and get to know it. Hopefully you will come to realize, as many of us have, the Riden is a good investment.
 
Can someone please comment of this: I charge a cell to 3.65, my multimeter shows 3.65... in about a day of not charging the cells voltage will drop to 3.4 and seems to continue dropping... why is that? It is like they don't hold the charge... and because I am charging the cells individually makes it impossible to get 4 cells at 3.65 at the same time, its a moving target.
 
Last edited:
It's not a moving target - don't be hung up on the voltage. It is normal for these cells to settle at a lower voltage. They're still full, they did not lose capacity. Just make sure that each cell is charged until the current drops; i.e., don't measure the voltage and say it's full, check the current and if it's dropping towards 0, then it's full.
 
It's not a moving target - don't be hung up on the voltage. It is normal for these cells to settle at a lower voltage. They're still full, they did not lose capacity. Just make sure that each cell is charged until the current drops; i.e., don't measure the voltage and say it's full, check the current and if it's dropping towards 0, then it's full.
I second that.
 
It has been a tough go, this week has been really cold and my espar d5ws is dying (31 codes, fan is on the outs)... I have been in Black Hawk during the cold camping, the lowest temp -15degrees... thankfully I was able to get a electric campsite to run a few ceramic heaters and to continue charging (2 cells left). I bought a S3 to replace my d5ws but I am hoping for a nice weather window to work on it (new wiring, fuel pump, mounting the s3, and removing the old d5ws stuff), it should be 40s this weekend so I plan to maybe give it a go.

My braided copper should arrive today for building my busbars, and later this week my 30mm grub screws and bolts..

While I know people make plans and God just laughs, I am hopeful that maybe I can deploy the batteries and new espar this weekend...God willing
 
Last edited:
It been a tough go, this week has been really cold and my espar d5ws is dying (31 codes, fan is on the outs)... I have been in Black Hawk during the cold camping, the lowest temp -15degrees... thankfully I was able to get a electric campsite to run a few ceramic heaters and to continue charging (2 cells left). I bought a S3 to replace my d5ws but I am hoping for a nice weather window to work on it (new wiring, fuel pump, mounting the s3, and removing the old d5ws stuff), it should be 40s this weekend so I plan to maybe give it a go.

My braided copper should arrive today for building my busbars, and later this week my 30mm grub screws and bolts..

While I know people make plans and God just laughs, I am hopeful that maybe I can deploy the batteries and new espar this weekend...God willing
Best of luck!
 
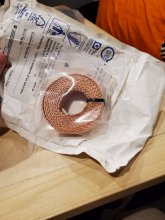
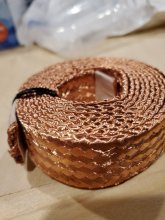
Another piece of the puzzle showed up today, thank you @upnorthandpersonal for the suggestion.

2021-02-1615.12.194390940134359489071.jpg2021-02-1615.14.191873106941745458099.jpg

Now I just need to test flattening copper pipe to create ends for the cells terminals or just using copper lugs and crimping them down
 
Make sure you use annealed copper.
From my limited reading you should be able to buy rigid and just heat to red and cool in water to make it malleable

I was just going to do a homedepot or lowes run... and maybe a bench top clamp from harbor freight to press it together. Something like this https://www.harborfreight.com/4-inch-jaw-capacity-drill-press-vise-30999.html

I was thinking press, heat, press, etc until the clamped portion (terminal ends) becomes a solid copper bar

Thinking about it I might try the same excluding the copper pipe and see if I can get the braided copper to press to solid. KISS
 
Last edited:
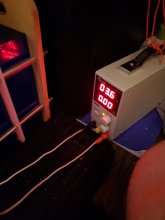
I rented another campsite this weekend to be able to run a few ceramic heaters and to charge my cells. My espar head unit is somewhere lost in Utah so I had no choice.

It was like Christmas when this happened
20210221_102908.jpg

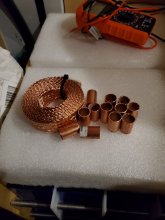
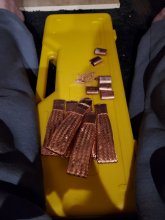
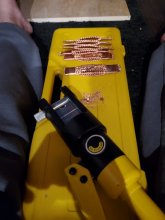
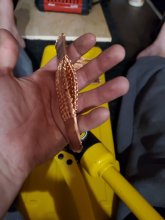
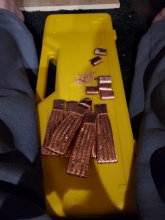
I built my busbars and started to layout my equipment... the layout without taking up my entire garage is a challenge.
20210221_184737.jpg
20210221_193117.jpg
20210221_194936.jpg
20210221_194946.jpg
 

Attachments

  • 20210221_193117.jpg
    20210221_193117.jpg
    95.8 KB · Views: 25
Very nice. That looks like a 12ton crimper with the dies turned upside down. Is that correct? Brilliant.
 
Yes it is and it wasn't my idea... it did work very well.
Fantastic. I was considering making my own “die” for doing the same thing, hadn’t occurred to me to turn a couple dies upside down. I am eager to get braids ordered, now. ?

Did you make any attempts without using the copper pipe?
 
Fantastic. I was considering making my own “die” for doing the same thing, hadn’t occurred to me to turn a couple dies upside down. I am eager to get braids ordered, now. ?

Did you make any attempts without using the copper pipe?
No, I also did not cut the pipe after crimped to see if the copper became solid... but I am thinking of the copper pipe more like washers... if the crimping did not fuze the copper into a solid piece the pipe will help provide better contact, I think... My homedepot has copper pipe for 7 bucks, so at the end of the day, I figure why not. The braided copper I ordered is very malleable, so without the pipe to help form it I think it would just spread out when crimping
 
No, I also did not cut the pipe after crimped to see if the copper became solid... but I am thinking of the copper pipe more like washers... if the crimping did not fuze the copper into a solid piece the pipe will help provide better contact, I think... My homedepot has copper pipe for 7 bucks, so at the end of the day, I figure why not.

I will make the copper pipe braids longer by .5” or so (may fold the end of the braid over then into the pipe, too); then, afterward I will cut the excess to length so I can also get a view inside to see how well the weld did or didn’t take. It’s a little wasteful, but i feel worth it. Beside, I won’t just toss the excess. If there’s enough it can be melted down and shaped for other uses in this project. For instance, I may use .25” x .75” copper bar to go from disconnect switch to distribution bus bar.
 
Back
Top