Steve_S
Offgrid Cabineer, N.E. Ontario, Canada
Ohhh That would be a HAPPY Mistake for eh customer, wouldn't it. I'd imagine the size & weight would be too noticeable.Hopefully they don't send you 280AH cells!
Ohhh That would be a HAPPY Mistake for eh customer, wouldn't it. I'd imagine the size & weight would be too noticeable.Hopefully they don't send you 280AH cells!
I wouldn't mind that ?. Amy did confirm the 8kg weight (4x2kg) when she quoted the shipping costs. The 280Ah cells should weigh 5.2kg each, so ~21kg. I expect at least the shipping company would notice it.Hopefully they don't send you 280AH cells!
A word of wisdom / experience. Don't attach battery cable to the cell terminals as such. It's much more prudent to run a (+) & (-) lead to Battery Terminals from the cells and then attach your cabling to the terminals with a fuse of course on the (+) terminal.
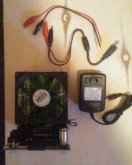
Terminal such as these but there are many varieties to suit various needs.


@andruby She has always provided photo's of the cells you are getting & a little video of the voltage tests. I had suggested that she put a Name Card with them when taking the pics / vid so people know it's theirs that they are seeing.
It is unwise to attach battery cables directly to an LFP cell as battery cables can move and the "posts" on LFP cells are not like Lead Batteries, the posts are weaker and can be damaged, damaging the cell. Good Practices are to run a cable from your cells (-) & (+) to fixed "terminals" as shown above and then attach your battery cables to them. The terminals of course have to be solidly affixed to the case or housing so they do not move for the battery pack.Can you give a simple example of what you mean by this?
I really want to try and build my own pack for my boat, but a bit nervous about making fatal errors, especially due to language based misinterpretations...
Patrick, check out Wills video where he built a $555 battery. He used terminal posts to connect his cells/BMS to the outside world. That way any cable strain/vibration from the outside cables only goes to the terminals of the "battery" and not to the top of your precious cells.Can you give a simple example of what you mean by this?
I really want to try and build my own pack for my boat, but a bit nervous about making fatal errors, especially due to language based misinterpretations...
Patrick, check out Wills video where he built a $555 battery. He used terminal posts to connect his cells/BMS to the outside world. That way any cable strain/vibration from the outside cables only goes to the terminals of the "battery" and not to the top of your precious cells.
Here is what Will used.
It is unwise to attach battery cables directly to an LFP cell as battery cables can move and the "posts" on LFP cells are not like Lead Batteries, the posts are weaker and can be damaged, damaging the cell. Good Practices are to run a cable from your cells (-) & (+) to fixed "terminals" as shown above and then attach your battery cables to them. The terminals of course have to be solidly affixed to the case or housing so they do not move for the battery pack.
I almost dont dare asking, but who is this Will, everyone is talking about? ?
check this video out, think it will help you alot.Ah, i see.. got some youtubing to do i gues
Common wisdom is to connect all the cells in parallel and let them all come to the exact same voltage. Either passively or actively. Whether you want to bottom balance or top balance is up to you. I'm not going to repeat what is covered in many long threads here.And i read a lot about everyone balancing and testing the cells. Offcourse i got the tools to measure the V on each cell, but that is as far as my equipment goes. If all cells are the same, i can just start connecting?
And what do i do if they aren't?


Did you take any precautions unpacking them for Corona Virus? Disinfect them in any way?THE CELLS ARRIVED ! \\YAY//
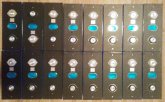
Everything arrived in "perfect" condition. Not a mark or scratch and nothing to note at all.
NO DOUBT That these are Grade-A, NEW cells !
All cells wrapped individually, double boxed with foam between the boxes too.
Quite an effort to unpack them ! Well done packing.
.......big snip........
Hope this info helps potential buyers and those pondering options.
I don't get involved in hypochondriac hyperbole. Mrs is a Doctor of Public Health teaching at the 4th top Medical University in North America, I get my info from CREDIBLE sources only thanks. I won't get into that stuff.Did you take any precautions unpacking them for Corona Virus? Disinfect them in any way?
One thing I forgot to do was tell Amy to double up on the amount of bus bars she was sending; so that kinda sucks... Might get some copper flat stock and make my own since you think they are the bare minimum for this capacity.Bus Bars:
These are odd but ok. Pure Copper, 15mm wide X 90mm long, 2mm thick. I consider these to be "bare minimum" for cells with this capacity. Doubling them up would also eliminate need for extra washers. NB: I will have to make my own Bridging Bars (2) as I am building "Square Packs" and the ones supplied are too short to cross over between "sides". see image
They make the grade but just. In reality, it's very unlikely to exceed the amperage to the point where these bus bars would be a problem, I personally like to have "elbow room" when It comes to load tolerances. I have advised Amy of these details and she's working on the bolt lengths and the busbars. I'm sure they will change shortly.One thing I forgot to do was tell Amy to double up on the amount of bus bars she was sending; so that kinda sucks... Might get some copper flat stock and make my own since you think they are the bare minimum for this capacity.
You have 10mm screws, 7mm inside the terminal, 2mm for the bus bars, then add ring terminals for the BMS. I'd rather have to add a washer, than have them be too short and not grab enough threads in the terminal.They make the grade but just. In reality, it's very unlikely to exceed the amperage to the point where these bus bars would be a problem, I personally like to have "elbow room" when It comes to load tolerances. I have advised Amy of these details and she's working on the bolt lengths and the busbars. I'm sure they will change shortly.


