diy solar

diy solar

6000XP’s/Ruixu Batteries/Boivet Panels in Production

BrianVeg

Solar Enthusiast
Joined
Sep 19, 2023
Messages
96
Location
Michigan
Well I’m finally done and my system is in production.

My goal when I started this phase (Phase 1) of the project was to create an expandable system that would act as a backup for my critical circuits for 24 hours during a power outage. While I have not quite hit that goal, I’m at 15:45 with the current batteries. My calculations of energy used were off. Oh well - still happy!

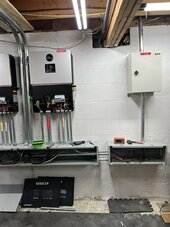
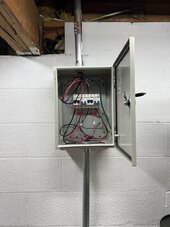
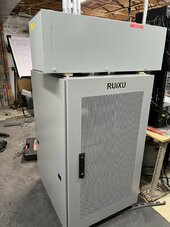
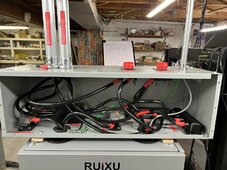
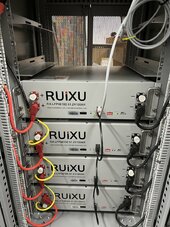
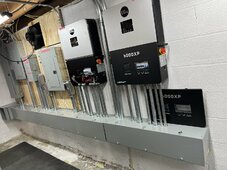
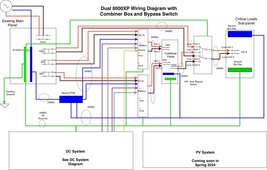
My system consists of 2 X 6000XP’s with 4 x Ruixu batteries. I also have AC connected to provide the primary source of energy for my UPS until I get solar.

I set the 6000XP’s with AC Grid first with a time slot of 00:00 to 23:59

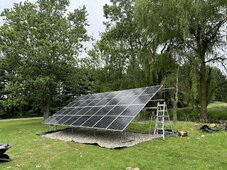
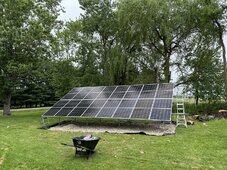
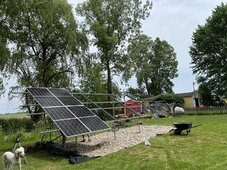
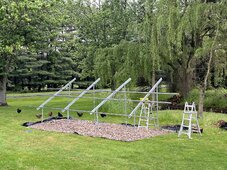
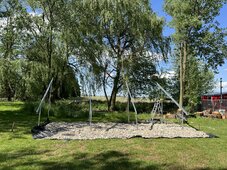
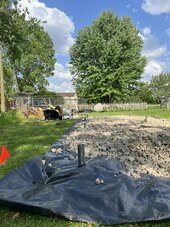
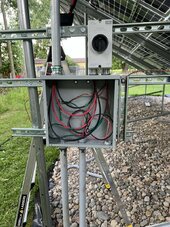
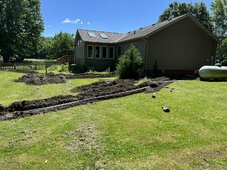
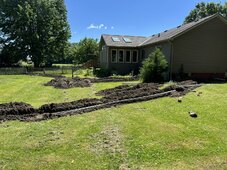
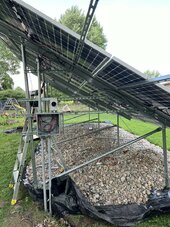
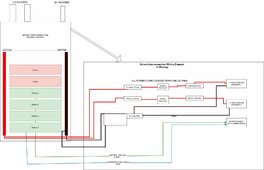
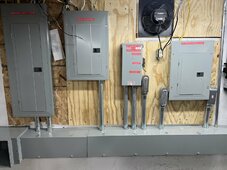
I posted some pictures here to show my system and the wiring diagrams I used.

This forum has been a great resource for putting this together specifically @FilterGuy and @AZ Solar Junkie for their help.

Current Connected @HighTechLab was also very helpful in selling and supporting my installation.

Time for inspection and on to planning for my panels!
 

Attachments

  • IMG_0657.jpeg
    IMG_0657.jpeg
    219.2 KB · Views: 135
  • Solar Project-DC System.jpeg
    Solar Project-DC System.jpeg
    104.6 KB · Views: 127
  • IMG_0647.jpeg
    IMG_0647.jpeg
    283.3 KB · Views: 128
  • IMG_0652.jpeg
    IMG_0652.jpeg
    232.5 KB · Views: 125
  • IMG_0655.jpeg
    IMG_0655.jpeg
    311.1 KB · Views: 128
  • IMG_0656.jpeg
    IMG_0656.jpeg
    248.3 KB · Views: 121
  • Solar Project-Copy of 6000XP Wiring Diagram.jpeg
    Solar Project-Copy of 6000XP Wiring Diagram.jpeg
    182.5 KB · Views: 119
Looks awesome, man. Very clean and nice. I have just 2 concerns:
  1. Lack of an earth ground connection to your second inverter. All equipment needs one for safety.

  2. I'm not a code guy, but I'm a little concerned from a code perspective about the unprotected wires I see - like the romex coming out of your combiner panel and other wires going to your critical loads panel. It might be totally fine, but might want to double-check on code requirements there. @FilterGuy @timselectric - would that pass inspection?
In a mechanical room, I think he is just fine. Might be missing a staple but we are really nitpicking now.
 
Lack of an earth ground connection to your second inverter. All equipment needs one for safety.
That somehow got deleted from the diagram. It’s there.

Just updated the diagram

I'm a little concerned from a code perspective about the unprotected wires I see - like the romex coming out of your combiner panel and other wires going to your critical loads panel
That’s the way my main panel is setup, so it should be okay.
 
Last edited:
That diagram looks familiar :ROFLMAO:.


Did I steal the design from you, or did we both steal it from someone else? ;) Congrats on getting to this point!
 
Thanx!

Yeh it does. @FilterGuy had an image in that thread that I started from, I needed it to be in draw.io to make the mods I wanted. So I forked it! (I live in an open source software world) 😂

He helped me tremendously with his comments.

In the big picture I’m not sure it matters, that’s what this community is all about!
 
I'm a little concerned with my settings. Running in AC Grid First mode draws quite a bit more power (~15%) than just the loads as it is trying to keep the battery charged.

What I want to do is to charge the batteries to 100% and then put the inverters in Bypass Mode and wait for a power failure.

@AZ Solar Junkie has a nice explanation on increasing efficiency by using the ECO Mode and On Grid EOD SOC % to get the inverters in bypass mode until the batteries are 10% above the On Grid EOD SOC %.


I have implemented his suggestion slightly differently given my use case.
  • ECO Mode - On
  • On Grid EOD SOC % = 90% (max)
I was able to discharge my batteries to 90% and the inverters switched to Bypass mode - Works Great!

However, given that I would want to maximize the time my batteries will run without grid I'm not sure I like that option either.

Right now I see two options:
  • Option 1 - Lower Efficiency with longer runway until batteries discharge (AC Grid First - 24 hours/ day - batteries always at 100% - grid power runs ~15% higher than load power)
  • Option 2 - Higher Efficiency with shorter runway until batteries discharge (On Grid EOD SOC % = 90% with virtually identical load and grid power)
Am I missing an option?
I don't think you're missing an option. I do think the firmware is missing some options to make it work the way you would like. Some setting thresholds that explicitly control when the inverter is in bypass would be nice...

What happens when the batteries get down to the On Grid EOD SOC % if you have no grid? I haven't actually tested that.
 
@AZ Solar Junkie - I did part of the test today. With grid on and the On Grid EOD SOC % set to 90%, I discharged the batteries with the system in UPS Mode. Once the batteries got down to 89% the system as expected went into bypass mode and operated fine.

After an hour of so I then killed power and the system switched back to UPS mode and continued to discharge the batteries. So that worked.

I do not have time today to discharge the batteries all the way to Discharge Cut-off SOC %. I'll leave that for another day next week when I can be here as the batteries get down to Discharge Cut-off SOC %.

I do agree that something that allows us to explicitly put the system in Bypass Mode is needed.
 
However, given that I would want to maximize the time my batteries will run without grid I'm not sure I like that option either.
I'm not usually on the side of babying batteries, but for a standby application, I'd be uncomfortable holding over 90% all the time.
 
@hwy17 Right now they are sitting at 89%. But I am curious as to why your uncomfortable with holding over 90%.
I believe higher states of charge accelerate degradation and the difference between 100 and 90% is bigger than 90 and 80%. I.e. giving up that first 10% gives the most benefit.
 
I’ve finally got my rack built with panels. I still need to do some trenching and wiring to complete the project.

I went with the Ready Rack from APA Solar. Very happy with it. Went together great and is very flexible and forgiving.

The helical screws allowed me to do this without the hassle or expense of concrete. All you need is to rent a skid steer for a day with an auger attachment. You then attached the screws to the foundation posts and slowly screw them in the ground. When done you have about 6 inches above ground and 4 feet below ground.

After that it’s like an erector set. Check out there web site. Matt Reid was my rep and he was a lot of help.

https://www.readyracksolar.com/

I added 16 x Boviet 450 watt bifacial panels that I got from Signature Solar to the rack using the end and mid clamps that comes with the Reasy Rack.

https://signaturesolar.com/preorder...-with-bifacial-gain-bvm6612m-450s-h-hc-bf-dg/

Check out the pics!

Let me know what you think.
 

Attachments

  • IMG_0783.jpeg
    IMG_0783.jpeg
    678.5 KB · Views: 24
  • IMG_0782.jpeg
    IMG_0782.jpeg
    673.8 KB · Views: 22
  • IMG_0781.jpeg
    IMG_0781.jpeg
    660.9 KB · Views: 25
  • IMG_0780.jpeg
    IMG_0780.jpeg
    583.7 KB · Views: 24
  • IMG_0778.jpeg
    IMG_0778.jpeg
    760 KB · Views: 23
  • IMG_0774.jpeg
    IMG_0774.jpeg
    317.7 KB · Views: 22
  • IMG_0771.jpeg
    IMG_0771.jpeg
    288.1 KB · Views: 24
I’ve finally got my rack built with panels. I still need to do some trenching and wiring to complete the project.

I went with the Ready Rack from APA Solar. Very happy with it. Went together great and is very flexible and forgiving.

The helical screws allowed me to do this without the hassle or expense of concrete. All you need is to rent a skid steer for a day with an auger attachment. You then attached the screws to the foundation posts and slowly screw them in the ground. When done you have about 6 inches above ground and 4 feet below ground.

After that it’s like an erector set. Check out there web site. Matt Reid was my rep and he was a lot of help.

https://www.readyracksolar.com/

I added 16 x Boviet 450 watt bifacial panels that I got from Signature Solar to the rack using the end and mid clamps that comes with the Reasy Rack.

https://signaturesolar.com/preorder...-with-bifacial-gain-bvm6612m-450s-h-hc-bf-dg/

Check out the pics!

Let me know what you think.
Nice Setup! Backup with benefits (solar) the ultimate UPS. That is how I started then you start running more loads and more and more :)
 
I’ve finally got my rack built with panels. I still need to do some trenching and wiring to complete the project.

I went with the Ready Rack from APA Solar. Very happy with it. Went together great and is very flexible and forgiving.

The helical screws allowed me to do this without the hassle or expense of concrete. All you need is to rent a skid steer for a day with an auger attachment. You then attached the screws to the foundation posts and slowly screw them in the ground. When done you have about 6 inches above ground and 4 feet below ground.

After that it’s like an erector set. Check out there web site. Matt Reid was my rep and he was a lot of help.

https://www.readyracksolar.com/

I added 16 x Boviet 450 watt bifacial panels that I got from Signature Solar to the rack using the end and mid clamps that comes with the Reasy Rack.

https://signaturesolar.com/preorder...-with-bifacial-gain-bvm6612m-450s-h-hc-bf-dg/

Check out the pics!

Let me know what you think.
Sweet. Are those cross beams unistrut? I used two 30ft rows of them for my ground mount. Yours looks a lot cleaner than mine.
 
Your rack set up with the screw in posts and rails looks like the one Everyday Dave on YouTube built. If I ever build another array I'll keep it in mind, looks pretty easy once you get the base posts lined up and put in the ground.
 
How did you find the install process to go? I've got my ReadyRack in the barn, just haven't had the time to install it yet. I initially planned on using my mini-excavator with an auger attachment to put the posts in, but found out after trying it, that it just doesn't have the power to get the job done. So I'll end up renting a skidsteer.

Mine setup is a 56 panel mount, so it'll take time to install for sure.
 
Everyday Dave on YouTube
@Subdood That’s where I got the idea/lead. I then reached out to Ready Rack and they were super helpful

How did you find the install process to go?
@kscessnadriver It went pretty well. Take your time and get the measurements right. Screwing the posts in with the skid steer went pretty smoothly. When you hit a rock or a big root the screw it may jump a bit get you off square. But this is where the flexibility of the Ready Rack system really comes into play. I was a bit off square from the post driving, but I was able to correct and adjust each post along the way.

The other thing that was super easy was installing the mid-clamp clips. Given the number of panels you need to install I thought you’d want to know that that works real well. Those clips also ground each panel to the rack system.
 
@Subdood That’s where I got the idea/lead. I then reached out to Ready Rack and they were super helpful
I thought it looked familiar, even using rocks on top of a weed barrier to keep weeds out. Plus in your case, it'll help with the backside of those bifacials. Wish I had done that, might still try it. I was wondering what gauge or thickness of the posts are, maybe 3in? Have you been able to tell how it's done in high winds or too early to tell?
 
@Subdood That’s where I got the idea/lead. I then reached out to Ready Rack and they were super helpful


@kscessnadriver It went pretty well. Take your time and get the measurements right. Screwing the posts in with the skid steer went pretty smoothly. When you hit a rock or a big root the screw it may jump a bit get you off square. But this is where the flexibility of the Ready Rack system really comes into play. I was a bit off square from the post driving, but I was able to correct and adjust each post along the way.

The other thing that was super easy was installing the mid-clamp clips. Given the number of panels you need to install I thought you’d want to know that that works real well. Those clips also ground each panel to the rack system.

Good to know. For sure, its a big project, I'm excited to get it going. I actually drove to their facility to pick up the rack, I was very impressed.
 
I was wondering what gauge or thickness of the posts are, maybe 3in?
What’s great about Ready Rack is you get complete engineering documentation. Below is a screenshot of one of the pages and it shows the lower posts are 2.2” with .12” thickness.

It’s really too early to tell actual wind speed results, but on the quote it stated that the wind speed load assumptions were <= 105mph

1717035275955.png
 
Update: My panels are all wired and I am in production. Day 1 went well and my batteries were fully charged and floating by 1PM. I kicked on the AC and the PV increased to cover that load. Added my power hungry server rack and again another PV increase to cover that load. Very cool!

Attached is some pics of the last part of the project. I got some more to do to get ready for inspection, but its working.
 

Attachments

  • IMG_0807.JPEG
    IMG_0807.JPEG
    191.3 KB · Views: 3
  • IMG_0806.JPEG
    IMG_0806.JPEG
    349.6 KB · Views: 4
  • IMG_0805.JPEG
    IMG_0805.JPEG
    181.7 KB · Views: 4
  • IMG_0804.JPEG
    IMG_0804.JPEG
    315.3 KB · Views: 4
  • IMG_0803.JPEG
    IMG_0803.JPEG
    278.7 KB · Views: 3
  • IMG_0798.JPEG
    IMG_0798.JPEG
    227 KB · Views: 3
  • IMG_0797.JPEG
    IMG_0797.JPEG
    614.3 KB · Views: 4
  • IMG_0796.JPEG
    IMG_0796.JPEG
    605.4 KB · Views: 4
  • Solar Project-PV Circuits.jpg
    Solar Project-PV Circuits.jpg
    74.8 KB · Views: 4
  • IMG_0803.JPEG
    IMG_0803.JPEG
    278.7 KB · Views: 3
  • IMG_0804.JPEG
    IMG_0804.JPEG
    315.3 KB · Views: 3
  • IMG_0808.JPEG
    IMG_0808.JPEG
    212.8 KB · Views: 3

diy solar

diy solar
Back
Top