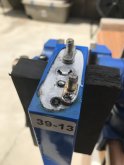
I'm building my 1st battery bank of 40, 3.2v, 25Ah LiFePO re-purposed aluminum cased cells. Yesterday as I was checking the cells for their voltages I accidentally bumped a loose buss-bar. This shorted a line of 8 cells, one of which caught fire and mostly burned up one of the battery post. I was able to quickly put the small fire out and checked all the shorted cells, including the burnt cell. Fortunately they all were still holding the 3.3v's they had before the short/fire, but it left one cell with only one fully functional threaded post. I was able to use my probe and place it against what was left of the burnt post to check it.
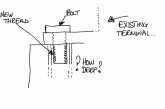
I have been looking for a way to repair or replace this cell's one loose post, but haven't had much luck. While cleaning the area I tried to solder a wire to what was left of the 2 little metal pieces that ended up flush with the aluminum case , but had no luck. I then tried to drill the middle of these pieces, but it just pushed them further into the aluminium case. There is enough left of the partially destroyed post that I could possibly use it if I could figure out how to solder it back on, but the solder just won't stick and I really don't know much about soldering.
These are unusually small aluminum cell batteries and I can't find any similar 10mm #8+- threaded battery post for sale on-line. Does anyone have any other ideas on how to save my cell???


