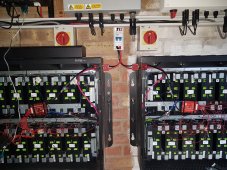
The BMS is probably shutting down early to avoid over-discharging 13 and 14 View attachment 116686
Definitely these to packs draining quicker than the rest, so system shuts down early.


The BMS is probably shutting down early to avoid over-discharging 13 and 14 View attachment 116686


No , unless you can vary the output to match the charge curve. Actually, given how unbalanced your packs are I wouldn't risk it as it'd be far too easy to overcharge one, then your shed's on fire. The other option you have if you just want to get them balanced is to disconnect every cell pack , and wire them all in parallel they should balance out within a few hours, BUT , you'll probably have the same issue with the last two strings when you start discharging again. I'd take those 2 out , separate them all , put a consistent load onto each and watch the voltage drop.... You've almost certainly got some duff cells in those last 2 strings. if you put a 20-50W load on each, start stopwatch , measure voltage every 30 secs , you should be able to spot the dodgy ones as they'll drop in voltage really quick. .....OR there may well be a cheap "cell testing kit" I don't know about , worth a google.I have DC power supply would that work?
Thanks for that feedback would you be interested in spot welding the existing copper and nickel back planes back onto the cells for me if so where are you based? Tia@Tad we mix and match cells all the time. Shouldn’t be an issue if you add one new per cell-string.
Spot welding is heavily dependent on a number of factors: surface finish, electrode wear, material imperfections, etc. Many hobby welders have difficulty making consistent welds. We actually use and really like kWeld for getting into tight spots where it’s inconvenient or impossible to use one of the Sunstones.
Glad you’re using pure nickel! You‘d be surprised to know that there are reputable brands that use nickel-plated steel. It’s always fun watching the heavily-corroded conductors disintegrate with the slightest touch of the flappy wheel. On the bright side, that isolates individual cells so we’re often able to save a few within a cell string.
Hi Tad, do you have the link for this amazon listing?I've tried to get answers from growatt technicians regarding what some of these codes mean exactly with no luck so now I'm in embarking on the journey of changing to lead acid mode which I have now successfully done with the right rs232 male to usb cable got the one with the driver disc as well and used mikehugs shinebus software had some tweaking issues to do with getting it to first start populating when it's connected to the growatt controller in usb property settings
I also purchased the right NTC sensor from amazon see attached just need to sort out BMS in a quandary over which voltage to get at the moment whether 48 volt or 52 as these batteries are actually 52v but 48v is a common modular voltage for these things and I noticed the parameter setting ranges from 44 to 58 View attachment 112351


 so that the pins line-up ok
Thanks a lot, I'm looking for an NTC for SPH series inverter.View attachment 126684 hi there i couldn't find a link but did take a photo of it it from my wife's phone hope this helps
If it's the same small white connector it should work okThanks a lot, I'm looking for an NTC for SPH series inverter.
If it's the same small white connector it should work ok

Hi Paul and anyone else interested I've now fitted my third-party dalley BMS 48-volt 14 string 60 amp to my GBL I 5001 I've had a lot to learn with getting the settings right as I opted for the standard plug and play vms without smart function but now happy to say it's working really well i thought i'd share some settings with you see attached photo with attention to voltage battery charge and discharge low and high settings for the charge it seems that this is a range that voltage fluctuates briefly in and out of of the same for discharge voltage fluctuates in and out briefly until discharge and charge functions are satisfied so in other words it's a range see my notes on my settings the charging up has worked really well today day got 3.4 kilowatt hours to 57v and 100% charge
Just to be a bit clearer the voltage battery charge high and low settings I believe this to be a range that the battery starts the stop charging process if that makes sense! And likewise for the voltage battery discharge low and high settings I believe this is a range that the battery starts the stop discharging process
and after discovering the anderson plug problem I have now increased the power to 95% and now no more tripping out !?
View attachment 113172View attachment 113177
I have the shine bus on my laptop but I have non of these settings in the list like vbat hi and lowHi Paul and anyone else interested I've now fitted my third-party dalley BMS 48-volt 14 string 60 amp to my GBL I 5001 I've had a lot to learn with getting the settings right as I opted for the standard plug and play vms without smart function but now happy to say it's working really well i thought i'd share some settings with you see attached photo with attention to voltage battery charge and discharge low and high settings for the charge it seems that this is a range that voltage fluctuates briefly in and out of of the same for discharge voltage fluctuates in and out briefly until discharge and charge functions are satisfied so in other words it's a range see my notes on my settings the charging up has worked really well today day got 3.4 kilowatt hours to 57v and 100% charge
Just to be a bit clearer the voltage battery charge high and low settings I believe this to be a range that the battery starts the stop charging process if that makes sense! And likewise for the voltage battery discharge low and high settings I believe this is a range that the battery starts the stop discharging process
and after discovering the anderson plug problem I have now increased the power to 95% and now no more tripping out !?
View attachment 113172View attachment 113177
Have messaged you appreciate it thank youIt sounds like you have an old or different software version send me your email and I'll email you a copy of it
Ok doneHave messaged you appreciate it thank you